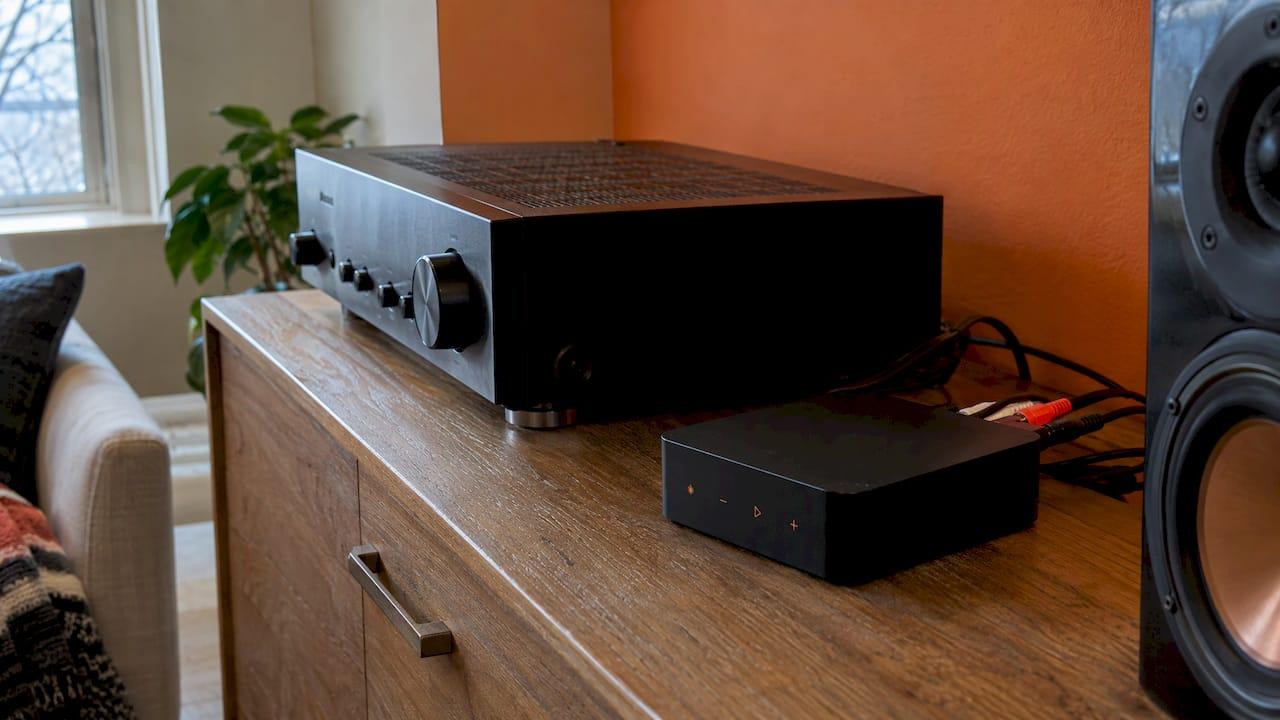
You can set up a WiiM Pro in about 15 minutes. Plug it into your speakers or amplifier, power it on, open the WiiM Home app, tap Set Up, and follow the prompts to join your Wi-Fi. Then pick the audio output that matches the cable you used. Most "it doesn't work" calls come from that last step, or from a TV still sending the wrong audio format.
Below, we walk through the full process the way we would on a Calgary home visit: what to have ready, the connection, the app, choosing inputs and outputs, playing music, and what to check when something goes quiet.
TL;DR
- You need the WiiM Pro, an audio system to plug into (powered speakers, amplifier, DAC or AV receiver), a phone or tablet, and a Wi-Fi network. Ethernet is optional.
- Connect the audio cable, power on, wait 30 seconds, then open the WiiM Home app and tap Set Up.
- The Pro sends sound out of one output at a time (Line Out, Optical or Coax), so choose the one you actually cabled.
- For TV sound over optical, set the TV's digital audio output to Stereo PCM.
- If setup stalls, check the Wi-Fi type first: guest networks and browser-login networks are the usual culprits.
Table of Contents
- What you need before you start
- Step 1: Connect the WiiM Pro to your audio system
- Step 2: Power on and wait for it to boot
- Step 3: Set up in the WiiM Home app
- Step 4: Choose the right input and output
- Connecting a TV through the optical input
- Step 5: Play music through your WiiM Pro
- If something doesn't work
- Placement and wiring tips from the field
- Our perspective: a streamer is a component, not a system
- Want it done once and done properly?
- FAQ
- Sources
What you need before you start
The WiiM Pro is a network streamer. It does not make sound on its own: it takes music from the internet or your phone and passes it to something that does. According to the WiiM Help Center setup guide, you need:
- The WiiM Pro itself.
- An external audio system: active speakers, a DAC, an amplifier or an AV receiver.
- A smartphone or tablet.
- A Wi-Fi connection, with an Ethernet cable as an option.
The WiiM Pro user manual adds that the unit is powered by the included 5V 2A USB Type-C adapter, and that passive speakers need an amplifier or receiver between them and the Pro. A home theatre with an AV receiver or soundbar works too.
Have these ready
- Your Wi-Fi network name and password.
- The audio cable you plan to use. Pick it based on your gear: an RCA cable for analog, a TOSLINK cable for optical, or a coaxial cable for COAX.
- A phone or tablet with the WiiM Home app installed from your app store.
- A spot near your router if you can manage it for the first setup. You can move the unit afterwards.
Step 1: Connect the WiiM Pro to your audio system
Start with the audio side, before the network. The Pro has three output ports, per the official setup guide:
| Output | Type | Typically goes to |
|---|---|---|
| Line Out | Analog | Powered speakers, amplifiers, AV receivers |
| Optical Out | Digital | Soundbars, DACs, AV receivers |
| COAX Out | Digital | DACs, AV receivers, amplifiers with coaxial input |
Connect one of them to the matching input on your amplifier, receiver or speakers. Then switch that equipment on and select the input you just used.
A quick rule of thumb: if your amplifier has a good built-in DAC, either digital cable is a clean choice. If it only has analog inputs, use Line Out. If you have a mix of old and new gear, ask us before you buy cables, because a wrong guess costs a second trip to the store.
The Pro is designed to output through only one of its three interfaces at a time, according to the user manual. That is why picking the right one in the app matters later.
Step 2: Power on and wait for it to boot
Plug in the supplied USB-C power adapter. The manual says to wait 30 seconds for the unit to fully boot before you start setup. People who rush this step often see the app fail to find the device.
On first power-up the Pro should enter setup mode by itself, with the LED flashing white slowly. If it doesn't, the WiiM Help Center says to press and hold the Play button on the device for 3 seconds to trigger it manually.
Step 3: Set up in the WiiM Home app
- Open the WiiM Home app on your phone or tablet.
- When the Set Up pop-up appears, tap it. If it doesn't show, go to Devices and choose Add Device.
- Follow the on-screen instructions to connect the Pro to your Wi-Fi network.
- Let the app check for firmware updates and install any it finds.
- If you have the WiiM Voice Remote, the app will offer to pair it.
That sequence comes straight from the official setup guide. On an iPhone or iPad there is an alternative: the same guide says you can set the Pro up using Apple WAC or the Apple Home app.
Wi-Fi or Ethernet?
Both work. When you plug in an Ethernet cable, the Pro switches to Ethernet and turns Wi-Fi off. Unplug the cable and it goes back to the Wi-Fi network you configured.
If the streamer sits in an equipment rack or a basement media room where Wi-Fi is weak, a wired connection is the more dependable choice. In a house that was not wired for it, there are still options. Our article on the MoCA home network explains how existing coax can carry network traffic to hard-to-reach rooms.

Step 4: Choose the right input and output
Once the Pro is on your network, tell it where to send sound. Open the device settings in the app and select the output port that matches your cable: Line Out, Optical Out or COAX Out. The manual warns that choosing the wrong one can leave you with no audio.
Getting the cleanest signal
For bit-perfect output, the manual recommends using a digital output (Optical or COAX), turning on Fixed Volume Output, and turning off EQ and mono audio in the app's device settings. Keep in mind that with fixed volume on, you control loudness from your amplifier, not from the app.
Using the Pro as an input too
The Pro also takes audio in: an analog Line In and an optical (TOSLINK) input. You can feed it a CD player, turntable preamp, TV or computer, per the manual. It supports auto-sensing of Optical In and Line In, which starts playing when a signal appears. The WiiM guide to line-in and optical input notes this only works when the Pro isn't already playing from another source.
Connecting a TV through the optical input
This is the setup that trips people up most. The Pro's optical input accepts Stereo PCM up to 24-bit/192 kHz. It does not support Dolby Digital, Dolby Atmos or DTS, according to the WiiM Help Center.
So on the TV:
- Plug a TOSLINK cable from the TV's optical out into the Pro's Optical In.
- In the TV's audio settings, set the digital audio output format to Stereo PCM, not Auto, Dolby or DTS.
- If the TV has a Digital Audio Out Volume setting, set it to Max. WiiM says a low value can produce very low sound or none.
- In the WiiM Home app, select Optical In as the source.
Menu names vary by brand. WiiM publishes a general guide to setting digital audio output to PCM for various TV brands, and it notes that the exact steps can differ slightly even between models from the same maker.
Expect stereo from this route. If you are curious how stereo compares with spatial formats, this look at 3D audio versus stereo is a fair primer. If you want true surround from your TV, that is a job for an AV receiver or a soundbar system. We cover that in our guides on Sonos for TV audio and Sonos home theatre setup.
Step 5: Play music through your WiiM Pro
Once the Pro is set up, you have several ways to play. The WiiM Home app lets you browse streaming services and internet radio and control playback. You can also send music to the Pro from other apps. The product manual lists AirPlay 2, Chromecast built-in, Spotify Connect, TIDAL Connect and DLNA among the supported ways to stream.
- iPhone or iPad: use AirPlay from the music app or Control Centre. Your Apple device and the Pro must be on the same Wi-Fi network.
- Spotify or TIDAL: pick the Pro from the device list inside the app.
- Android and Chromecast-enabled apps: tap the cast icon and choose the Pro.
- Your own library: DLNA lets you stream from a network drive.
If you own more than one WiiM device, the app can group them for multi-room playback. The app's Devices tab is where you pick a group lead and add the rest.
Apple households sometimes see dropouts when several AirPlay 2 speakers play at once. Our guide to fixing AirPlay 2 multiroom dropouts explains the network causes and when a pro visit makes sense.
If something doesn't work
Work through these in order. They follow WiiM's own guidance.
The app can't find the Pro
- Confirm the LED is flashing white slowly. If not, hold Play for 3 seconds.
- Make sure your phone is on the same Wi-Fi network you plan to use, with Bluetooth and local network permissions allowed for the app.
- WiiM's setup troubleshooting lists networks the Pro does not handle well: guest Wi-Fi, networks that need a browser login page, VPNs that block local network access, and managed or corporate networks with restrictions. Hotel-style and condo-building networks sometimes fall in this group. Switch your phone off the VPN and onto your main home network.
It connects, then drops out
- Where your router offers both bands, a 5 GHz connection is usually the steadier choice for streaming at home, with less interference from neighbouring networks.
- On a mesh system, devices can hop between access points. In the app's network status settings, look for the Wi-Fi roaming option and try turning it off for the Pro.
- In a larger Calgary home with a finished basement, a wired connection or a properly planned network solves most of this for good.
No sound
The WiiM troubleshooting guide for no sound suggests checking:
- The external device is powered on.
- Volume in both the app and on the amplifier or speakers.
- All cables are firmly seated.
- The correct input and output are active in the app.
- The right input is selected on your amplifier or receiver.
- Firmware is up to date.
If you use Optical or Coax out and hear nothing, the same guide recommends lowering the maximum audio resolution, for example from 192 kHz/24-bit to 96 kHz/16-bit, and playing a test tone to rule out a sample-rate mismatch with your receiver or DAC.
The TV has sound, but the Pro is silent
Almost always the TV is outputting a compressed format. Go back to the PCM step above. If the picture and sound problems come together, a handshake fault between devices can be the real cause, and our guide to HDMI handshake issues shows how to test a direct connection first.
Placement and wiring tips from the field
A streamer is only as good as what it plugs into. A few habits that make the difference:
- Keep the Pro near the amplifier so cable runs stay short.
- Give it airflow. Do not stack it under a hot receiver.
- Label the input you used on the amplifier. It saves you a long search when you change something later.
- If your speakers are in-wall or in-ceiling, gauge and code matter. See our notes on speaker wire gauge and in-wall code rules in Canada.
- If you want music in several rooms, plan the wiring before the walls close. Our piece on multi-room audio wiring for Canadian homes shows what it costs to retrofit later.
Our perspective: a streamer is a component, not a system
We like the WiiM Pro for what it does well: it turns a good amplifier or powered speakers into a network player without replacing anything. For many rooms, that is exactly the right answer.
What we see in homes around Calgary is that the streamer is rarely the problem. The trouble starts in the details around it: a TV sending the wrong audio format, a mesh network that moves the device between access points, speaker wire buried in a wall at the wrong gauge, or three remotes for one room.
Our approach is to design the whole system for the space. We choose best-in-class brands, scale the system to the room, and make the install disappear into the architecture. WiiM and Sonos both sit comfortably in that approach. You get one point of contact for design, install and ongoing support, so a setup like this one is checked against the rest of your network and AV, not treated as a one-off.
For new builds and acreage homes, the best time to get this right is before drywall: low-voltage wiring, network drops and speaker locations planned together.
JupiterAV
Want it done once and done properly?
If you would rather not spend an evening on cables and menus, we handle sales, installation and service of audio and video systems, WiiM and Sonos audio, smart home control, motorized blinds, low-voltage wiring and custom home theatres for homes, businesses and builders in Calgary and area. We can set up your streamer, tune your network for it and tie it into the rest of your system.

See what we do on the JupiterAV site and get in touch to talk through your room.
FAQ
Do I need Wi-Fi to set up a WiiM Pro?
You need a network connection, but it can be Wi-Fi or Ethernet. The user manual says the Pro switches to Ethernet when a cable is plugged in and returns to Wi-Fi when it is unplugged. You still use the WiiM Home app on a phone or tablet for setup.
Which output should I use on the WiiM Pro?
Use the one that matches your cable: Line Out for analog, Optical Out or COAX Out for digital. The Pro sends sound through only one at a time, so select the same one in the app. For the cleanest signal, the manual recommends a digital output with Fixed Volume Output on.
Can the WiiM Pro play Dolby Atmos or surround sound from my TV?
No. According to the WiiM Help Center, the optical input handles Stereo PCM and does not support Dolby Digital, Dolby Atmos or DTS. Set the TV's digital output to PCM for stereo sound. For surround, an AV receiver or soundbar setup is the better fit.
What do I do if the LED isn't flashing white during setup?
Press and hold the Play button on the Pro for 3 seconds to put it into setup mode, then try again in the app. Make sure you have waited the full 30 seconds after powering on, per the setup guide.
Why is there no sound from my TV through the WiiM Pro?
The most common cause is the TV's digital audio format. Set it to Stereo PCM and, if available, set Digital Audio Out Volume to Max. Then confirm that Optical In is the selected source in the app. WiiM's PCM guide covers common TV brands.
Sources
- How to Set Up Your WiiM Pro and WiiM Pro Plus, WiiM Help Center
- WiiM Pro: Hi-Res Music Streamer user manual
- How to use Line-In or SPDIF-In audio, WiiM Help Center
- Troubleshooting: How to Resolve No Sound Issues with Your WiiM Device
- General Guide to Setting Digital Audio Output to PCM for Various TV Brands