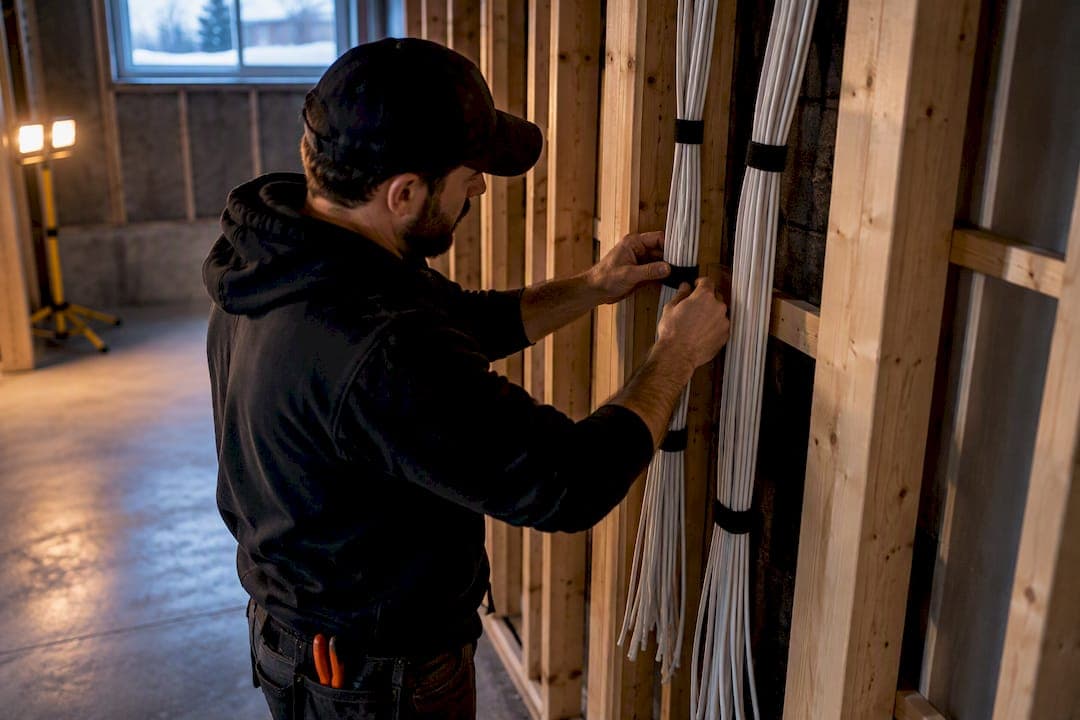
The most reliable approach is home run speaker wiring from every room back to a central equipment closet, gauge chosen by run length, with CAT5e pulled alongside for control and stationary streaming devices hardwired for consistent playback. Before you buy a single spool of cable, map your listening zones, pick a closet with short, even runs to each room, and order enough 14/4, CAT5e and RG6 to cover every drop plus spares.
TL;DR:
- Home run speaker wiring from a central closet with appropriate gauge is essential for reliable multi-zone audio, especially for longer runs.
- Use four-conductor cables and CAT5e or CAT6 runs for control, combining them where possible to simplify installation and future upgrades.
- Keep low-voltage cables separated from electrical wiring, route through conduit, and seal penetrations to prevent interference and maintain safety standards.
- Label all cables and document wiring during installation to streamline future troubleshooting and avoid costly relocations or repairs.
- Prioritize wiring for future expansion by pulling spare cables and using conduit, as it reduces costs and effort for upgrades or system adjustments later.
Table of Contents
- Planning audio zones and choosing an equipment closet location
- Choosing the right speaker wire, conductor count and in-wall cable types
- Best practices for routing runs, conduit, and sealing penetrations
- Wiring speaker drops, volume controls and closet terminations
- Powering zones: receivers, amplifiers and networked endpoints
- Placement rules for in-ceiling and in-wall speakers
- How electrical boxes and wall treatment affect sound isolation
- Commissioning checklist: testing, labelling and documentation
- Common mistakes to avoid during multi room audio wiring
- Troubleshooting connectivity and signal issues
- Future-proofing wiring infrastructure for upgrades
- Safety standards and codes specific to audio wiring
- Installer perspective on when to DIY and when to hire a pro
- How JupiterAV can help with your prewire and installation
- Sources
- FAQ
Planning audio zones and choosing an equipment closet location
Start by deciding what each room actually needs. A kitchen or patio used for background music has different demands than a media room that doubles as a primary listening space with higher volume and better dynamics. Group rooms into zones based on how they will be used and whether each needs independent volume or source control.
Once zones are set, look at where the equipment closet should sit. The goal is the shortest combined cable run to every zone, plus enough ventilation and space for an amplifier rack, network gear and patch panels. A closet in the middle of the home usually beats one tucked in a corner, even if it means a slightly longer run to one or two rooms.
Before drywall goes up, put together a simple prewire list so nothing gets missed:
- Speaker drops for every zone, including spares for rooms you might add later.
- CAT5e or CAT6 runs to each keypad, wall control and network audio device location.
- RG6 coax to any location needing an antenna or satellite feed.
- Power drops near the equipment closet and any in wall amplifiers.
This list becomes your order sheet and your checklist during rough in.
Choosing the right speaker wire, conductor count and in-wall cable types

Wire gauge should match the distance from the equipment closet to the speaker, not just whatever spool happens to be on the shelf. The widely used rule of thumb is 16AWG for runs under about 50 feet, 14AWG for runs between 50 and 100 feet, and 12AWG for anything longer. Primary listening rooms, home theatres or any zone that gets pushed to higher volume benefit from upsizing a gauge even within those distances.
For rooms with a wall mounted volume control, a four conductor cable (commonly called 14/4) run from the closet lets you carry both speaker channels to the control point, then split into two conductor pairs on to each speaker.
- Run CAT5e or CAT6 to every keypad, in wall control and networked audio device for control and future flexibility.
- Combine 14/4 and CAT5e in a single composite pull where possible to cut down on separate runs.
- Use quad shield RG6, not RG59, for antenna or satellite distribution over longer runs.
- Choose CL2, CMR or CL3 rated cable for anything going inside walls or ceilings, since standard speaker cord is not rated for that use.
Pro Tip: Buy a little more cable than the math says you need. Spare footage in the closet costs almost nothing and saves you from an unplanned splice later.
Best practices for routing runs, conduit, and sealing penetrations
How you route cable matters almost as much as what cable you buy. Keeping low voltage runs away from electrical wiring, at least 6 inches (15 centimetres) apart, reduces hum and interference picked up along the run.
- Choose home run wiring over daisy chaining whenever possible. Each speaker gets its own cable back to the closet, which makes troubleshooting a single room simple instead of a hunt through a shared chain.
- Install conduit or an accessible chaseway in areas where you expect to add speakers or upgrade wiring later, particularly in finished basements or additions.
- Route speaker and network cable through separate paths where the layout allows, since tightly bundling them over long runs can introduce crosstalk.
- Seal every wall and ceiling penetration with fire rated caulk, and take care not to puncture or compress the vapour barrier while pulling cable.
Getting these details right during rough in is far cheaper than opening a finished wall to fix them after the fact.
Wiring speaker drops, volume controls and closet terminations
A clean speaker circuit looks like this: a home run cable leaves the closet, lands at a wall box behind the volume control, and from there two separate two conductor cables continue on to the left and right speakers in that room. This keeps the wiring simple to trace and easy to repair if a speaker ever needs replacing.
- At the closet end, terminate speaker cable on labelled banana posts or a small patch panel rather than leaving bare wire twisted together.
- Colour code both ends of every run, and label them with the room name, not just a number, so a future technician does not need your notes to make sense of it.
- Leave a service loop of extra cable coiled in the closet at each termination point.
- Skip passive speaker selectors for anything beyond two zones. They generally waste amplifier power and degrade sound quality compared with a dedicated amplifier channel or zone per room.
Terminating cleanly at both ends is what separates a system that is easy to service in five years from one that requires guesswork every time something goes quiet.
Powering zones: receivers, amplifiers and networked endpoints
How you power each zone depends on how many rooms you are covering and how much control you want over each one. A single AV receiver with A and B speaker outputs can run two zones at the same volume and source, which works for a small home but breaks down once you want independent control per room.
- A dedicated multi zone amplifier, or one amplifier channel per zone, gives each room its own volume and source without compromising the others.
- Hardwire stationary networked amplifiers and streaming devices to Ethernet rather than relying on Wi-Fi. Sonos recommends wiring stationary components for larger installations, reserving wireless for genuinely portable devices.
- Give the equipment rack proper ventilation, since stacked amplifiers generate heat that shortens component life in a closed closet.
- Check speaker impedance before wiring multiple speakers to one amplifier channel, since mismatched loads can damage the amplifier.
Hardwiring as many audio endpoints as possible produces a more reliable multiroom experience than Wi-Fi alone, particularly once a home has more than a handful of zones competing for network bandwidth.
Placement rules for in-ceiling and in-wall speakers
Where you place speakers determines where you run wire, so it pays to settle placement before the drops go in. Ceiling speakers generally sound most even when spaced and offset consistently rather than centred purely on furniture layout, and drops should avoid HVAC ducts, structural joists and extreme room corners where bass response suffers.
| Room type | Typical spacing guideline | Common obstruction to avoid |
|---|---|---|
| Living or family room | Even spacing across the seating area | HVAC ducts and ceiling joists |
| Kitchen | Positioned away from range hood vents | Range hood ductwork |
| Bathroom | Centred over the main use area, moisture rated | Exhaust fan housings |
| Outdoor patio | Spaced to cover the seating zone evenly | Soffit vents and eaves |
Document every speaker location on a simple wiring diagram as you go, and pull a spare run or two in rooms where you might add a speaker later. Locating drops correctly the first time avoids the far more expensive job of relocating a ceiling speaker after drywall is finished.
How electrical boxes and wall treatment affect sound isolation
Adding wiring and outlet boxes to a wall between rooms can quietly undo some of its sound isolation if you are not careful. National Research Council testing found that poorly placed metal electrical boxes can reduce a wall's sound transmission class by as much as six points, while plastic vapour barrier boxes and proper spacing largely mitigate that loss.
- Offset back to back boxes on shared walls by roughly 400 millimetres rather than placing them directly opposite each other.
- Keep insulation intact and fully filling the wall cavity around any box.
- Use airtight gaskets on boxes and caulk any penetration where cable passes through a fire or sound rated wall.
- Consider foam gaskets or mastic liners as a retrofit fix on existing boxes that are already causing sound leakage.
Pro Tip: Check with your local electrical authority before substituting box materials, since not every jurisdiction treats plastic and metal boxes the same way for code purposes.
For a deeper look at protecting isolation in a media room specifically, see our retrofit plan for soundproofing a home theatre.
Commissioning checklist: testing, labelling and documentation
Before you close up walls or call the job finished, test every run. A continuity and polarity tester catches wiring mistakes in minutes that would otherwise take hours to diagnose after drywall goes up.
- Test each speaker run for continuity and correct polarity at both ends.
- Play low level music through each zone and listen for hum or interference, which usually points to a run crossed too close to electrical wiring.
- Confirm impedance matches what the amplifier channel is rated to handle before running speakers at full volume.
- Build a closet wiring manifest recording cable origin, type, gauge and termination for every run, and store photos of the finished termination strip alongside it.
Good documentation at commissioning is what makes a future troubleshooting call take twenty minutes instead of an afternoon, since a labelled manifest tells a technician exactly what they are looking at before they open the closet door.
Common mistakes to avoid during multi room audio wiring
Most wiring headaches trace back to a handful of avoidable decisions made during rough in. Daisy chaining speakers off a single run instead of home running each one is the most common, since it turns a single bad connection into a room wide outage. Skipping in wall rated cable in favour of ordinary speaker cord is another, and it can create a genuine safety issue behind a wall you cannot easily reach again.
Undersizing wire gauge for a long run is a frequent mistake too, since it causes noticeable power loss and weaker bass on distant speakers even when everything else is installed correctly. Leaving no spare cable or service loop in the closet turns a minor repair into a full wall opening later. Running speaker and network cable bundled tightly together over a long distance can introduce hum or dropouts that are hard to diagnose after the fact.
Finally, skipping labelling at both ends of every run is the mistake that costs the most time down the road. A closet full of unmarked cable means every future repair starts with a lengthy trace and test process instead of a quick look at a manifest. None of these mistakes are expensive to avoid during the prewire stage, but nearly all of them are expensive to fix once walls are closed.

Troubleshooting connectivity and signal issues
When a zone drops out or sounds wrong, start with the simplest explanation before assuming a wiring fault. Check that a networked streaming device or amplifier is actually connected to Ethernet rather than Wi-Fi, since a weak wireless signal is a common cause of dropouts in larger homes.
If a speaker sounds thin or distorted, test polarity and continuity on that run first. A reversed polarity connection will cancel bass response even though the speaker technically still plays. Hum or buzzing usually points to a low voltage cable running too close to electrical wiring or a lighting dimmer circuit, so check the routing before assuming a defective component.
For persistent multiroom sync issues on networked systems, congestion on a home network is often the culprit rather than the audio wiring itself. Hardwiring the affected device usually resolves the issue faster than any settings change. If you are running an Apple based system, our guide to fixing AirPlay 2 multiroom dropouts covers network specific fixes in more depth. When a problem persists after checking wiring, polarity and network connection, it is usually a sign the issue sits with a component rather than the cable itself.
Future-proofing wiring infrastructure for upgrades
The cheapest time to plan for a system you do not have yet is during the initial prewire. Pulling one or two spare speaker runs to rooms you might use later, even if they sit capped off in the closet for years, avoids opening a finished wall down the line. The same goes for CAT5e: running it to every keypad and speaker location even in a system with no smart features yet leaves you room to add control later without new cable.
Using conduit or an accessible chaseway anywhere a future upgrade is plausible, particularly in a basement or over a garage, means new cable can be pulled without cutting into finished surfaces. A composite pull combining 14/4 speaker cable and CAT5e in one jacket gives you both speaker and control infrastructure in a single run, which is worth the modest extra cost during construction.
Keeping a digital copy of your wiring manifest and photos means that whoever upgrades the system in five or ten years, whether that is you or a hired installer, can see exactly what is behind each wall without opening it up first. Infrastructure built with spare capacity in mind tends to outlast whatever gear is currently connected to it.
Safety standards and codes specific to audio wiring
Low voltage audio and control wiring is generally exempt from the stricter rules that govern electrical circuits, but that does not mean anything goes behind a wall. Cable run inside walls, ceilings or other concealed spaces needs an in wall fire rating, commonly CL2, CL3 or CMR, rather than the unrated speaker cord sold for exposed home theatre connections.
Any penetration through a fire rated or sound rated wall assembly needs to be sealed appropriately, typically with fire rated caulk, to preserve the wall's rating. Electrical box choice and placement also falls under local code in some jurisdictions, particularly where metal versus plastic boxes affect both wiring safety and the acoustic performance of a shared wall.
Because requirements vary by municipality and by the specific wall assembly involved, checking with your local electrical authority or a licensed electrician before finalizing box types, cable ratings or penetration methods is the safest route, especially on any wall shared between units or between a garage and living space.
Installer perspective on when to DIY and when to hire a pro
Running and terminating basic speaker wire is well within reach for an experienced DIYer with patience and the right testers. Where it gets harder is anything involving network integration, rack building with multiple amplifiers, or DSP tuning to balance a room acoustically, since mistakes there are harder to diagnose without the right tools.
A professional prewire typically comes with documentation, a labelled closet, and integration with whatever smart home control you are using, along with a warranty on the installed work. If you do bring in a professional, a clear scope, room by room zone list, expected sources, and whether smart control is part of the plan, gets you a far more accurate quote than a vague request for "whole home audio."
— JupiterAV
How JupiterAV can help with your prewire and installation
If the wiring side of this project feels like more than you want to take on yourself, JupiterAV plans and installs the whole thing, from mapping zones and running cable before drywall goes up to building out the equipment rack and commissioning every speaker in the house. Low voltage wiring and whole home audio services can cover the planning, the pull, and the testing, so the system works the way it was designed to from day one.

Jobs typically run through a single point of contact from first walkthrough to final commissioning, with support after the install if something needs adjusting down the line. Whether you are prewiring a new build or retrofitting an existing home, our Smart, Effortless Living and Immersive Sound & Cinema services cover the planning and installation end to end. Reach out through our site to set up a consultation and get a scope built around your home's actual layout.
Sources
- Recommended settings for using Sonos with Ethernet networks
- Effect of electrical outlet boxes on sound transmission through gypsum board walls (NRC research)
- Whole House Wiring Basics
FAQ
How do you hook up a multi room sound system?
Start by home running speaker cable from each room back to a central equipment closet, sized by gauge for the run length, then connect each zone to either a dedicated amplifier channel or a multi zone receiver. Add CAT5e for control and hardwire any networked streaming components, following Sonos's recommended Ethernet setup for stationary devices.
What is the best wired multi-room audio system?
There is no single "best" system since the right setup depends on the number of zones, the sources you want, and whether you need independent control per room. A well planned wired system generally combines home run speaker wiring, a multi zone amplifier or one amplifier per zone, and hardwired network audio endpoints for reliability.
What is the 83% rule for speakers?
If you have heard this term from a specific source, it likely refers to a rule of thumb for that particular product or placement method rather than an industry wide standard.
Can you run 4 speakers and a sub off one amp?
It depends entirely on the amplifier's rated output and the combined impedance of the speakers connected to it, since mismatched loads can damage the amplifier or cause it to shut down. Check the amplifier's specifications and the impedance of each speaker before wiring multiple pairs plus a subwoofer to a single channel, and use a dedicated amplifier channel per zone where possible for better sound quality and reliability.