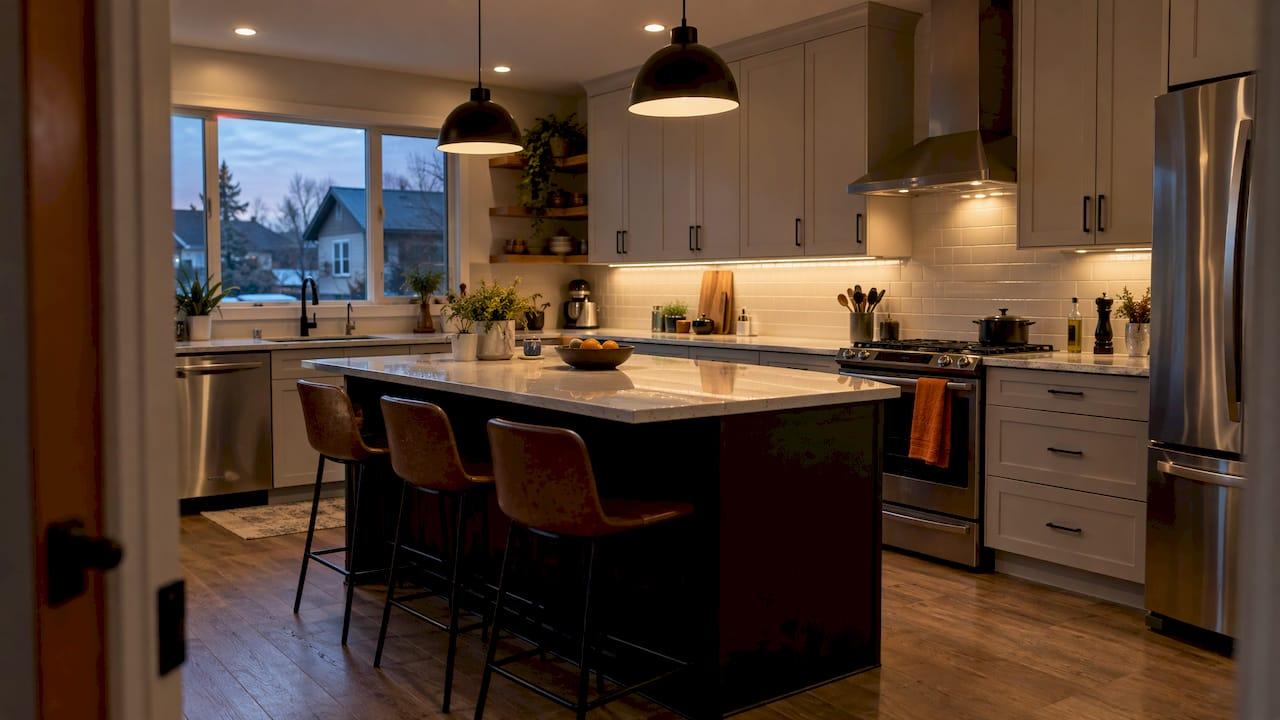
Smart kitchen lighting is a set of connected lights, dimmers and controls that you run from a wall keypad, an app, a sensor or your voice. Done well, it gives you bright, accurate light for cooking, a softer scene for dinner and a dim path for a midnight glass of water, all from the same fixtures. The part that decides whether it works for years is not the bulb. It is how the light is layered, how the controls are wired and which system ties them together. This guide covers all three, including what Calgary homeowners and custom home builders should settle before drywall goes up.
TL;DR
- Layer your kitchen light in three groups (ambient, task and accent) and put each on its own control so you can dim them separately.
- Under-cabinet lighting is the most useful upgrade: choose high-CRI LEDs, a correctly sized driver and a control system that stays local if the internet drops.
- Plan neutral wires, low-voltage cabling and dimmer-compatible circuits during construction. Devices change, walls do not.
- Electrical work in Alberta falls under permit and Canadian Electrical Code rules, and products should carry a CSA or cUL mark.
- Builders get the best result by involving the A/V and automation installer before framing is finished.
Table of Contents
- What smart kitchen lighting actually does
- Layer the light first, then add the smart
- Smart under-cabinet lighting: what to choose
- Control: from simple scenes to a full smart home
- Wiring and electrical safety in Alberta
- What custom home and acreage builders should plan
- Perspective: why we design the wiring before the fixtures
- Work with us on your kitchen
- Maintaining a smart kitchen
- FAQ
- Sources
What smart kitchen lighting actually does
A smart kitchen light is any fixture, bulb, strip or switch that can be controlled beyond an on/off flick. According to CEDIA, the home technology professional association, the main building blocks are smart bulbs, smart switches and dimmers, and LED strips and under-cabinet lighting. With them you can schedule lights to switch on and off automatically, avoid wasting energy by keeping lights off when nobody needs them, and make the house look occupied while you are away.
In practice, this is what homeowners ask us for:
- Scenes. One press for "cooking" (bright task light and island pendants), another for "dinner" (task light off, pendants low, toe-kick glow on), another for "clean-up" (everything at full).
- Automatic arrival. Prep areas brighten when you walk in, then fade out after the room has been empty for a set time.
- Night lighting. A very low level under the cabinets or along the toe-kicks after a certain hour.
- Whole-home integration. The same keypad that sets the kitchen scene can also lower the shades or start the music, because it all sits on one system.
How the devices talk matters more than most buyers expect. Smart lighting products communicate over Bluetooth, Wi-Fi or Zigbee, and a hub or bridge links them into a network. A few lines later we will look at why that choice affects reliability.
Energy and lifespan
LED is the baseline for any smart kitchen. Natural Resources Canada reports that ENERGY STAR certified bulbs use up to 90% less energy on average than traditional incandescent bulbs, and ENERGY STAR certified LED bulbs last at least 15 times longer. In a room where lights are on for many hours a day, that matters. Add scheduling, dimming and occupancy sensing, and the lights spend less time at full output.

Layer the light first, then add the smart
Before choosing any product, decide what each part of the kitchen needs. The widely used approach is to divide the lighting into ambient, task and accent layers, and Ideal Home suggests considering separate circuits for ambient and task lighting so each can be controlled and dimmed on its own.
| Layer | Job in the kitchen | Typical fixtures | Control idea |
|---|---|---|---|
| Ambient | Even general light, the "room" level | Recessed downlights, flush ceiling lights | Wall dimmer plus scene button |
| Task | Bright, shadow-free light on counters, sink and cooktop | Under-cabinet strips, rangehood light | Own dimmer, sensor or schedule |
| Island / dining | Light over seating and the island | Pendants, linear fixtures | Separate dimmer, usually dimmed low for meals |
| Accent | Depth and mood | Toe-kick strips, in-cabinet lights, glass-front uppers | Scene or time-of-day schedule |
The common mistake is putting recessed lights, pendants and under-cabinet strips on a single switch. Then every scene is a compromise. Giving each layer its own channel is what makes smart control worth having.
Placing the lights
A few placement rules we apply on most kitchens:
- Put task light in front of the person, not behind. Downlights directly above the counter edge cast your shadow onto the work surface. Under-cabinet lights near the front edge of the upper cabinets solve that.
- Keep pendants about the island, not the room. Their job is to define the eating and chatting area, so dim them independently.
- Light the vertical surfaces. Backsplashes, open shelves and glass cabinets make a kitchen feel larger at night.
- Leave room for the range hood light and any other built-in lighting when counting circuits.
Smart under-cabinet lighting: what to choose
Under-cabinet lighting is the single most requested smart kitchen upgrade, and it rewards careful selection. Natural Resources Canada's home lighting guide calls LED an excellent choice for under-cabinets and recommends warm lamps in the 2700 to 3000K range for an inviting atmosphere.
Keep these decisions in mind:
- Colour accuracy. A manufacturer's under-cabinet guide recommends CRI 90 or higher for prep areas, so food, finishes and countertops look true. Pick it for the task strip especially.
- Colour temperature. Match the strip to your cabinets and counters. Warmer light flatters wood and warm stone, while cooler white suits white or stainless kitchens. Tunable-white strips let you shift through the day.
- Driver sizing. The power supply (driver) is the part most likely to fail, so size it with headroom. The same guide suggests at least 20 percent spare capacity, for example a 30-watt driver for a 24-watt strip.
- Dimming. Confirm the strip, driver and control are designed to work together. A mismatch is the usual cause of flicker or a limited dimming range.
- Control and network. For a built-in installation, the guide favours Zigbee because the mesh stays local if the internet drops, while Wi-Fi suits people who do not want a hub.
That last point is the real dividing line between a gadget and a system. For a kitchen you plan to live with for a decade, we prefer controls that keep working without a cloud connection and that sit on a properly designed network. Our smart home networking guide explains what the network needs to look like.
Dimmers, keypads and sensors
Most homeowners want a physical control by the kitchen entrance that does the obvious thing every time. Wall dimmers and keypads give guests and family a familiar interface, while an app, schedule or voice command adds convenience on top. Voice assistants work well as a hands-free extra when your hands are covered in flour, but we plan them as a backup, not the only way to turn the lights on. Motion and occupancy sensors, plus schedules tied to sunset, handle the routine changes so nobody has to think about them.

If you want to add smart dimming to an existing house, check your switch boxes first. Many older boxes lack a neutral wire. Our guide to smart switch fixes for boxes without a neutral covers the options. We also work with Lutron Caseta lighting controls, and our note on Caseta compatibility and the 75-device limit helps you size a system correctly.
Control: from simple scenes to a full smart home
There are three practical levels, and the right one depends on the size of the house and how much else you want connected.
- Stand-alone smart dimmers and a voice assistant. Suitable for a single kitchen refresh. Scenes, schedules and voice control, with few moving parts.
- A lighting system with keypads, dimmers and a hub. Better when you want lighting across several rooms, shade control and consistent behaviour from every switch.
- A full home control system. Right for larger or custom homes, where lighting, audio, video, shades, security and networking are designed as one. If you are weighing this route, our comparison of Control4 and its alternatives lays out the trade-offs between a dealer-installed system and a do-it-yourself setup.
Whichever you choose, think about compatibility. The Connectivity Standards Alliance announced Matter 1.5 on November 20, 2025, expanding the standard to more device types and aiming to make devices from different brands work together more easily. A professional installer can tell you which of your chosen products support it and how they are best joined.
Wiring and electrical safety in Alberta
Lights and switches are electrical work, and the rules are the same whether the fixtures are smart or not.
- Permits and code. In Cochrane, for example, the Safety Codes guide for homeowners says a homeowner taking out an electrical permit needs basic knowledge of electrical wiring, and installations must meet the current Canadian Electrical Code. Check your own municipality's requirements before starting any new circuit or switch work, and hire a licensed electrician for anything beyond a like-for-like swap.
- Approved products. Natural Resources Canada notes that electrical devices must be approved, shown by a CSA or cUL mark. Look for it on drivers, strips and dimmers.
- Heat. The same guide warns that lamps and fixtures produce heat, which must be vented in enclosed or recessed fixtures. Use fixtures rated for the way they are installed.
- Circuit protection. Kitchens carry many outlets and appliances. For a plain-language explanation of AFCI and GFCI protection, including what each protects against and where it is needed, see this overview, and confirm local requirements with your electrical contractor.
Low-voltage lighting runs and control cabling are our daily work, and they are separate from line-voltage circuits, which a licensed electrician handles and your municipality inspects.
What custom home and acreage builders should plan
For builders, smart lighting is a framing-stage decision. Once drywall is up, every change costs more. Questions worth settling with your clients before rough-in:
- Neutral wires. Specify a neutral at every switch location. Most smart switches need one.
- Dimmer-compatible circuits. Make sure the LED loads, drivers and dimmers on each circuit are matched.
- Low-voltage cabling. Run control wiring for keypads, sensors, shades and any central system. For network and data cabling, see our home ethernet wiring guide for Alberta homeowners.
- Lighting zones. Agree on the circuits in the kitchen (ambient, task, island, accent) in the electrical plan, not after.
- Shade pockets and cabling. If motorized blinds are planned, the window details and power need to be known early. The same applies to speakers, TV locations and any home theatre.
- Access. Leave a sensible location for the network and control equipment, with space for future changes.
- Budget clarity. Itemize the system up front. Our breakdown of Calgary smart home costs shows what to list so the project avoids change orders.
Acreage builds add distance, outbuildings and often patchy rural internet, which is one more reason to favour local control and wired backbones over devices that depend on the cloud.
Perspective: why we design the wiring before the fixtures
We see the same pattern on many kitchen projects. The client picks a beautiful pendant and a strip light, and only later asks how it will all be controlled. By then the walls are closed and the options are narrow.
Our approach is to treat lighting as part of the whole home's architecture. We scale the system to the space, run the low-voltage wiring and control cabling while the walls are open, and choose reliable, best-in-class brands such as Lutron Caseta for lighting control. The aim is for the technology to disappear into the room: a keypad that does what you expect, light that is right for the task, and nothing visible that does not need to be.
We also believe in a single point of contact. The same team that designs your lighting scenes can integrate your shades, audio, TV, security and network, and stays around for support once you move in. For builders, that means one coordinated trade at rough-in instead of several.
JupiterAV
Work with us on your kitchen
JupiterAV sells, installs and services smart home products in and around Calgary, including Lutron Caseta smart lighting, Control4 and Alexa-based control, Lutron and Clara motorized blinds, low-voltage wiring, whole-home audio and video, security and CCTV, and networking. We work with homeowners, businesses and home builders, and we design each system to suit the space.

If you are planning a kitchen renovation or a new build, talk to us about a smart home and lighting plan before the walls are closed. We will help you decide what to wire, what to control and how to keep it all simple to use.
Maintaining a smart kitchen
A well-built system needs little attention, but a yearly check helps. Confirm that firmware is current, that the router and network equipment are healthy, and that scenes and schedules still match how you live. Our pre-winter smart home maintenance guide suggests what to look at before Calgary's darker months, when lights are on for longer each day.
FAQ
Is smart under-cabinet lighting worth it?
For most kitchens, yes. It puts bright light directly on the work surface, removes shadows and doubles as a soft night light. Choose high-CRI LEDs, a correctly sized driver and a control system that fits the rest of the house.
Do I need a neutral wire for smart kitchen switches?
Most smart switches do need one, so it is worth specifying a neutral at every switch location in a new build or renovation. If an existing box does not have one, there are workarounds, and an installer can recommend the one that suits your loads.
Can I install smart kitchen lighting myself?
Plug-in and low-voltage products are straightforward, but new circuits, switch changes and hardwired drivers are electrical work. Alberta installations must meet the Canadian Electrical Code and may need a permit, so check with your municipality and use a licensed electrician where required.
What is the best time to plan smart lighting in a new home?
Before framing is finished and well before drywall. That is when neutral wires, low-voltage cabling and lighting zones are simplest to add, and when the A/V and automation installer can coordinate with the electrician.
Sources
- Light bulbs or lamps, Natural Resources Canada
- Upgrade Your Kitchen with Smart Home Tech, CEDIA
- The 3-layer lighting rule for kitchens, Ideal Home
- Home Lighting Design Guide Pocket Book, Natural Resources Canada
- How to Select Under Cabinet Lighting, Osram
- Matter 1.5 announcement, Connectivity Standards Alliance
- Safety Codes Homeowners Electrical Guide, Town of Cochrane