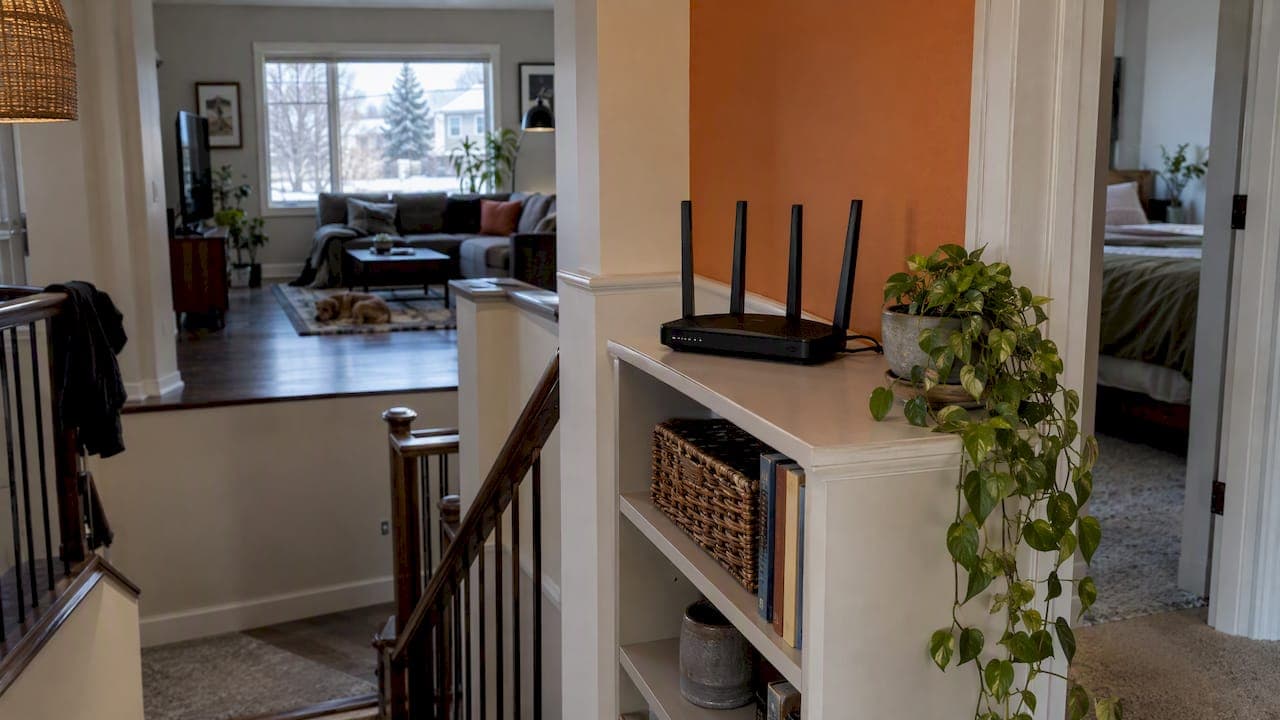
The best place for a router is central, elevated and out in the open: on a shelf or table in the room where you use Wi-Fi most, not in a basement corner, a cabinet or against an exterior wall. Get those three things right and many "slow Wi-Fi" problems disappear without buying anything. This guide explains why each rule works, what gets in the way in Canadian homes, and when placement alone is not enough.
TL;DR
- Put the router near the centre of the home, or near where you use the internet most, and keep it visible instead of tucked behind furniture.
- Raise it off the floor onto a shelf or table. In a two-storey home, mount it high on the main floor.
- Keep it away from exterior walls, metal, concrete, water and other electronics such as microwaves and cordless phones.
- If one router cannot cover the house, add mesh nodes or wired access points, placed where signal is still strong rather than in the dead zone.
- Building or renovating? Plan the router and cabling location before the drywall goes up.
Table of Contents
- The short answer: central, open and elevated
- Why the usual hiding spots fail
- How high should the router sit?
- Walls, floors and everyday objects
- 2.4 GHz, 5 GHz and why range changes
- Antennas: point them in different directions
- Two storeys, basements and larger homes
- When one router is not enough: mesh and access points
- Planning placement in a new build or renovation
- Our perspective
- Get a network designed around your home
- FAQ
- Sources
The short answer: central, open and elevated
Rogers advises placing the modem centrally, especially in an open-floor home or near where the internet is used most, and keeping it visible and upright on a shelf or table, not inside or behind cabinets or furniture. Wakey Internet, a Canadian provider, gives the same direction: an open, central area such as a living room or office beats a basement corner or an enclosed cabinet.
The logic is simple. A router radiates in all directions. The closer it sits to the middle of the space you want covered, the shorter the distance the signal travels to reach any device, and the fewer walls it has to cross on the way. TP-Link goes as far as calling central placement the single most important factor for even coverage, a claim worth treating as a manufacturer's view but one that matches what installers see in practice.
The catch is that the "centre" of the house is rarely where the internet comes in. The cable enters at a wall near the garage, a utility room or the basement. That tension between where the router is convenient and where it works best is the heart of most placement problems.
Why the usual hiding spots fail
Most routers end up in one of four places, and each has a cost.
The entry point. It is where the cable arrives, so it is where the router lands. If that is a corner of the home or an exterior wall, Engadget notes that an exterior wall wastes about half the signal broadcasting outdoors. You are paying to cover your driveway.
The cabinet or media unit. It looks tidy, but a closed cabinet blocks signal and traps heat. TP-Link points out that hiding routers in cabinets can shorten their lifespan and make them throttle performance. If the look matters to you, the answer is a ventilated, open shelf, or a planned equipment location, not a closed door.
The basement. Linksys describes the basement as the least effective location because dense materials like concrete absorb the signal before it reaches upper floors. That is especially relevant in Calgary, where many homes have developed basements and the network gear often lives down there next to the furnace room.
The floor. Linksys also warns that on the floor much of the signal is absorbed or directed into the ground instead of spreading through the home.
A poor spot costs real performance. Optimum, a US provider, says a bad location such as a cabinet, basement or corner can cut speeds by 50% or more. Treat that as a rough guide rather than a guarantee, since results depend on the house, but the direction is consistent across sources.

How high should the router sit?
Height matters because it keeps the signal above furniture and clutter and gives it a clearer path across the room.
| Source | Height guidance |
|---|---|
| Xfinity | At least 2 feet off the floor, upright |
| Optimum | 5 to 7 feet off the floor in a single-storey home |
| TP-Link | High on the ground floor of a two-storey home |
The numbers differ because the homes differ. A practical reading: the floor is never right, a desk-height shelf is a decent minimum, and higher on a shelf or wall is better in a bungalow. In a two-storey house, put the router on the main floor and high, so it splits coverage between the levels instead of favouring one.
For satellite or mesh units, matching height helps too. TP-Link's Deco guidance, for example, suggests keeping a satellite at roughly the same height as the source unit in an open area, though always follow the manual for your specific system.
Walls, floors and everyday objects
Wi-Fi is radio, and radio does not pass through everything equally. Ofcom, the UK regulator, lists water, metal, glass and dense walls such as brick as significant signal blockers. Canadian homes add their own versions of these:
- Concrete foundations and poured basement walls, which separate the lowest level from everything above.
- Stucco with metal lath and foil-faced insulation, which can act like a screen around the house.
- Large mirrors, tile backsplashes and glass shower enclosures near a router.
- Fish tanks and water heaters. Water absorbs signal, so a router behind an aquarium is a router in a bad spot.
- Steel appliances, such as a fridge sitting between the kitchen router and the family room.
If you have a shop, garage or outbuilding clad in steel, the same physics applies at larger scale. We cover that in WiFi in a metal building, and the fix for a detached building is often a wired or point-to-point link, which we explain in our guide to an outbuilding network bridge.
Keep it away from other electronics
Ofcom also lists microwaves, baby monitors, fairy lights and cordless phones as devices that can interfere with the router. Rogers recommends at least 4 feet between the modem and other wireless devices, electronics, metal, concrete and appliances. Xplore's Canadian user guide suggests at least 2 metres from interference sources such as microwaves, security systems or Bluetooth devices for its whole-home units.
This is the rule people break most often. The router sits on the TV stand, next to the soundbar, the streaming box, the game console and a pile of power bricks. It is convenient and it is crowded. Move it a couple of feet to a side shelf and you often gain more than a new router would give you.
2.4 GHz, 5 GHz and why range changes
Placement and frequency band work together. Rogers explains that 5 GHz carries more data but has less range and is more easily obstructed than 2.4 GHz. In practice:
- Close to the router, with few walls between, 5 GHz is usually the faster choice for streaming, video calls and gaming.
- Far from the router, or through several walls, a device may hold a steadier connection on 2.4 GHz, with lower peak speed.
So if your office is two walls from the router and the laptop feels sluggish, the fix may be moving the router closer, not changing a setting. Wakey Internet adds a tuning note for busy areas: a 20 MHz channel width on 2.4 GHz generally gives better stability, while 80 MHz can deliver more throughput when the environment and devices support it. That is a setting worth touching only after placement is sorted.
The same trade-off between range and speed explains why smart home devices, which often use the 2.4 GHz band, can behave differently from your laptop. Our smart home networking guide goes into how to plan a network that supports both.
Antennas: point them in different directions
If your router has external antennas, do not aim them all the same way. Ofcom suggests pointing multiple aerials in different directions, such as vertically and horizontally, to extend the reach of the signal. Vertical antennas spread signal mostly sideways across a floor, while tilted ones send more of it up or down. With a two-storey house, one tilted antenna can help the upper level.
Many modern routers have internal antennas and beamforming, so there is nothing to adjust. In that case, position and height are your only controls, which is another reason to get them right.
Two storeys, basements and larger homes
The bigger and taller the house, the less one router can do alone. A workable approach:
- Find where you actually use Wi-Fi. Note the home office, the main TV, the kitchen and the bedrooms, not just the floor plan's centre.
- Place the main router high on the main floor, as TP-Link recommends for two-storey homes.
- Test. Stand in the weakest rooms with a phone and run a speed test at each spot. Move the router a metre or two and test again.
- Add coverage only where the test shows a gap.
Google's help pages list the factors to weigh: home size, construction type, where Wi-Fi is regularly used, layout and the placement of Wi-Fi points, and note that the modem's location and cable lengths may limit where the router can go. That last point is why placement is a wiring question as much as a Wi-Fi one.
When one router is not enough: mesh and access points
TP-Link's guidance is that if placement is not enough, a mesh system or range extender is the next step. Two details decide whether it works.
Do not put a node in the dead zone. Wakey Internet advises placing mesh units halfway between the main router and the weak area, so the node still receives a strong signal to pass on. A node placed where the signal is already poor just repeats poor signal.
Mind the range. Cogeco states that Wi-Fi pods and extenders typically cover 9 to 12 metres (30 to 40 feet) through walls. Space them accordingly.
For several access points, Ars Technica's analysis argues that each unit belongs in the centre of the area it serves, to shorten the distance it must transmit. Our access point placement rules turn that into practical steps, and if you are choosing hardware, see our picks for routers and mesh systems. The same principles of coverage planning apply on larger sites, as in this overview of business Wi-Fi installation, where access points are laid out to reach every working area.
When the mesh nodes can be connected by network cable instead of wirelessly, performance is usually better, because the nodes do not spend radio capacity talking to each other. That needs cabling in the walls, which brings us to new builds.

Planning placement in a new build or renovation
The cheapest time to fix Wi-Fi is before the walls close. If you are building or opening up walls:
- Choose a central equipment location that is ventilated, accessible and not in a mechanical room full of metal ducting.
- Run network cable to ceiling or high-wall positions in the main living area, the upper floor, the home office and any outbuilding or garage you want covered.
- Add a spare run or two where you may want a camera, a TV or an access point later. Our security camera placement guide shows why those spots are worth planning early.
- Allow for a guest or smart-device network from the start, covered in our guest WiFi setup and home VLAN guides.
On acreage, the distances are the challenge: a house, a shop and a barn do not share one Wi-Fi cloud. Plan the house network first, then link the outbuildings with a wired or point-to-point connection.
Our perspective
We see the same pattern in many homes: the router is wherever the cable happened to come in, and everything else is built around that accident. The Wi-Fi is then blamed on the provider, the router or the house.
Our view is that the network should be designed like lighting or audio: decide where people live and work, then put the equipment where it serves them. That means low voltage wiring planned into the build, access points placed in the ceiling where they disappear into the architecture, and equipment housed somewhere ventilated and tidy.
It also means one point of contact. Wi-Fi touches the TVs, the whole-home audio, the smart lighting, the cameras and the control system. When one team designs and supports all of it, a dropout is solved once instead of passed between suppliers. We scale each system to the space, which for a condo is a single well-placed router and for a large custom home is a wired network with several access points.
> JupiterAV
Get a network designed around your home
If you have tried moving the router and the weak spots remain, or you are building and want it done properly from the start, we can help. We supply, install and service TVs, smart home systems, whole-home audio, security and CCTV, networking and low voltage wiring for homes, businesses and builders in and around Calgary.

See what we offer at JupiterAV and tell us about your home, your builder's timeline or the rooms where the signal drops.
FAQ
Where is the best place for a Wi-Fi router?
The best place is a central, open, elevated spot near where you use the internet most, such as a shelf in the main living area. Keep it out of cabinets, away from exterior walls and clear of large metal objects. In a two-storey home, place it high on the main floor.
Can Wi-Fi go through walls?
Yes, but it weakens with every barrier. Ofcom says water, metal, glass and dense materials like brick are the biggest blockers. Drywall costs you less than concrete or a metal-lined wall. The fewer and thinner the obstacles between router and device, the better.
Should a router be on the floor or up high?
Up high. Xfinity recommends at least 2 feet off the floor, and Optimum suggests 5 to 7 feet in a single-storey home. Floors absorb or redirect part of the signal, so a shelf or wall position works better.
Is it bad to put a router in a cabinet?
It usually is. Closed cabinets block signal and trap heat, which can shorten the router's life and make it slow itself down. If you want it out of sight, use an open or ventilated shelf, or plan a dedicated equipment spot with proper airflow.
Do I need a mesh system or a better router?
Try placement first. If a central, elevated spot still leaves weak rooms, a mesh system or wired access points are the next step. Put each node roughly halfway between the main router and the weak area, and wire them with network cable where you can.
Sources
- Rogers: best practices for modem placement
- Wakey Internet: improving your Wi-Fi experience
- Engadget: positioning router antennas
- Linksys: where you place your router matters
- TP-Link: where to place your Wi-Fi router
- Optimum: finding the best router placement
- Xfinity: managing and optimizing your WiFi network
- Ofcom: improving your wifi experience
- Xplore Hub 5 user guide
- Cogeco: placing Wi-Fi pods and extenders
- Ars Technica: Wi-Fi access point placement
- Google Home and Nest Help: where to place your Wifi devices
- TP-Link support: Deco placement
- Business Wi-Fi installation overview