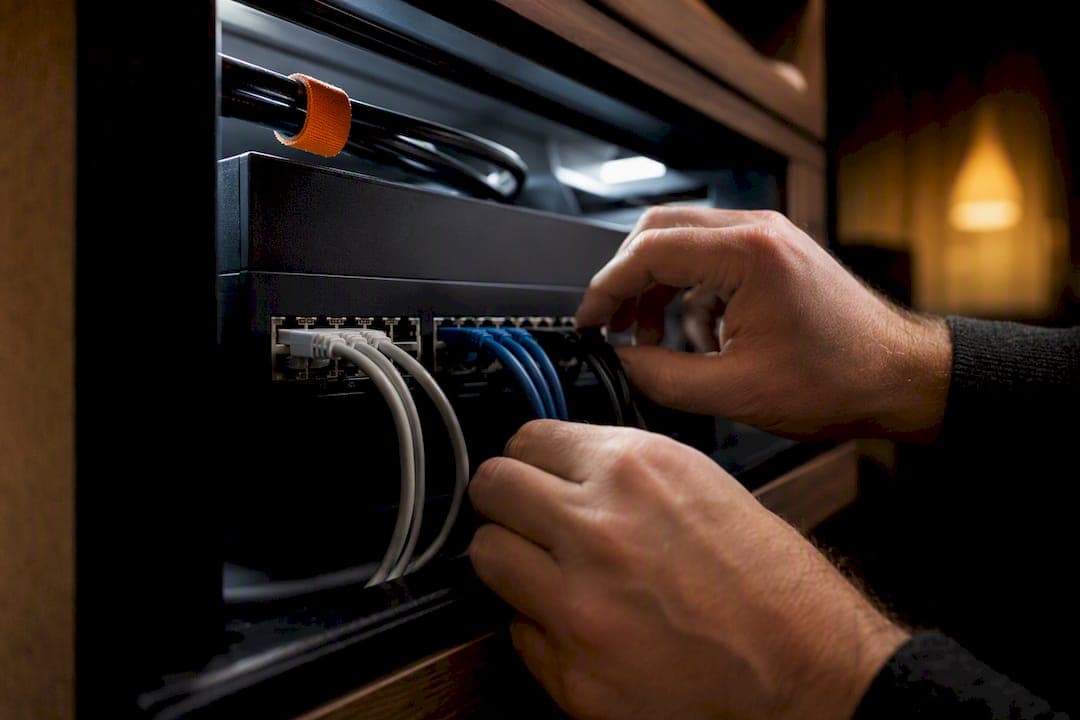
Yes, VLANs are worth setting up once your smart home includes wired devices, more than one access point, or devices you genuinely don't trust on the same network as your laptop. Start with three zones: Trusted, IoT, and Guest, with an optional Management VLAN for your network gear itself. Expect some setup time if you already own a managed switch and a router that supports subinterfaces.
TL;DR:
- VLANs are essential when wired IoT devices, multiple access points, or security-sensitive equipment are involved, especially beyond simple wireless guest isolation.
- Most homes benefit from starting with three VLANs: Trusted, IoT, and Guest, handling the majority of segmentation needs efficiently before expanding further.
- Using a managed switch, VLAN-supporting access points, and a VLAN-capable router are necessary for reliable VLAN implementation; hardware limitations are a common obstacle.
- Proper configuration involves planning device locations, mapping switch ports and SSIDs to VLANs, and testing DHCP, connectivity, and isolation before relying on the setup.
- Implementing a strict default-deny firewall policy with specific allow rules is key to security, while solutions like mDNS reflectors can help devices discover each other across VLANs at security trade-offs.
Table of Contents
- When to choose VLANs versus a guest network
- Recommended VLAN map for most homes
- Essential hardware and capabilities you'll need
- How to configure VLANs step by step
- Firewall rules and inter-VLAN policy that actually work
- Keeping smart-home discovery working across VLANs
- Testing and troubleshooting checklist
- Best practices and pitfalls to avoid
- JupiterAV's take: when to bring in professional help
- Get a professional VLAN setup from JupiterAV
- Sources
When to choose VLANs versus a guest network
A guest Wi-Fi network solves one problem well: keeping a visitor's phone off your main network. It's built into almost every consumer router, takes five minutes to enable, and isolates wireless clients from each other and from your trusted devices. For a lot of households, that's genuinely enough.
The trouble starts when isolation needs to cover more than a wireless guest. Guest networks are lower overhead and suitable when you only need isolated wireless internet access, but they fall apart the moment you add wired devices, multiple access points, or reusable policy groups across the home. A guest SSID can't touch the smart thermostat wired into your basement switch. It can't isolate the security camera plugged into an Ethernet jack in the garage. And it can't apply a consistent policy across three different access points scattered through the house.
VLANs solve this because they operate at the switch level using IEEE 802.1Q tagging, letting one physical switch or access point host multiple isolated broadcast domains simultaneously. A single switch port can carry traffic for your trusted laptop, your smart lock, and your kid's game console, each confined to its own network segment, without needing separate physical wiring for each.
Here's a rough decision framework:
- Guest network is enough if your isolation need is temporary, wireless only, and limited to visitors or a single IoT device sitting on its own SSID.
- VLANs make sense once you have wired IoT gear, more than one AP, a home server or NAS you want isolated from IoT traffic, or a homelab you're experimenting with.
- VLANs are close to mandatory if you're running security cameras, smart locks, or voice assistants on the same physical switch as your work computer and financial accounts.
- Skip VLANs for now if your entire smart home consists of two or three wireless devices and you have no wired infrastructure to speak of.
The real threshold isn't the number of devices. It's whether those devices touch wired ports or multiple APs. A dozen wireless-only smart bulbs on a dedicated IoT SSID can be handled without ever touching a VLAN. One wired NVR for security cameras changes the calculus completely, because now you need Layer 2 segmentation, not just SSID separation.
Recommended VLAN map for most homes
Most homes don't need seven VLANs. A practical layout commonly starts with three zones: Trusted, IoT, and Guest, and that combination covers the large majority of typical home needs before anyone touches a homelab or a DMZ. Expanding to more zones makes sense once you're running self-hosted services or a genuine lab environment, but going further than that early tends to create more troubleshooting overhead than security benefit.
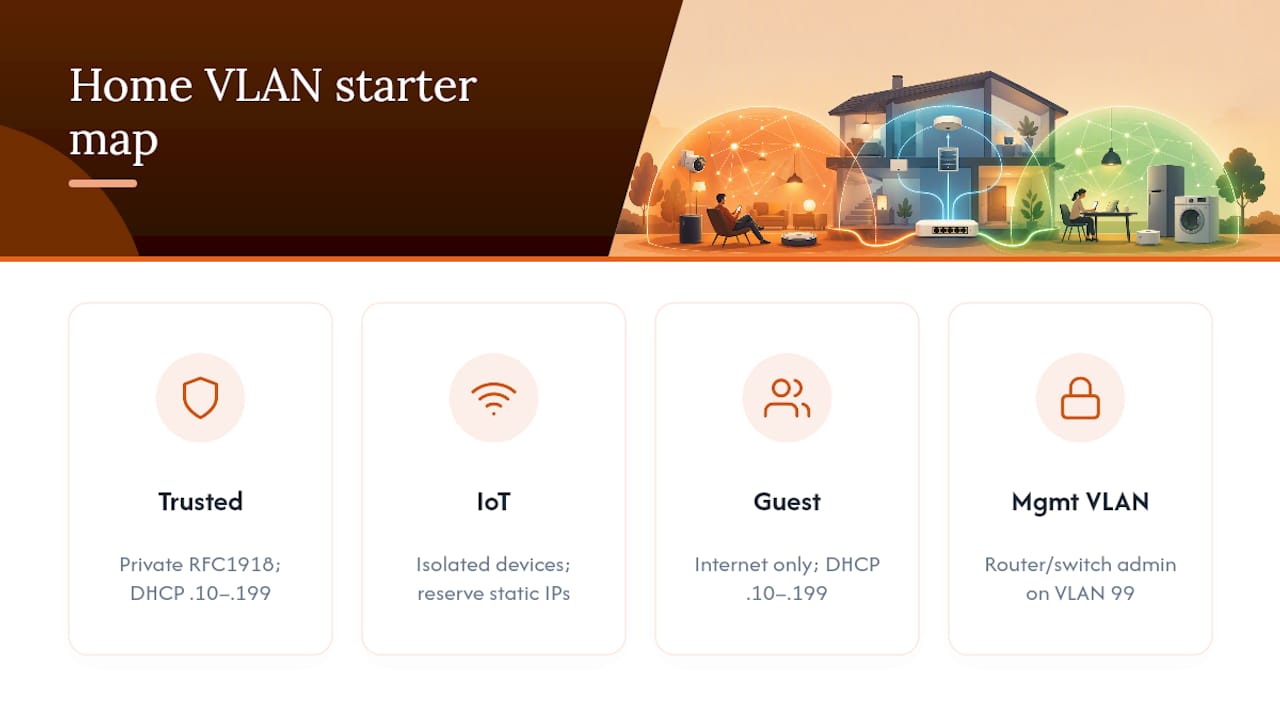
Here's a starter template you can adapt directly, using private address ranges from RFC 1918:
VLAN IDs can technically run from 1 to 4094 under the 802.1Q standard, but sticking to easy-to-remember numbers like 10, 20, 30, 99, and 40 makes troubleshooting faster at 11pm when something breaks.
For DHCP scope sizing, don't overthink it. A subnet large enough for most home VLANs keeps the math simple and leaves room to grow. Reserve the top of each range for static assignments: your NVR, your smart hub, your printer. That way DHCP hands out from .10 to .199 dynamically without ever colliding with a device you've hardcoded.
The Management VLAN deserves special mention. Keeping your switch, access point, and router admin interfaces on a separate VLAN from everything else means a compromised IoT device can't reach your network gear's login page, even if it's on the same physical switch.
Essential hardware and capabilities you'll need
The single biggest reason home VLAN projects stall isn't the configuration. It's the hardware. Many consumer ISP routers simply don't support proper VLAN tagging, trunking, or multiple DHCP scopes, which is exactly why a managed switch and a capable router or firewall are non-negotiable if you want this to work reliably.
Three pieces of gear need to cooperate:
- A managed Layer 2 switch that supports 802.1Q tagging, with the ability to configure trunk ports (carrying multiple tagged VLANs) and access ports (carrying a single untagged VLAN to an end device).
- Access points that support VLAN tagging per SSID, so your Trusted SSID lands on VLAN 10 and your IoT SSID lands on VLAN 20, over the same physical AP and cable.
- A router or firewall with VLAN subinterfaces, capable of running separate DHCP scopes and firewall rules per VLAN, and routing between them only where you explicitly allow it.
Power matters here too. If your access points and switch draw Power over Ethernet, confirm your switch actually supplies enough PoE budget for every AP you're running, especially if you're adding a second or third AP down the line. A switch that's PoE capable on paper but underpowered in practice is a common surprise.
Pro Tip: Buy the managed switch first, even before you touch VLAN configuration on your router. Most of the frustrating troubleshooting in home VLAN projects comes from misconfigured trunk and access ports, not firewall rules, so get comfortable with tagging on the switch before layering anything else on top.
If you're planning cabling from scratch or during a renovation, it's worth reading up on structured Ethernet wiring before you commit to a layout, since port placement affects how cleanly you can split VLANs later. The good news: once you've replaced the ISP router with something that handles subinterfaces, the rest of the stack tends to be a one-time cost, not a recurring headache.
How to configure VLANs step by step
Configuring VLANs in the wrong order is the single most common reason people end up locked out of their own network. Follow this sequence and you'll avoid most of the pain.
- Plan first, touch nothing yet. Inventory every device on your network, wired and wireless. Decide which VLAN each device belongs on, and map physical switch ports and SSIDs to VLAN IDs. Write this down. A spreadsheet with port number, VLAN ID, and device name saves you hours later.
- Configure the switch. Create your VLANs by ID on the managed switch first. Set the port connecting to your router as a trunk port carrying all VLANs. Set the port to each AP as a trunk port (since APs broadcast multiple SSIDs across multiple VLANs). Set ports going to single devices, like a desktop or a wired camera, as access ports assigned to the correct VLAN.
- Configure the access points. Map each SSID to its corresponding VLAN ID. Confirm the AP's uplink port to the switch is set as a trunk, not an access port, or none of your SSID tagging will actually reach the switch correctly.
- Configure the router or firewall. Create a VLAN subinterface for each VLAN, matching the IDs you set on the switch. Assign a DHCP scope to each subinterface. Apply a default deny rule between VLANs, then add only the specific allow rules you actually need.
- Test before you trust it. Confirm each device pulls an IP address from the correct VLAN's DHCP scope, confirm inter VLAN traffic is blocked where it should be, and confirm allowed traffic (like internet access from IoT) still works.
Documenting VLAN IDs, switch port mappings, and firewall rules before touching production devices reduces lockout risk substantially and speeds up troubleshooting when something inevitably needs adjusting six months from now.
Pro Tip: Before you apply your first default deny rule on the router, keep a console cable or a temporary access port plugged into the Trusted VLAN. If a firewall rule locks you out of the management interface, you'll need a way back in that doesn't depend on the network you just broke. Back up your switch and router configuration before every major change, not just the first one.
Firewall rules and inter-VLAN policy that actually work
A default-deny inter-VLAN firewall policy with a small set of explicit allows is the practical security posture for home VLANs, and it's the approach most reliable home network guides converge on. The logic is simple: block everything between VLANs by default, then punch narrow, specific holes only for traffic you actually need.
Firewalls evaluate rules top to bottom and stop at the first match, which is why rule ordering matters as much as the rules themselves. A broad allow rule sitting above a specific deny rule will override it every time, silently defeating the restriction you thought you'd set. Most home firewalls are also stateful, meaning a rule allowing outbound traffic automatically permits the matching return traffic, so you rarely need to write reverse rules by hand.
Here's a compact rule set that covers the majority of home scenarios:
| Order | Source | Destination | Action | Rationale |
|---|---|---|---|---|
| 1 | Trusted | Any VLAN | Allow (specific ports) | Trusted devices need to reach management interfaces and shared services |
| 2 | IoT | Internet | Allow | Smart devices need cloud connectivity to function |
| 3 | IoT | Trusted, Management, Lab | Deny | Blocks a compromised smart device from reaching sensitive systems |
| 4 | Guest | Internet | Allow | Visitors need internet, nothing else |
| 5 | Guest | Any internal VLAN | Deny | Prevents guest devices from touching anything on the home network |
| — | Any | Firewall (DNS/NTP) | Allow | Devices need name resolution and time sync to function correctly |
| 7 | Any → Any | Any | Deny | Default deny catches everything not explicitly allowed above |
That last rule is the one that actually does the security work. Everything above it exists to carve out exceptions; the default deny at the bottom is what keeps a compromised IoT device from probing your file server or your laptop when it inevitably tries to.
Notice rule 3 sits above the default deny but doesn't need to be paired with an explicit "IoT to Guest" rule. Since Guest already sits in its own isolated policy, and IoT has no listed allow toward Guest, the implicit default deny at the bottom handles it without you writing a redundant line.
Keeping smart-home discovery working across VLANs
Split your network into VLANs and the first thing that usually breaks is casting to your TV or finding a smart bulb in an app. This isn't a bug in your configuration. It's how multicast-based discovery works, and understanding why saves a lot of frustrated troubleshooting.
Service discovery protocols like mDNS and Bonjour operate as Layer 2 multicast traffic, which means they simply don't cross VLAN boundaries by default, since VLANs are designed specifically to keep Layer 2 traffic contained within its own segment. Symptoms show up as devices that connect to Wi-Fi fine but never appear in an app, or a Chromecast that works until you move it to a different VLAN than your phone.
A few practical fixes, each with a different trade-off:
- An mDNS reflector or proxy relays multicast discovery packets between specific VLANs, letting devices find each other without opening broad network access between zones.
- Placing shared controllers on the Trusted VLAN with narrow, explicit allow rules toward IoT, rather than merging the VLANs entirely, keeps most of the isolation benefit intact.
- Static DNS entries or a local DNS server can substitute for discovery in cases where you know the device's address and don't need automatic detection.
Each of these carries its own security trade-off, since any bridge between VLANs, even a narrow one built for mDNS, is a small crack in an otherwise sealed wall. The right call for most homes is a reflector scoped to only the VLANs that need it, not a blanket rule allowing all multicast traffic everywhere.
Pro Tip: If you're running a smart home platform with a central hub or controller, like a Control4 or similar system, put that controller on the Trusted VLAN and allow only the specific ports it needs toward the IoT VLAN. Don't open the whole subnet just to make one hub work. Our guide on smart home networking covers controller placement in more depth.
Testing and troubleshooting checklist
Before you consider your VLAN setup finished, run through a structured test pass rather than assuming it works because nothing obviously broke.
- Verify DHCP on every VLAN. Connect a device to each VLAN and confirm it receives an IP address in the correct subnet, not one from a neighbouring VLAN, which usually points to a tagging mistake.
- Confirm SSID to VLAN mapping. Connect to each Wi-Fi network and check the assigned IP address matches the VLAN you intended for that SSID.
- Run ping tests between VLANs. From a device on Trusted, ping a device on IoT. It should fail if your default-deny rule is working; it should succeed only for the specific allows you've configured.
- Run an nmap scan from an isolated VLAN. From the Guest VLAN, scan toward your Trusted subnet. You should see no open hosts responding, confirming isolation actually holds under a real scan, not just a single ping.
- Check DNS resolution. Confirm devices on every VLAN can resolve domain names, since a misconfigured allow rule for port 53 will let a device get an IP address but never load anything.
These checks, borrowed from standard segmentation testing practice, catch the vast majority of home VLAN mistakes before they become a mystery you're debugging at midnight.
Common failure causes are predictable: a trunk port that isn't actually tagging traffic, an access port assigned to the wrong VLAN, a DHCP scope that was never created for a new VLAN, or a firewall rule sitting in the wrong order in the list. On Windows, ipconfig /all shows you the assigned IP and subnet instantly. On macOS or Linux, ifconfig or ip a does the same. Most managed switches and routers also show live VLAN and port status in their web interface, which is often faster than a command line for spotting a port assigned to the wrong VLAN at a glance.
Best practices and pitfalls to avoid
Start with a few zones and resist the urge to build more until you actually need them. Over-segmentation is one of the most common beginner mistakes, and most residential needs are genuinely covered by a few zones, with additional VLANs adding troubleshooting complexity that rarely pays for itself in a typical home.
A few rules of thumb worth internalizing:
- Default-deny between VLANs, always, then add specific allows as you discover you need them.
- Document every VLAN ID, port assignment, and firewall rule before you touch a live device, and back up your switch and router configuration after every change.
- Don't create a VLAN per room or per app. A VLAN per policy group, like "all my IoT devices" or "anything a guest touches", scales far better than one per device category.
- Plan for firmware updates on switches and APs ahead of time, since a botched update mid-VLAN-project is a lot harder to recover from than one on a flat network.
Pro Tip: Name your VLANs descriptively in your documentation, not just by number. "VLAN 20, IoT" is far easier to troubleshoot at 11pm than trying to remember what VLAN 20 was for six months after you set it up.
JupiterAV's take: when to bring in professional help
Plenty of homeowners can build a solid three-zone VLAN setup on a weekend with the right hardware. Where it starts making sense to call a professional is when the project grows past a single switch: multiple access points needing PoE budgeting, wiring runs between floors or into a detached garage, or fibre planning for a larger property.
At JupiterAV, the value we add on a home network project isn't just running cable or racking a switch. It's the documentation, the recovery plan, and the device inventory that turns a fragile one-off configuration into something maintainable years later. We commission and test every VLAN and firewall rule before calling a job done, not just when everything appears to work on the surface.
A straightforward three-zone install for an existing home might wrap up in a day. Add structured wiring, multiple APs, or a whole-home AV integration alongside the network work, and the timeline stretches accordingly, with a documented handoff at the end either way.
— JupiterAV
Get a professional VLAN setup from JupiterAV
Professional installers can handle the wired infrastructure and network hardware that make home VLANs reliable instead of fragile, so you're not troubleshooting a locked-out router on a Sunday night.

Beyond VLAN and network segmentation projects, installers may handle smart home ecosystems with systems like Control4 automation, Lutron Caseta lighting, whole-home Sonos and WiiM audio, security cameras, and custom home theatre builds that tend to live on the same network. If your home is due for a rewire or a prewire before drywall goes up, our prewire checklist is worth a look before you commit to a layout, and if you're extending coverage to a garage or shop, we've also written about bridging a network to an outbuilding without trenching your yard.
If you're weighing whether to DIY your VLAN project or bring in a professional, reach out through our contact page with your device list and rough network layout on hand. That's enough for us to scope the work and give you a realistic timeline.
Sources
For readers who want to go deeper, the 7-zone homelab VLAN guide covers advanced segmentation beyond the three-zone starter here. The OPNsense segmentation guide walks through firewall rule implementation in detail, and How-To Geek's smart home VLAN guide offers a beginner-friendly walkthrough of the same default-deny approach.
- Government of Canada cyber security guidance (reference to segmentation concepts)
- Home Network VLAN Guide: The 7‑Zone Setup I Run
- Home network segmentation with OPNsense: a complete guide
- How-To Geek — Set up VLAN for my smart home