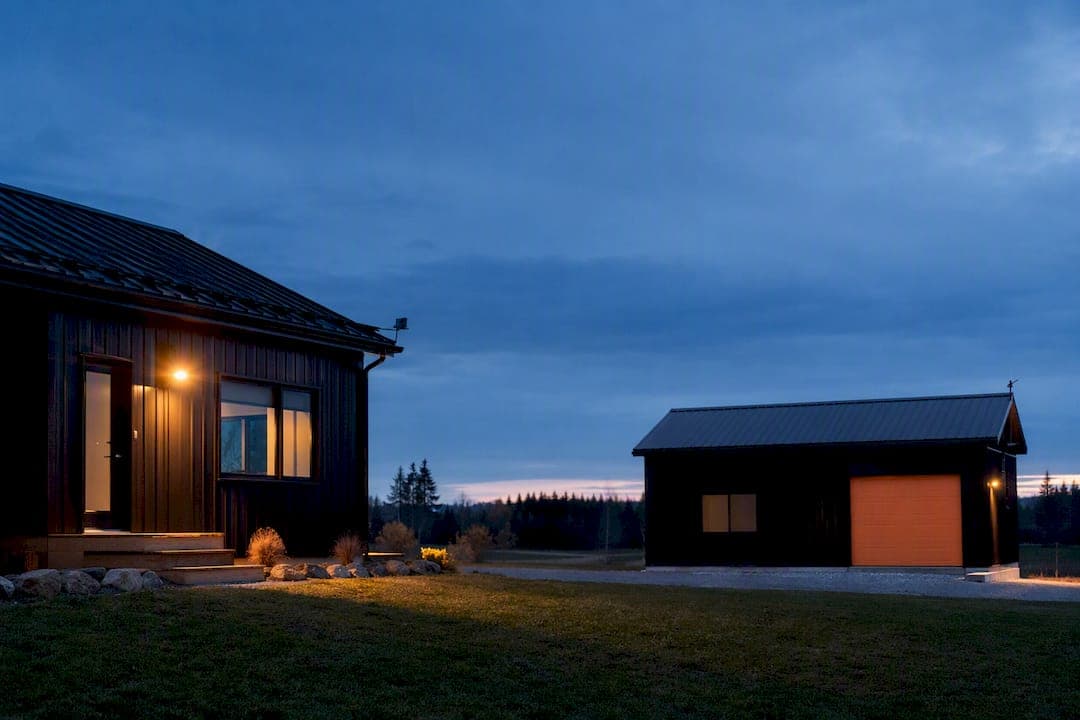
For most no-trench installs, a point-to-point wireless bridge gives the best balance of speed, cost, and reliability when connecting a garage, shed, or workshop to your home network. Choose buried Ethernet or MoCA over existing coax if you already have wiring in place or need a fully weatherproof, interference-free link. Powerline adapters, mesh extenders, and cellular gateways remain useful fallbacks, but only in specific situations.
TL;DR:
- A point-to-point wireless bridge provides the best balance of speed and installation ease for most outbuilding links, especially over open sightlines within a few hundred meters.
- Line-of-sight, distance, and obstacle presence primarily determine whether a wireless bridge or a wired connection is more reliable for outbuilding networking.
- Proper site surveys, correct mounting height, and alignment verification are essential to prevent link degradation caused by weather, wind, or seasonal changes.
- Powerline adapters and mesh extenders often underperform unless electrical wiring is shared and noise-free, making them less reliable options for detached structures.
- Professional installation is recommended for complex mounts, high placements, or wiring that requires code compliance, ensuring a lasting and secure network link.
Table of Contents
- Comparing the realistic ways to bridge an outbuilding network
- How does a point-to-point wireless bridge actually work?
- What should you check before buying bridge hardware?
- When does a wired connection make more sense than wireless?
- Why do powerline adapters and mesh extenders often fail here?
- Step-by-step: installing and configuring a PtP bridge
- What if the link degrades after a season outdoors?
- JupiterAV field guidance: when to DIY vs call a pro
- A field tech's take on the one thing owners always miss
- Get a professional survey and install from JupiterAV
- Sources
Comparing the realistic ways to bridge an outbuilding network
Every property is different, but the options for extending connectivity to a detached structure boil down to six practical methods. Homeowner guides consistently point to the same shortlist: external extenders, outdoor masts, PtP bridges, powerline adapters, and direct Ethernet runs each solve a different version of the problem.
- Point-to-point (PtP) wireless bridge: Two matched radios, one on each building, aimed at each other. Works over open sightlines from a few hundred metres to several kilometres depending on the kit.
- Direct burial or conduit Ethernet: Cat6/Cat6A run underground. Rock solid once installed, but digging is labour and cost.
- MoCA over existing coax: Repurposes old cable TV wiring already running between buildings for a wired-equivalent connection.
- Powerline adapters: Send data over electrical wiring, but only works well when both buildings share a panel.
- Outdoor access point or mesh node: Extends Wi-Fi range but still needs a backbone connection to the main router.
- Cellular gateway: An LTE or 5G modem placed in the outbuilding, independent of your home network entirely.
Distance and line of sight decide most of this for you. If you can see the outbuilding clearly from a mounting point on the house and there's no fence line of mature spruce in the way, a PtP bridge usually wins on cost and install speed. If the structures already share a coax run from a satellite dish install, MoCA is nearly free to try. Trenching only makes sense when you want a permanent, invisible link and don't mind the labour, or when local terrain makes a wireless link unreliable.
How does a point-to-point wireless bridge actually work?
A PtP bridge is really just two radios talking to each other in a straight line: a sender unit mounted at the house, a receiver at the outbuilding, each with a directional antenna instead of the omnidirectional one on your router. The receiving unit outputs a standard Ethernet jack, so whatever you plug in on the outbuilding side, a switch, an access point, a security NVR, just sees a normal wired connection.
Frequency choice matters more than most people expect. 5 GHz radios deliver the highest throughput but need a genuinely clear line of sight. If your property has trees, outbuildings, or a hill between the two structures, lower-frequency options like Wi-Fi HaLow at 900 MHz penetrate obstacles far better, even though their ceiling on raw speed is lower. On heavily wooded or hilly lots, that trade-off often flips in favour of the lower-frequency radio or simply mounting higher to clear the canopy.
Statistic callout: Preconfigured PtP kits from established outdoor networking vendors advertise usable ranges from a few hundred metres up to 5 km (3.1 mi) on standard models, with select long-range hardware rated to 15 km under clear line-of-sight conditions.
For a typical acreage or suburban lot, expect these realistic numbers:
- Under 100 m (328 ft), near line of sight: full gigabit speeds are achievable with entry-level kits.
- 100 to 500 m, clear sightline: several hundred Mbps is realistic on mid-tier hardware.
- 1 km or more: throughput drops and alignment tolerance tightens considerably, favouring dedicated long-range kits over consumer bridges.
Preconfigured kits that auto-pair out of the box cost less and install in an afternoon. Enterprise-grade long-range bridges cost more upfront but hold their alignment better in wind and handle multi-kilometre links that consumer kits simply won't attempt.
What should you check before buying bridge hardware?
A site survey takes an hour and saves you from buying the wrong gear. Confirm feasibility before anything else gets ordered.
- Walk the sightline between mounting points at the height you plan to install, not from ground level, since a clear view from your feet doesn't guarantee a clear view from a pole six feet up.
- Do a temporary mount test. Zip-tie one radio to a ladder or fence post at roughly the intended height for a day and check signal strength before committing to permanent brackets.
- Pick your mounting points: a gable-end wall, an eave, or a dedicated pole. Higher is usually better for clearing obstacles, but every extra foot of mast adds wind load and mounting complexity.
- Plan your power run. Most outdoor bridges use PoE (Power over Ethernet), so you need either a PoE injector near an indoor switch or an outdoor-rated PoE switch, plus a cable run within the specified length for that voltage.
- Address grounding and lightning protection. Outdoor antennas on a mast are a lightning risk; a grounding rod and surge-rated PoE injector are not optional extras on any elevated installation.
- Check your municipality's rules on structures over a certain height or on antennas visible from the street, and confirm your homeowner's insurance doesn't have exclusions for roof-mounted equipment.
Pro Tip: Take photos of your line-of-sight test from both ends, at the exact mounting height, before buying anything. It's the cheapest insurance against discovering a mid-height power line or a neighbour's tree crosses your path after the hardware arrives.
Working at height, running new circuits, or drilling through brick veneer is where most homeowners should stop and call a professional installer instead of pushing through solo.
When does a wired connection make more sense than wireless?
Wired links win on raw reliability. There's no weather to fight, no alignment to maintain, and no 5 GHz interference from a neighbour's new router. The trade-off is labour and, often, permitting.
Ethernet has a hard distance ceiling. Without active gear in the middle, Cat6 or Cat6A runs are limited to about 100 m (328 ft) before signal degrades; beyond that you need a switch partway along the run, or fibre instead of copper.
- Direct burial cable rated for underground use can go straight in a trench, but conduit is worth the extra step almost every time, since it protects against rodents and lets you pull a second cable later without redigging.
- Cat6A over Cat6 is the better call for any run over roughly 50 metres or anywhere near electrical conduit, thanks to its tighter shielding against interference.
- UV-rated jacketing matters wherever any part of the cable is exposed above ground, even briefly at an entry point.
- MoCA adapters repurpose existing coax, often left over from an old satellite or cable TV run, and can deliver wired-equivalent speeds with almost no new cabling.
Cost and time are the real deciding factors. A PtP bridge kit and an afternoon of mounting work is often cheaper and faster than trenching for most detached garage or workshop scenarios, especially where the ground is rocky or landscaped. Trenching earns its cost back when you want a connection that's completely immune to weather, foliage growth, or line-of-sight changes over the next twenty years. For anyone planning cable runs during a build or major renovation, it's worth reviewing a home ethernet wiring guide before the trench gets closed up.
Why do powerline adapters and mesh extenders often fail here?
Powerline adapters look tempting because they use wiring you already have. The catch is that performance depends entirely on both buildings sharing the same electrical panel and clean, unshared circuits. If the garage runs off a subpanel fed by a different circuit than expected, or the wiring is decades old with noisy connections, speeds can drop to a fraction of the rated figure, or the link can drop out entirely.
- Shared panel required: if the outbuilding has its own separate electrical service, powerline generally won't work at all.
- Distance and noise matter: older wiring, dimmer switches, and appliances on the same circuit all degrade the signal.
- Mesh extenders and indoor boosters are built for drywall and open floor plans, not for punching a Wi-Fi signal through an exterior wall, an air gap, and another exterior wall.
Statistic callout: Consumer powerline kits often advertise speeds up to 1,000 Mbps (AV1000), but these figures assume ideal wiring conditions that are rarely met between separate structures on a property.
A cellular gateway, essentially an LTE or 5G modem placed in the outbuilding, sidesteps all of this by not depending on your home network at all. It's a reasonable fallback when the outbuilding just needs basic connectivity and running any link back to the house isn't practical.
Step-by-step: installing and configuring a PtP bridge
Buying the kit is the easy part. Getting the alignment and network settings right is what separates a link that works from one that drops out every time it rains.
- Confirm distance and mounting points match your chosen kit's rated range, with margin. Don't buy a 500 m kit for a 480 m link.
- Order the right power accessory: check whether your kit ships with a PoE injector or expects an existing PoE switch, and confirm your cable run length fits the PoE standard's voltage drop limits.
- Mount both units at the surveyed height using weatherproof brackets, running drip loops in any exposed cable to keep water from tracking into connectors.
- Coarse-align by sight, pointing each unit roughly at the other using the mounting bracket's swivel.
- Fine-align using the app or LED signal indicators most kits include; this step is what field installers say takes the most patience but the least skill.
- Set the network mode. Most home setups want the remote unit in bridge mode, passing DHCP through from the main router, rather than acting as its own separate access point unless you specifically want a segmented network.
- Assign or confirm IP addressing and lock down the wireless link itself with WPA3 or WPA2 encryption and a strong passphrase, since this link is now part of your attack surface.
- Run verification tests: a speed test from a device plugged directly into the remote Ethernet port, a ping test checking for packet loss, and a real-world trial streaming or transferring a large file.
Anything wildly below that points back to alignment or interference, not a bad unit.
- Bookmark the bridge's IP address for future troubleshooting.
- Label both ends of the cable run at install time; you will thank yourself in a year.
What if the link degrades after a season outdoors?
Most post-install problems trace back to one of three causes: alignment drift, power issues, or seasonal interference. Wind and thermal expansion can shift a bracket by just enough to drop throughput noticeably over a few months.
- Alignment drift: re-run the app's signal strength indicator; a sudden drop after a windstorm is almost always a mount that's shifted.
- PoE power problems: a failing injector or a cable run near its voltage-drop limit shows up as intermittent drops rather than a hard failure, so swap the injector first before assuming the radio itself is bad.
- Firmware and channel contention: check for a firmware update, and if you're on 5 GHz, scan for new neighbouring Wi-Fi networks that may have moved onto your channel since install.
- Storm damage: after any major wind or ice event, visually check both mounts and reseal any cable entry points where caulking may have cracked.
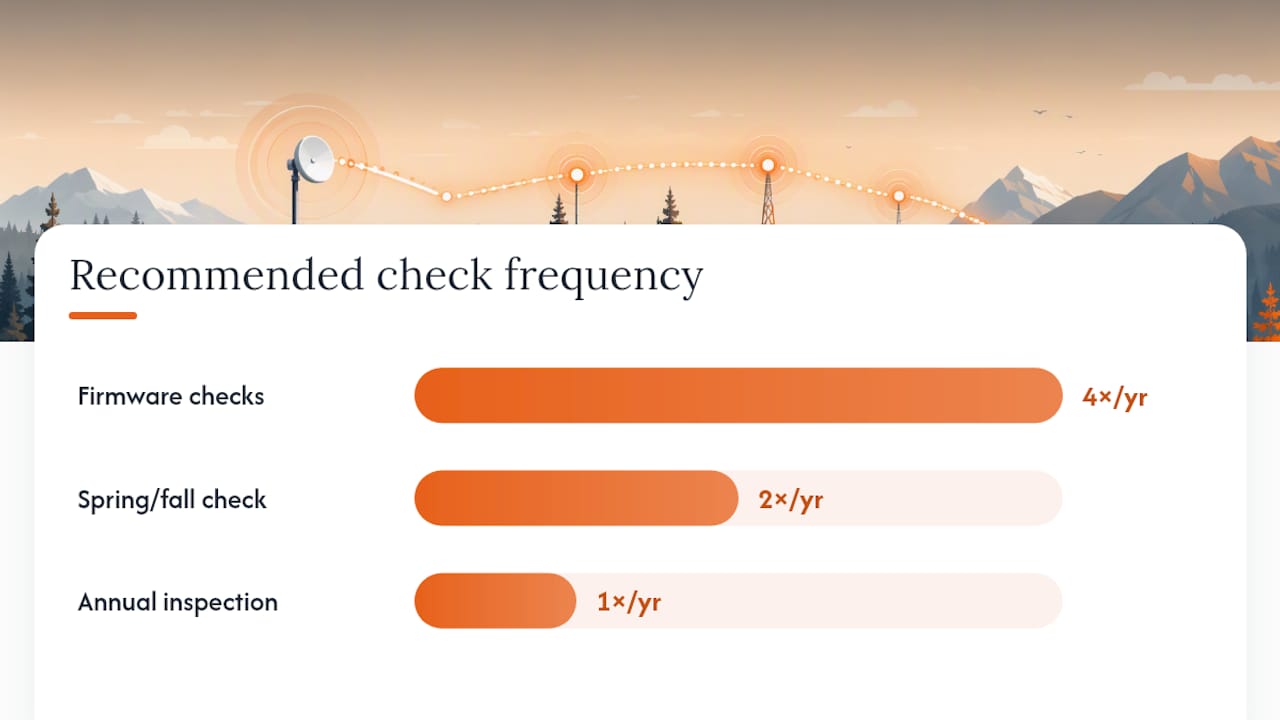
Pro Tip: Set a recurring calendar reminder every spring and fall to physically check both mounting brackets and re-seal cable entries. Freeze-thaw cycles are the single biggest cause of slow bracket loosening on outdoor networking gear.
A quarterly firmware check and an annual physical inspection are enough for most residential bridges to run for years without drama.
JupiterAV field guidance: when to DIY vs call a pro
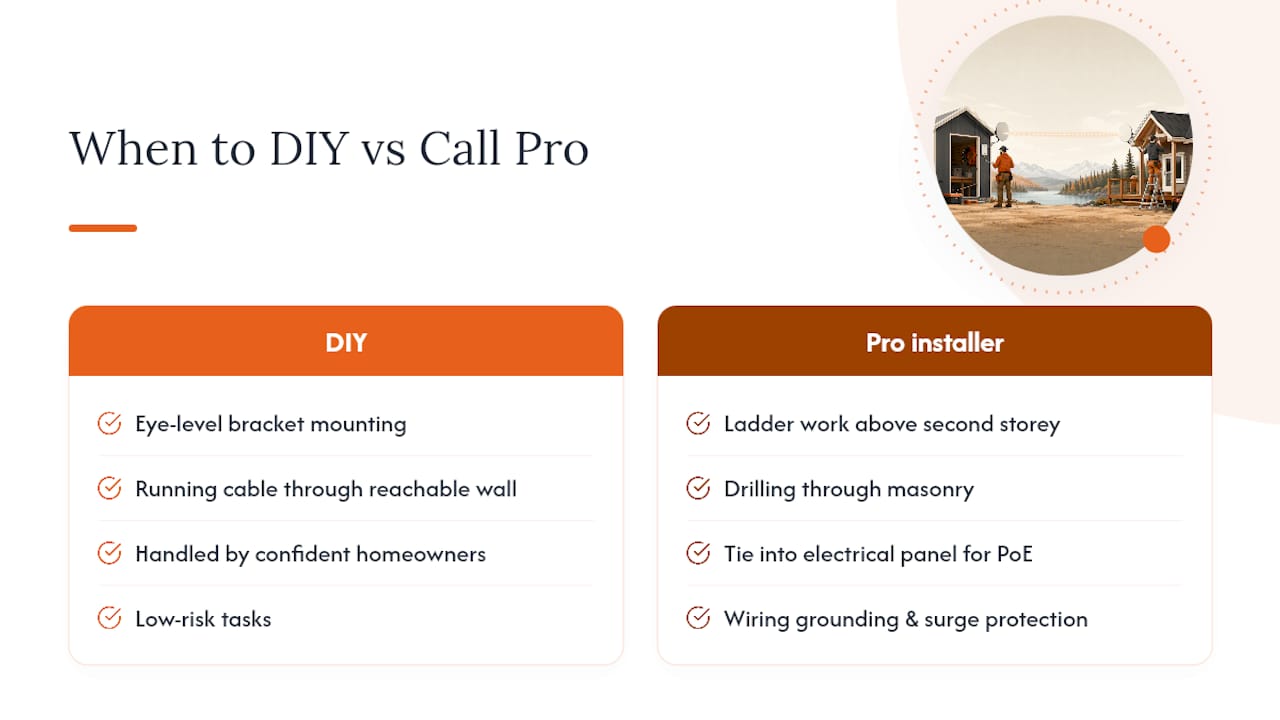
Mounting a bracket at eye level and running a network cable through a wall you can reach are jobs most confident homeowners handle fine. Working from a ladder above the second storey, drilling through masonry, tying into your electrical panel for a PoE run, or wiring proper grounding and surge protection is where the risk profile changes, and where a certified installer earns their fee.
Ballpark, a straightforward PtP bridge install runs a few hours for a technician once the survey is done; wired burial jobs or complex mounts can stretch to a full day. Costs vary with cable length, mounting height, and whether trenching or masonry work is involved, so treat any number online as a starting estimate rather than a quote.
If you're planning cabling as part of a larger project, our prewire checklist and fibre home network guide cover how an outbuilding link fits into a broader home network plan.
A field tech's take on the one thing owners always miss
Most install days follow the same rhythm: survey, mount, align, test. The step owners underestimate is verification. It's tempting to call it done the moment the light on the receiver turns green. But a green light means the radios found each other, not that the link will hold in wind or handle a video call reliably.
Run the throughput test. Check it again a week later. If aiming a bracket eighteen feet up a ladder isn't something you're comfortable with, that's exactly the point to call in a pro instead of improvising.
— JupiterAV
Get a professional survey and install from JupiterAV
JupiterAV handles the part of this project most homeowners would rather not do themselves: climbing the ladder, aligning the radios precisely, and grounding everything to code.

A JupiterAV visit typically starts with a site survey to confirm line of sight and mounting options, followed by a straightforward quote covering hardware, labour, and timing. Our certified technicians handle the PoE wiring, surge protection, and alignment testing so the link performs at the numbers the kit promises, not a fraction of them. Whether you need a wireless bridge to a detached garage, a buried Cat6A run planned alongside a bigger smart home networking project, or advice on which approach fits your property's terrain, our team scopes it before any hardware gets ordered. Book a site survey through JupiterAV to get a firm quote and installation date for your outbuilding connection.
Sources
- Omada Professional Outdoor Wireless Bridge Solution
- 5 ways to connect your shed to your Wi‑Fi router
- TX‑E knowledge hub: connectivity for lifestyle properties