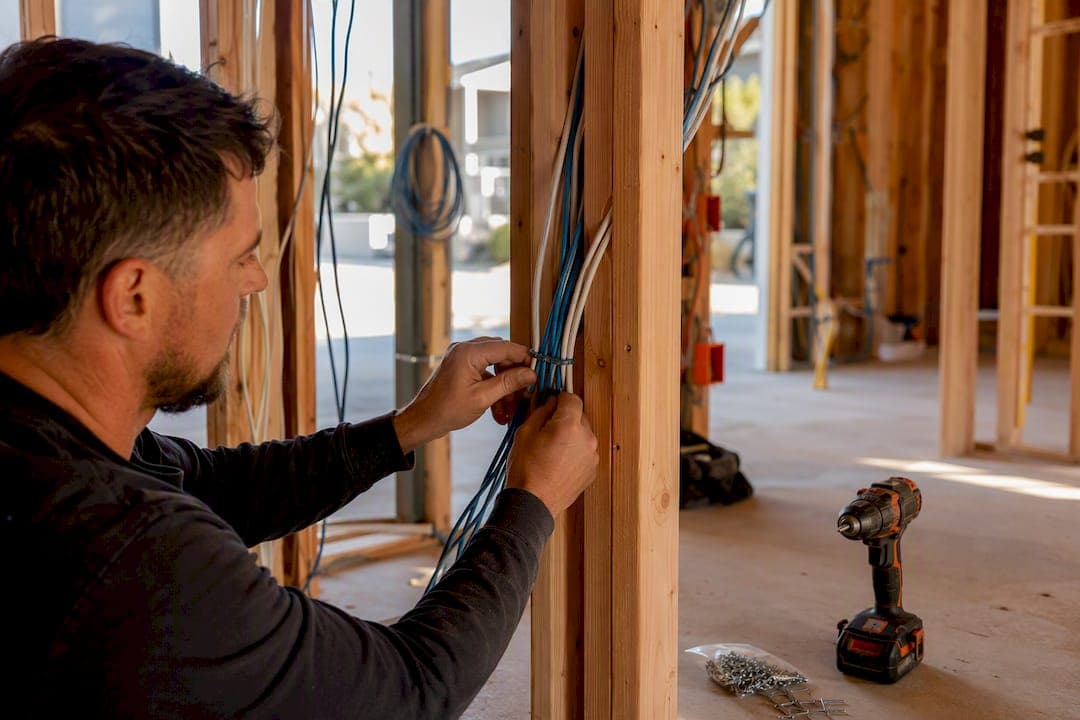
Prewire a smart home by home-running Cat6A to every access point and camera, RG6 plus Cat6 to every TV location, 16/4 speaker cable to media rooms, and empty conduit from a central rack to the attic and basement. Do this during the low-voltage rough-in window, after framing and before insulation goes up. Get it wrong at this stage and you're cutting drywall later to fix it.
The essential drops, at minimum:
- TVs: 2× Cat6 + 1× RG6 per location
- Ceiling access points: 1× Cat6A each
- Cameras and doorbells: 1× Cat6 to each location, weatherproofed outdoors
- Speakers: 16/4 pairs run to a central amp
- Keypads and touch panels: 18/2 or Cat6 depending on system
According to CrimpShop's low-voltage pre-wire guide, this exact combination (two Cat6, one RG6, Cat6A to APs) has become the defensive standard for new-construction prewires because it covers nearly every device category a homeowner will add over the next decade.
Key Takeaways
A future-proof smart home prewire comes down to home-running Cat6A and RG6 to every device location, adding conduit for tomorrow's unknowns, and documenting every cable before drywall closes.
| Point | Details |
|---|---|
| Prioritize conduit first | Empty conduit from the rack to attic and basement is the cheapest insurance against future upgrades. |
| Use Cat6A for APs and cameras | Cat6A supports multi-gig and PoE++ demands that plain Cat6 can't handle long-term. |
| Size PoE switches with headroom | Add 20 to 30% headroom above your calculated device power budget when choosing a switch. |
| Separate low-voltage and line-voltage | Keep 12 inches of separation from parallel electrical runs to avoid interference. |
| Bring in JupiterAV for complex builds | JupiterAV designs and installs Control4, Sonos, Lutron Caseta, and structured wiring for Calgary homes and builders. |
Table of Contents
- Core backbone: Cat6 vs Cat6A, and when fibre earns its keep
- Room-by-room wiring checklist: what to mark on your plans
- PoE and electrical planning: power budgets and neutral wires
- The structured media centre: where to put the rack
- Labelling, documentation, and testing before drywall goes up
- When to prewire and what it actually costs
- Printable checklist for your builder and low-voltage installer
- Why consider a pro for the install
- Guidance on grounding and surge protection for smart home equipment
- Low-voltage vs line-voltage wiring: separation, code, and safety
- Planning centralized audio and video distribution wiring
- Coordinating with other trades to avoid wiring conflicts
- Integration considerations across Z-Wave, Zigbee, and Wi-Fi
- Wiring specific appliance controls: HVAC, blinds, and security
- Sources
Core backbone: Cat6 vs Cat6A, and when fibre earns its keep
Cat6 is the floor, not the ceiling. It handles gigabit speeds reliably over runs up to 100 metres, which covers most in-wall drops for TVs, keypads, and wired streaming boxes. Cat6A is the better call anywhere a device will push serious bandwidth or sit on Power over Ethernet for years: ceiling access points, PTZ security cameras, and any drop feeding a future 2.5 or 10 gigabit switch port. CEDIA's wiring guide recommends Cat6A specifically for access points and camera feeds, since those locations tend to get the least attention during a later upgrade and the most benefit from headroom now.
Single-mode fibre earns its place in larger homes, multi-building properties, or any run that exceeds Ethernet's practical distance limit, roughly 90 metres for a single unbroken pull. If you're feeding a detached garage, a guest house, or a remote equipment closet, fibre avoids the need for a secondary switch closet altogether.
Coax (RG6) hasn't disappeared. Even in an all-streaming household, one RG6 run per TV location covers over-the-air antenna feeds and gives you a fallback if a future occupant wants cable or satellite.
The topology matters as much as the cable grade. Every drop should home-run back to a central rack rather than daisy-chaining between rooms, and conduit between that rack and each floor's key junctions turns a future upgrade into an afternoon job instead of a wall-opening project. A fibre-ready home network plan makes this easier to dimension correctly the first time.
Room-by-room wiring checklist: what to mark on your plans
Print this section and hand it to whoever is drawing your electrical plan.
- TV locations — 2× Cat6 + 1× RG6 per wall-mount point. If the source components will sit in a cabinet elsewhere, add a 1.5-inch HDMI conduit sleeve between the wall plate and the equipment location.
- Home offices and bedrooms — 2× Cat6 minimum, even in rooms with no obvious tech use today. A guest bedroom becomes a home office more often than builders expect, and running the cable now costs a fraction of adding it later.
- Ceiling access points — 1× Cat6A to each AP location, generally one per 1,500 square feet as a baseline, though a proper RF site study can push that number up in homes with metal studs, ICF construction, or lots of tile and stone.
- Cameras and doorbells — 1× Cat6 to each exterior camera and doorbell position, terminated in a weatherproof jack rated for outdoor exposure.
- Speakers and media rooms — 16/4 (or 14/4 for longer runs) speaker cable from each ceiling or in-wall speaker back to a multi-zone amplifier at the rack, plus HDMI or fibre-optic conduit for any projector run over 25 feet.
PoE and electrical planning: power budgets and neutral wires
Power over Ethernet lets a single Cat6 or Cat6A cable carry both data and power to a device, which eliminates a separate low-voltage transformer at every access point, camera, and touch panel. Standard PoE delivers up to about 15 watts, PoE+ up to roughly 30 watts, and PoE++ up to around 60 to 100 watts depending on the switch, which covers higher-draw devices like PTZ cameras and larger touch panels.
Size your switch with headroom, not exact math:
- Add up the rated draw of every PoE device on a switch
- Add 20 to 30% headroom for switch inefficiency and future device additions
- Choose a switch model with that total in its power budget, not its port count alone
Pro Tip: Don't buy the PoE switch until the device list is final. Guessing early almost always means undersizing, and swapping a switch after the rack is built adds an extra service call.
Line-voltage wiring needs its own attention. Many smart dimmers and switches require a neutral wire at the switch box, which older homes often lack, so confirm this with your electrician before rough-in closes. If an EV charger is even a maybe for the driveway or garage, run a dedicated 240V circuit sized for 40 to 50 amps now. It's a cheap add during framing and an expensive one after.
The structured media centre: where to put the rack
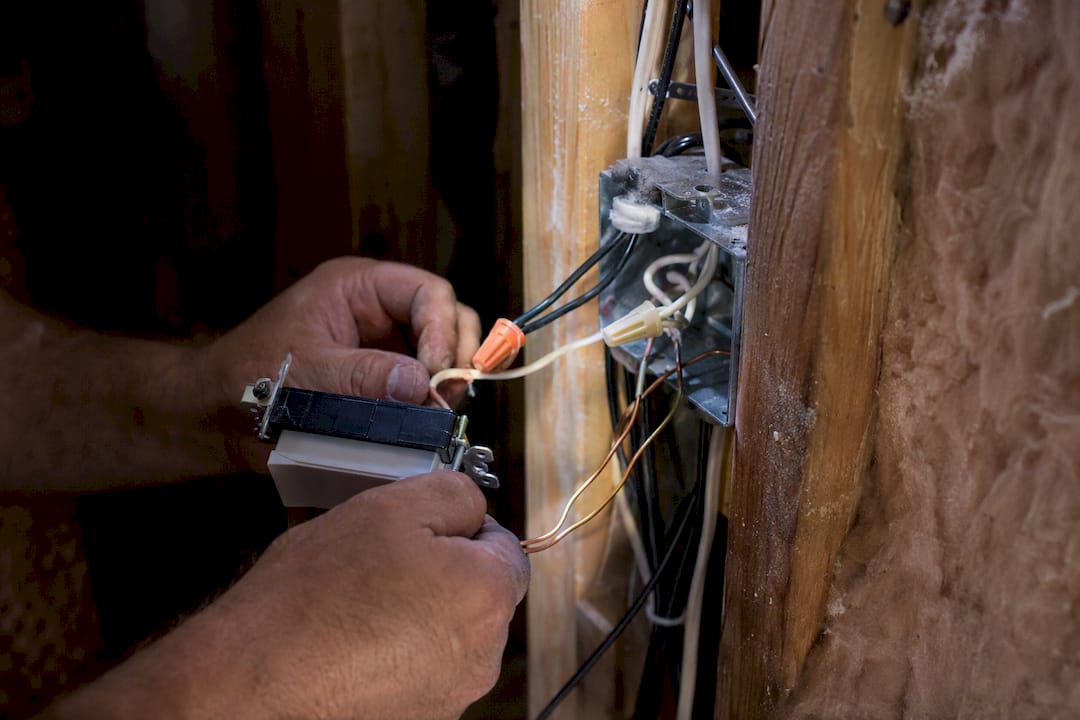
The structured media centre, sometimes just called the rack or the SMC, is the physical hub every home-run cable lands at. Placement decisions here affect performance and serviceability for the life of the house.
- Location: a conditioned, central space with easy access, a basement closet or mechanical room usually works best. Avoid attics and exterior walls, where temperature swings shorten equipment life.
- Power: a dedicated 20-amp circuit, surge protection at the panel, and at least two outlets inside the enclosure for a UPS and future gear.
- Cooling: passive ventilation is fine for a light load, but a rack full of PoE switches and an NVR needs active cooling to avoid thermal shutdowns.
- Cable management: patch panels for every cable category, labelled and organized before the rest of the equipment goes in.
Keep every drop within a practical cable-run distance of the rack, and skip locations that see big temperature or humidity swings.
Labelling, documentation, and testing before drywall goes up
Once drywall closes the walls, every mistake becomes a repair job instead of a five-minute fix. Handle these steps first.
- Label both ends of every cable with a permanent, legible tag, and record the same information in a digital wiring diagram you can hand to future contractors.
- Test continuity on every run, and check link speed where your tester supports it, before insulation goes in.
- Leave service loops: about 6 feet of slack at the rack end and 12 inches at each device drop, so future terminations have room to work with.
- Maintain 12 inches of separation from parallel electrical runs, support cable with J-hooks every 4 to 5 feet, and never over-bend or overstuff a low-voltage box.
CrimpShop's installation standards treat this separation and support spacing as non-negotiable, since electrical interference and physical cable damage are two of the most common causes of intermittent smart home problems years later.
When to prewire and what it actually costs
Low-voltage rough-in happens after framing and rough electrical, but before insulation and drywall. That window is usually a matter of weeks, and it needs coordination between your general contractor, electrician, and low-voltage installer so nobody closes a wall before the last cable lands.
The cost argument for doing it now is straightforward: retrofitting wiring into finished walls typically runs three to five times the labour cost of pulling the same cable during rough-in, since a retrofit means opening drywall, fishing cable blind, and patching afterward. According to Hammer.io's prewire cost guide, a standard whole-home prewire package runs in the low thousands of dollars, a fraction of what the same scope costs after move-in.
If budget is tight, prioritize these first:
- Empty conduit from the rack to attic and basement, the cheapest insurance against future unknowns
- Home-run Cat6A to AP and camera locations
- Extra "just in case" drops in rooms with no clear use yet
Printable checklist for your builder and low-voltage installer
Attach this to your build contract or scope of work.
- Confirm drop counts and exact locations for every TV, office, bedroom, AP, camera, and speaker position on the floor plan.
- Add conduit runs from the SMC to attic, basement, and any exterior soffit locations for future pulls.
- Confirm SMC location, dedicated 20A circuit, and rack space sized for current plus future equipment.
- Confirm neutral wire availability at every switch box slated for smart dimmers, and a 240V circuit if EV charging is a possibility.
- Clarify who pulls which cable: electricians typically handle line-voltage and neutral requirements, while a low-voltage installer handles Cat6/Cat6A, speaker wire, and coax.
- Schedule a framing walk-through where the homeowner initials each drop location before insulation goes in.
Why consider a pro for the install
JupiterAV designs, sells, and installs Control4 automation, Lutron Caseta lighting, Sonos and WiiM audio, motorized blinds, and the low-voltage wiring that ties it all together, along with custom home theatres and structured wiring for builders across Calgary.
A basic AP and camera prewire is manageable for a confident DIYer working with a good checklist. Whole-home audio zoning, large PoE camera systems, and integrated Control4 automation are a different scale of project, where a design mistake at rough-in gets expensive fast. That's the point where a system integrator earns their fee.
Guidance on grounding and surge protection for smart home equipment
Smart home gear is more sensitive to power fluctuations than the appliances it replaces, and grounding gets overlooked more often than any other rough-in detail. Every rack, switch, and PoE injector needs a solid path to ground, ideally tied into the same grounding electrode system as the electrical panel rather than a separate ground rod, which can create dangerous ground potential differences during a fault.
Surge protection belongs in two places, not one. A whole-home surge protective device at the main panel handles large transient events like nearby lightning strikes or utility switching. A secondary surge strip or rack-mounted unit inside the structured media centre catches smaller, more frequent spikes before they reach switches, NVRs, and control processors. Skipping the second layer is a common mistake: panel-level protection alone still lets smaller surges through to sensitive electronics.
Outdoor cameras, doorbells, and any Ethernet run that crosses between buildings need additional attention. A cable that travels outdoors, even briefly, can pick up induced voltage during a storm and carry it straight into your switch. Ethernet surge protectors installed at both ends of any exterior run add a small cost during rough-in and prevent a genuinely common failure mode. If your prewire plan includes a detached garage or guest structure fed by fibre, mention grounding and bonding requirements to your electrician explicitly. It's not the kind of detail that comes up unless someone asks.
Low-voltage vs line-voltage wiring: separation, code, and safety
Low-voltage cabling, your Cat6, Cat6A, coax, and speaker wire, carries data or minimal power and falls under a different set of rules than line-voltage electrical wiring, which carries 120 or 240 volts and can injure or kill if handled incorrectly. Codes generally require physical separation between the two, and for good reason: running low-voltage cable parallel to and touching electrical wiring induces interference (called crosstalk or EMI) that shows up as dropped connections, slow speeds, or camera feeds that stutter for no obvious reason.
Keep a minimum of 12 inches of separation wherever the two run parallel, and cross them at 90-degree angles when they must intersect rather than running alongside each other. This single detail explains a surprising share of "my smart home network is flaky" service calls after move-in. It's not the router. It's a Cat6 cable zip-tied to a 120-volt circuit for six feet in the attic.
Jurisdiction matters here too. Who's licensed to pull which cable varies by province and municipality, and low-voltage work sometimes falls outside standard electrical licensing while other jurisdictions treat it as electrical work requiring a permit. Confirm this with your electrician and local building authority before assuming a low-voltage contractor can pull everything on the list. Bazinie Engineering's explainer on load calculations is a useful reference if you're unsure whether your panel has capacity for the added circuits a smart home rack, EV charger prep, and PoE switches all draw on simultaneously.
Planning centralized audio and video distribution wiring
A whole-home audio system that pulls from a single rack instead of scattering wireless speakers room to room needs its own wiring plan, decided at rough-in, not after the drywall's up. Every zone runs 16/4 speaker cable (or 14/4 for longer distances) back to a multi-zone amplifier housed at the structured media centre, which lets one system manage volume, source selection, and zoning for the whole house from a single location.
Centralized video distribution follows a similar logic. If more than one TV will share sources, cable boxes, an Apple TV, or a media server, an HDBaseT or HDMI-over-IP matrix at the rack lets any source feed any display without a separate box at every TV. That requires either a dedicated Cat6A run per display for HDBaseT extenders, or standard network cabling if you're going the HDMI-over-IP route. Decide which approach fits your home before rough-in, because the cable count and category depend on it.
Not every home needs this. A house with two or three TVs and no shared source hardware is fine with a simple RG6 and Cat6 drop at each set. The centralized approach earns its cost in homes with a dedicated media room, multiple viewing zones fed from shared equipment, or a whole-home audio ambition from day one. Media rooms specifically also need a projector HDMI conduit run if the projector and screen sit more than a few feet apart, since fishing that cable after drywall is a genuinely miserable job.
Coordinating with other trades to avoid wiring conflicts
Low-voltage rough-in doesn't happen in isolation, and the trades most likely to create conflicts are HVAC and plumbing, both of which claim the same wall cavities and ceiling spaces your cable runs need.
A quick coordination checklist:
- Walk the site with your HVAC contractor before cable pulls start, since ductwork often claims the same joist bays a Cat6A run to a ceiling AP wants to use.
- Confirm plumbing rough-in locations first in any wall that will also carry low-voltage cable, particularly in bathrooms and kitchens where both trades compete for the same stud bays.
- Flag your structured media centre location to the HVAC contractor early. A rack needs airflow and a stable temperature, and an HVAC supply or return dumped nearby can undermine both.
- Confirm your electrician's rough-in schedule against your low-voltage installer's, since neutral wire runs for smart switches often get decided at the same time cable gets pulled.
The build sequence that avoids the most rework: framing, then rough plumbing and HVAC ductwork, then electrical rough-in, then low-voltage cable pulls last, once the other trades have claimed their space. Skipping that order is how homeowners end up with a Cat6A run crimped behind a duct that shows up two weeks later.
Integration considerations across Z-Wave, Zigbee, and Wi-Fi
Most smart homes end up running more than one wireless protocol, and your wiring plan needs to account for that even though these are wireless technologies. Zigbee and Z-Wave are mesh protocols built for low-power devices like door locks, sensors, and light switches; Zigbee's mesh design means each device also acts as a repeater, extending range without extra hardware. Wi-Fi handles higher-bandwidth devices like cameras and streaming boxes but doesn't mesh in the same way, which is exactly why ceiling access points wired with Cat6A matter so much: they're the physical infrastructure that makes Wi-Fi coverage even and reliable throughout the house.
None of this replaces the wired backbone. A strong wiring backbone remains essential precisely because wireless protocols, however good the mesh, still depend on wired access points, wired hubs, and wired power for consistent performance. A Zigbee door lock talks to a hub, and that hub needs a reliable network connection, ideally wired, to report status and receive commands without lag.
If you know which ecosystem you're building toward, Control4, a Zigbee-based platform, or a Wi-Fi-first setup, mention it to your low-voltage installer before rough-in. Some hubs and controllers need a wired Ethernet connection at a specific location rather than relying on Wi-Fi, and that's a five-minute addition to the plan now versus a visible cable run added later. A smart home networking guide covers AP placement in more depth if multiple protocols are part of your plan.
Wiring specific appliance controls: HVAC, blinds, and security
Beyond networking and entertainment, several appliance categories need their own wiring consideration during rough-in, and each has a slightly different requirement.
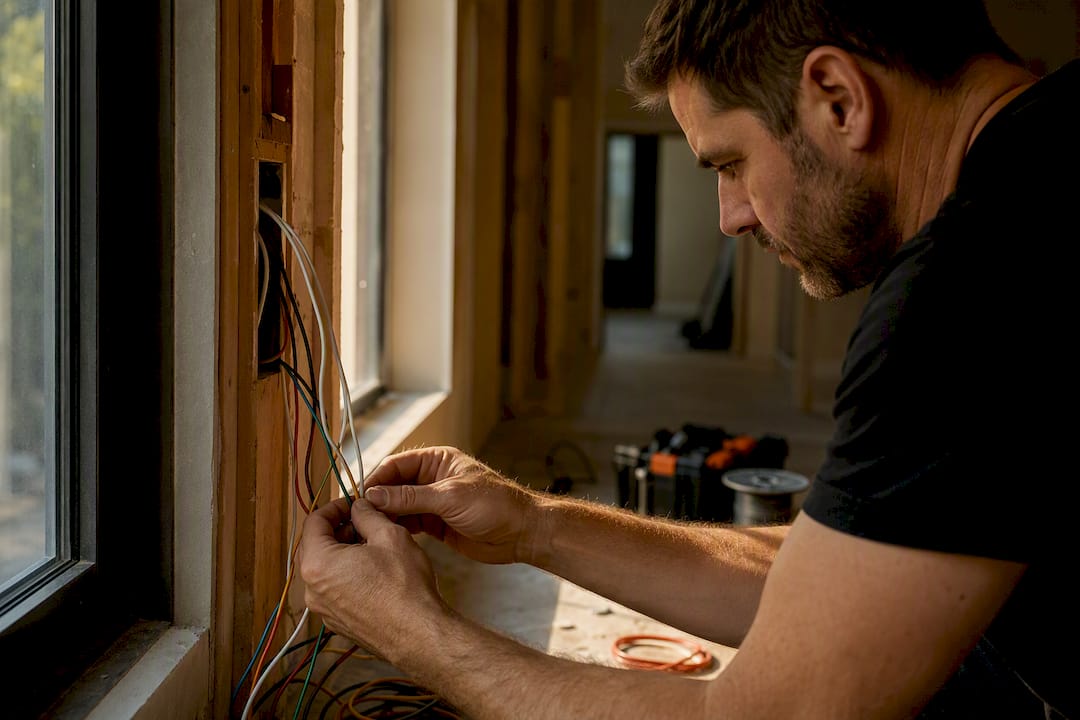
Smart thermostats and HVAC zoning almost always need a C-wire (common wire) at the thermostat location to power the display and Wi-Fi radio continuously. Older HVAC wiring often skips this wire entirely, so confirm with your HVAC contractor that a full thermostat cable, ideally an 18/5 or 18/8 run, lands at every thermostat location, not just the two or three wires a basic mechanical thermostat needs.
Motorized blinds need power at the window, which most homes never plan for. Battery-powered blind motors sidestep this, but wired motors need a low-voltage run to each window treatment location, decided before drywall closes that wall. If you're planning Lutron or Clara motorized blinds, confirm with your installer whether the specific motor line needs line-voltage or low-voltage power, since this varies by product.
Security systems need their own Cat6 runs to door and window sensors if you're using a wired system, plus a dedicated location for the security panel itself, generally near the SMC so it shares power and network infrastructure. Keypads at entry doors need either 18/2 low-voltage cable or Cat6, depending on the panel manufacturer.
Treat this category as a checklist item with your HVAC and security contractors specifically, since these wiring needs rarely make it onto a generic low-voltage plan unless someone asks for them directly.
Publisher perspective: practical trade-offs for homeowners and builders
When budget forces trade-offs, conduit and home-run drops rank above everything else, since they're cheap now and brutal to add later. Document every decision in writing, and keep the structured media centre in a spot your future self can actually reach.
— JupiterAV
How JupiterAV helps you get the prewire right
JupiterAV is the team Calgary builders and homeowners bring in when a project moves past basic Cat6 drops into full home automation, whole-home audio zoning, or a Control4 system tying it all together. We handle design, sales, and installation of Control4, Lutron Caseta lighting, Sonos and WiiM audio, motorized blinds, low-voltage wiring, custom home theatres, and the structured media centre that ties a whole build together, work that's harder to get right after drywall closes than most homeowners expect.

If you're at the framing stage right now and want a second set of eyes on your wiring plan before the walls close, or you're a builder looking for a low-voltage partner for an upcoming project, request a design consultation through JupiterAV. We'll walk the site, confirm drop counts and rack placement, and make sure the plan you hand your electrician actually covers what you'll want to add five years from now.
Sources
- The Ultimate Smart Home Wiring Guide | CEDIA
- Smart Home pre-wire guide: Low-voltage cabling for new construction | CrimpShop
- Smart Home Pre-Wiring Guide 2026: What to Install During Build
- Why a smart home needs a strong wiring backbone | HTA