Yes, a smart switch can control a 3‑way circuit, but not every model does it the same way, and the wrong pick means a return trip to the store. The short version: you need either a matched master/companion kit built for multi‑location control, a no‑neutral switch paired with a wireless remote, or smart bulbs run by an app. What decides which route works in your house comes down to two things at the switch box: whether you have a neutral wire, and whether the other switch is wired with traveller wires running between them.
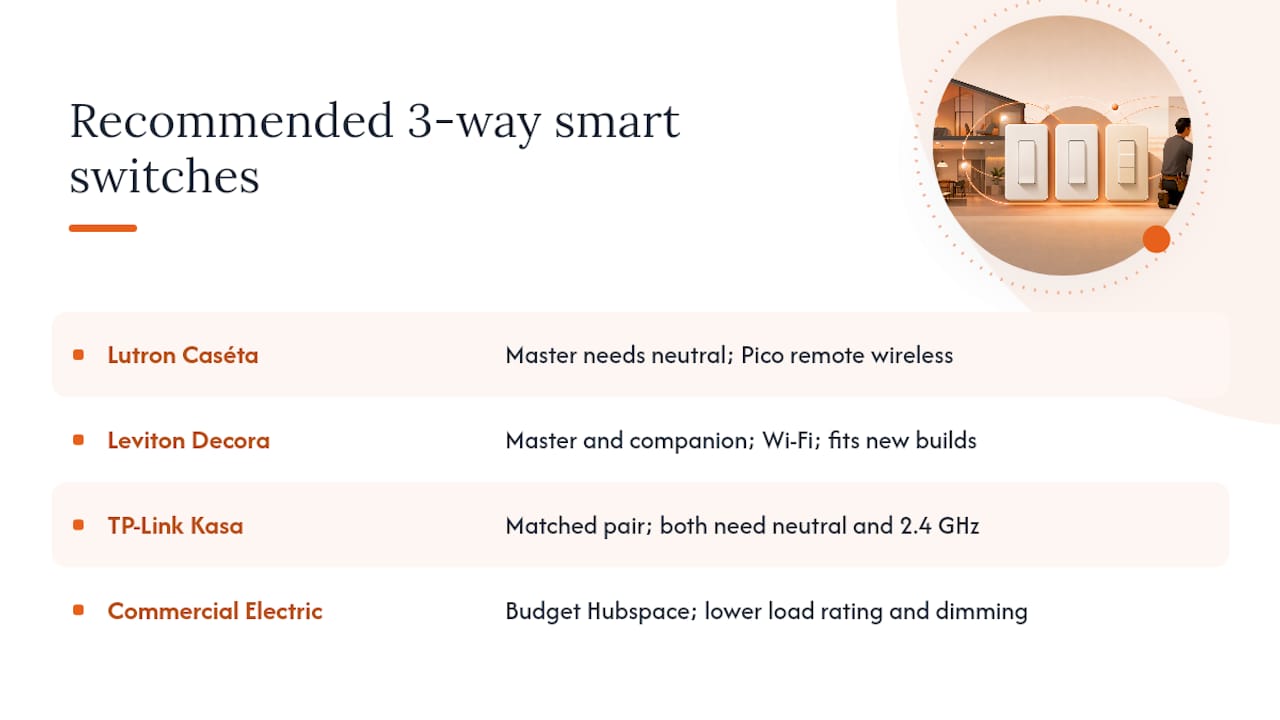
Three models come up constantly in retail searches, and each solves the 3‑way problem differently. Lutron Caséta sells a kit with one smart switch and a wireless Pico remote, and it needs a neutral wire at the main switch location. TP‑Link Kasa's HS210 kit replaces both physical switches with two networked units, but both ends need neutral wiring and a 2.4 GHz Wi‑Fi connection. Leviton Decora Smart switches work in pairs similar to Kasa's approach, with a smart switch at one location and a companion at the other. Before you buy any of them, shut off the breaker, pull the faceplate, and check for a bundled white wire capped off in the box. That single wire decides your entire shopping list.
Table of Contents
- What 3‑way smart switch options actually exist?
- How do you check if your switches will work with a smart switch?
- Which 3‑way smart switches are worth buying?
- How installers actually wire a 3‑way smart switch
- No neutral wire? Here's what actually works
- When should you hire an electrician instead of DIY?
- Get a professional 3‑way smart switch install without the guesswork
- Quick action checklist and next steps
- Frequently asked questions
- Sources
What 3‑way smart switch options actually exist?
Every 3‑way smart switch on the market falls into one of four engineering approaches, and knowing which one you're looking at saves you from buying the wrong kit twice.
The first is the master and companion kit, where one switch does the smart work (Wi‑Fi radio, app pairing, scheduling) and a simpler companion device at the second location just tells the master to turn the load on or off. Kasa's HS210 and Leviton's Decora Smart both work this way. The master switch needs line, load, and neutral; the companion typically needs far less, sometimes just the traveller connection and a neutral of its own, depending on the model's wiring diagram.
The second approach is a no‑neutral master paired with a wireless remote, which is how Lutron Caséta handles most retrofits. Instead of running a second smart device with its own neutral requirement, you get a battery‑powered Pico remote that talks to the main switch over Lutron's Clear Connect radio protocol. No wiring runs between the two locations at all beyond what's already there.
Third, you can skip switches entirely and go with smart bulbs controlled by a companion remote or dimmer, leaving your existing 3‑way wiring untouched and just changing the bulbs. This sidesteps neutral and traveller questions altogether but only works if every bulb on that circuit gets swapped.
Fourth, some setups rely on a hub or bridge that mediates between the switch and your phone app, rather than the switch talking directly to Wi‑Fi. Hub‑based systems tend to offer steadier performance in homes with spotty Wi‑Fi coverage, at the cost of one more device plugged into your router.
| Approach | Neutral needed | Hub required | Installation complexity |
|---|---|---|---|
| Master + companion kit | Yes, both ends | No (Wi‑Fi direct) | Moderate — two boxes to wire |
| No‑neutral master + wireless remote | Yes at master, none at remote | No | Low to moderate |
| Smart bulbs + remote | No | No | Low — no rewiring |
| Hub or bridge system | Usually yes | Yes | Moderate — pairing, plus wiring |
Pro Tip: If your home was built before the mid‑1980s in most parts of Canada, assume there's no neutral in at least one of your 3‑way boxes until you've confirmed otherwise with a voltage tester. Guessing wrong here is the single most common reason DIY smart switch installs stall halfway through.
How do you check if your switches will work with a smart switch?
Confirming compatibility takes fifteen minutes with a screwdriver and a voltage tester, and it should happen before you add anything to your cart.
Start by shutting off the breaker for that circuit, not just the switch. Then use a non‑contact voltage tester to confirm the wires are dead before touching anything. Once the plate is off, look for these wire types:
- Line (hot): the wire bringing power in from the panel, usually black.
- Load: the wire carrying power out to the fixture, also often black, which is why line and load get mixed up so easily.
- Neutral: a bundle of white wires, sometimes capped with a wire nut and pushed to the back of the box if it's not currently used.
- Traveller wires: typically red and an additional black or striped wire running between the two 3‑way switch locations, carrying the signal that tells the circuit which position is "on."
Photograph the inside of each box before you disconnect anything, and label each wire with tape and a marker. This single step is what separates a fifteen‑minute reinstall from an hour of guesswork later, whether you're doing this yourself or handing photos to an electrician.
Once you know what you're working with, check it against the product spec sheet: does it require a neutral? Does it need a companion switch or can it run solo? Does it need a hub, or does it connect straight to Wi‑Fi? Is it listed as HomeKit, Alexa, or Google Assistant compatible if that matters to you? Manufacturers generally quote installation as typically quick for straightforward replacements source, but that number assumes your wiring matches the diagram exactly. Any surprise, especially a missing neutral, adds real time.
Which 3‑way smart switches are worth buying?
Four names dominate the shelves and search results for multi‑location smart lighting, and each targets a slightly different homeowner.
Lutron Caséta remains the standard reference point for no‑neutral retrofits. Its 3‑way kit pairs one smart switch with a wireless Pico remote, and Lutron's own retail listing notes the master switch does require a neutral wire, while the remote itself needs no wiring at all and can be mounted anywhere with adhesive or a screw. That flexibility is why installers reach for Caséta first when the second switch box turns out to be neutral‑free.
Leviton Decora Smart switches follow the master and companion model, with both units communicating over the household Wi‑Fi network rather than a proprietary radio. They fit well in newer construction where neutral wires are already run to every box.
TP‑Link Kasa's HS210 kit ships two switches designed as a matched pair, and the product listing confirms both need neutral wiring and a 2.4 GHz Wi‑Fi connection to operate without a separate hub. Kasa's own setup pages walk through an app‑guided wiring process that displays a wiring diagram on screen as you go, which helps first‑time DIYers avoid crossing line and load.
Commercial Electric, sold through Home Depot and powered by the Hubspace platform, targets the budget end of the market. Retail listings for these 3‑way smart switches advertise fast app setup and Alexa or Google Assistant support at a lower price point than the other three. That price gap usually shows up in load rating, dimming smoothness, and how long the manufacturer keeps pushing firmware updates.
For an older home without neutral wires at either box, Caséta's remote‑based kit tends to be the least disruptive fix. For a new build where every box already has neutral run to it, Kasa or Leviton give you a fully networked pair without extra hardware. If you're outfitting several rooms and cost matters more than polish, Commercial Electric fills that gap, though you should read the load rating carefully before putting it on a circuit with a ceiling fan or a bank of LED pot lights.
How installers actually wire a 3‑way smart switch
A licensed installer follows roughly the same sequence every time, whether the job is a Caséta remote pairing or a full Kasa kit swap.
- Kill power at the breaker, not just the wall switch, and confirm with a voltage tester at both boxes.
- Open both switch locations and photograph the existing wiring before touching a single wire.
- Identify line, load, neutral, and traveller wires at each box, checking them against the manufacturer's diagram.
- Prepare the master switch box by connecting line, load, and neutral according to the kit's wiring diagram.
- Wire the companion device or remote, which may involve traveller wires (for a matched kit) or nothing at all beyond mounting hardware (for a wireless remote).
- Secure and box up both switches, then restore power at the breaker.
- Test operation from both locations, confirm app pairing, and check dimming or on/off response before closing the wall plates.
This sequence rarely changes, but the time it takes does. A straightforward swap with matching wiring runs close to the manufacturer's advertised timeline, while a box with unlabelled travellers or a buried neutral can turn a fifteen‑minute job into an hour of tracing wires with a multimeter.
Pro Tip: Label every wire with masking tape before disconnecting anything, even if you think you'll remember which is which. Travellers look nearly identical to line and load in a cramped box, and re‑opening a finished wall plate to fix a mixed‑up connection costs more time than labelling ever would.
None of this replaces your local electrical code or a licensed electrician's judgment on a job that looks more complicated than a straightforward swap. If two circuits share a box, if the wiring doesn't match any diagram you can find, or if you're not fully confident identifying line from load with a dead circuit, that's the point to call a professional rather than push forward.
No neutral wire? Here's what actually works
A missing neutral is the single biggest reason DIY smart switch installs stall, and it comes up constantly in older homes where the original wiring never anticipated networked switches.
- Buy a no‑neutral compatible switch, such as Lutron Caséta's kit, which pairs a neutral‑equipped master with a remote that needs no wiring of its own.
- Add a wireless remote to your existing setup rather than replacing the second switch at all, which sidesteps the neutral question completely at that location.
- Switch to smart bulbs paired with a battery‑powered remote or dimmer, leaving your 3‑way wiring untouched and shifting the intelligence to the bulb itself.
- Have an electrician pull a neutral wire through the existing conduit or wall cavity, which opens up the full range of smart switches but adds labour cost and, in older plaster walls, some patching.
Each option trades something. No‑neutral switches and remotes cost less in labour but can limit dimming smoothness on certain LED loads. Smart bulbs are the cheapest fix on paper but mean replacing every bulb on that circuit and losing the physical switch's instant reliability if your Wi‑Fi drops. Pulling a neutral is the most invasive and expensive option, but it future‑proofs the box for whatever you install next. Solutions that avoid the neutral requirement generally shift the intelligence to a remote or hub rather than the wall switch itself, which is worth knowing before you assume every smart switch needs the same wiring.
If your panel is old, if you find aluminum wiring, or if the box shows signs of previous amateur work, treat that as your cue to bring in a licensed electrician rather than continue on your own.
When should you hire an electrician instead of DIY?
A licensed electrician earns their fee doing the parts of this job that punish guesswork: pulling a neutral where none exists, sorting out travellers in a box with more wires than the diagram accounts for, and making sure the whole circuit meets local code before it's closed up behind drywall.
A typical professional visit runs through four stages. First, an assessment of your existing wiring and a recommendation on which switch type fits your boxes. Second, sourcing and confirming the parts, either from your own purchase or their supplier account. Third, the physical install, which for straightforward 3‑way swaps takes under an hour per pair of switches but can run considerably longer if a neutral needs pulling or travellers need rerouting. Fourth, setup and integration with your phone app or a voice platform, plus a walkthrough so you know how to use the system before they leave.
Costs vary by region and by how much rewiring is involved, so treat any number you see online as a rough estimate rather than a quote. A simple like‑for‑like swap with existing neutral and traveller wiring in place sits at the lower end of a service call; adding a pulled neutral, additional switch locations, or full smart home integration pushes the job toward a half‑day or more of labour.
Before hiring anyone, ask a few direct questions:
- Are you licensed and insured to do electrical work in this province?
- Have you installed smart switches or smart lighting systems before, specifically in 3‑way or 4‑way configurations?
- What's covered under warranty if a switch fails or the app integration stops working after install?
- Will you provide a written estimate before starting, and does it include parts, labour, and any patching?
Pro Tip: Ask specifically about experience with smart lighting, not just general electrical work. Wiring a traditional 3‑way switch and wiring one that needs to pair with an app and a home network are related skills, but they're not identical, and an electrician unfamiliar with the second part can leave you with a working switch that never connects properly.
If a contractor can't answer the licensing question directly or hesitates on a written estimate, treat that as a red flag and keep looking.
Installer perspective: common issues and quick on‑site advice
Two problems come up again and again on smart switch jobs, and neither one is really about the switch itself.
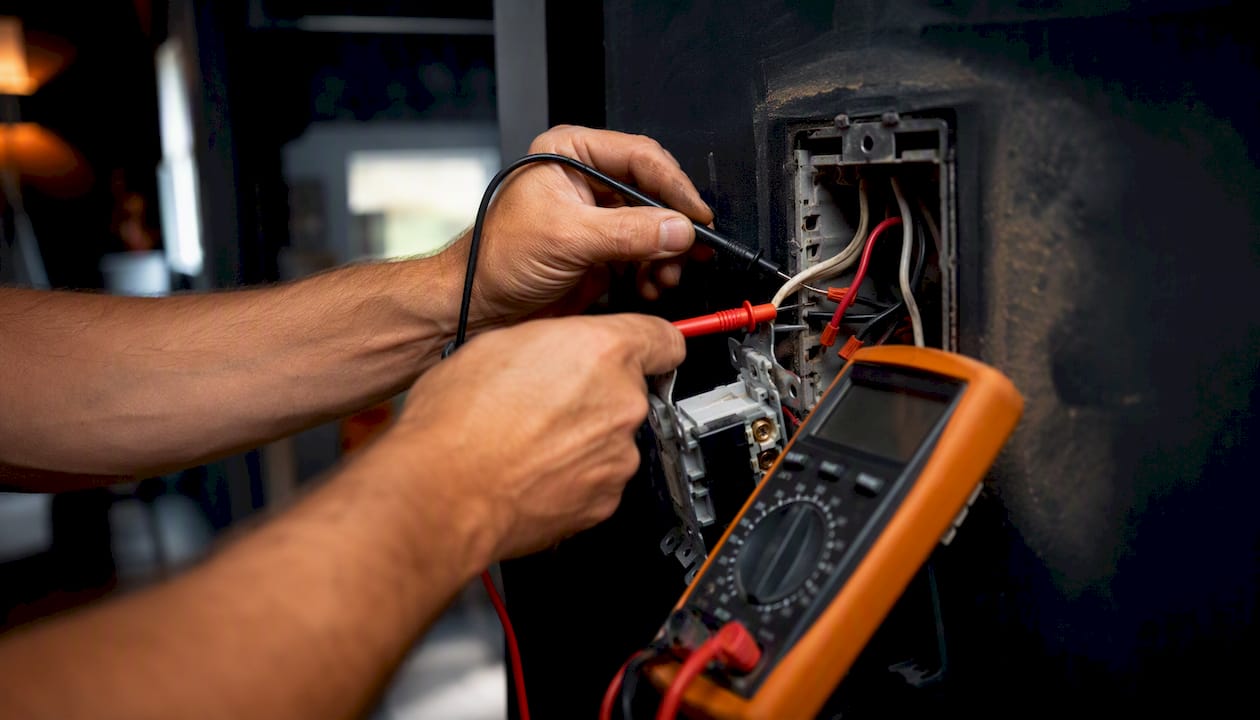
The first is mislabelled or swapped travellers. Someone rewired the box years ago, forgot to note which wire went where, and now the "obvious" connection doesn't match what the switch actually expects. The fix is almost always a multimeter and patience: trace each wire back to its source rather than trusting the colour alone. The second is a neutral that's technically present but buried, capped off, and pushed to the back of the box because the original electrician never needed it. Finding it usually means pulling the box slightly forward and checking behind the visible wiring, not assuming "no neutral" just because none is immediately obvious.
Before any installer arrives, clear access to your electrical panel and to both switch boxes, take your own photos of the existing wiring if you can, and make sure a stable ladder is on hand if either switch sits above standard reach. These small steps routinely shave twenty or thirty minutes off a visit, since the installer spends less time setting up and more time actually working.
Get a professional 3‑way smart switch install without the guesswork
If you'd rather skip the voltage tester and the wire labelling entirely, JupiterAV handles the whole job, from checking what's actually behind your switch plate to configuring the finished system with your voice assistant of choice. This is a paid service, and it includes an on‑site wiring assessment, the switch and remote hardware suited to your specific boxes, full installation and testing, and setup with Alexa, Google Assistant, or Apple Home depending on what you're already running at home.

The advantage over piecing this together yourself isn't just convenience. It's avoiding the return trips to the store when a switch turns out to need a neutral you don't have, and avoiding the half‑finished wall plate when travellers don't match the diagram. JupiterAV's installers carry stock for the no‑neutral scenarios and the full kit scenarios both, so the assessment visit tells you exactly what fits before anything gets purchased. Every install comes from a licensed, insured team, and the work is backed by post‑install support if something needs adjusting after the fact.
For anyone weighing smart home options beyond a single switch, whether that's a Control4 system down the road or just getting your lighting talking to the rest of your house, it's worth reading through how Control4 alternatives compare for Canadian homeowners before committing to one ecosystem. To get started on the switch itself, request a quote or book a site visit through JupiterAV and you'll get a firm cost and timeline before any work begins.
Quick action checklist and next steps
A 3‑way smart switch works reliably once you've matched the product's wiring requirements to what's actually in your walls, which almost always comes down to confirming a neutral and identifying your travellers before you buy anything.
| Point | Details |
|---|---|
| Check for neutral first | Shut off the breaker and look for a capped white wire bundle before buying any switch. |
| Match the wiring type to the kit | Master/companion kits need neutral at both boxes; no‑neutral kits pair a remote instead. |
| Photograph and label everything | Take photos and label wires before disconnecting, whether you're doing this yourself or hiring out. |
| Decide DIY vs professional early | Bring in a licensed electrician if you find aluminum wiring, extra circuits sharing a box, or unclear travellers. |
| Book a professional assessment | Contact JupiterAV for an on‑site wiring check and full install if you'd rather skip the troubleshooting. |
Manufacturer setup pages, retailer product pages and electrical safety resources
For model‑specific wiring diagrams and setup steps beyond what's covered here, these pages carry the primary documentation.
| Resource | What it covers |
|---|---|
| Lutron Caséta 3‑Way Kit product page | Kit contents, neutral requirement, and Pico remote pairing |
| Kasa Smart Wi‑Fi 3‑Way Kit setup guide | App‑guided wiring diagram and Wi‑Fi pairing steps |
| Home Depot Canada 3‑way switch category | Canadian retail availability and spec sheets across brands |
| Apple Home accessories documentation | HomeKit compatibility requirements for smart switches |
Frequently asked questions
Can you use a regular smart switch in a 3‑way circuit? No, a single‑pole smart switch designed for standard circuits generally won't work safely in a 3‑way setup without a companion device or remote built specifically for multi‑location control. Look for products explicitly labelled as 3‑way compatible kits.
Do all 3‑way smart switches need a neutral wire? No. Matched kits like Kasa's HS210 and most Leviton Decora Smart models need a neutral at both switch locations, while Lutron Caséta's kit only needs a neutral at the master switch, since its companion is a wireless remote.
Can I install a 3‑way smart switch as a single‑pole switch instead? Yes, if you're only controlling the light from one location and want to cap off the traveller wires, most 3‑way smart switches can run as a standard single‑pole switch. This works as a temporary or permanent fix if you're planning to eliminate the second switch location entirely, though check the manufacturer's wiring diagram first.
What's the difference between traveller wires and neutral wires? Traveller wires carry the signal between two 3‑way switch locations telling the circuit which position is active. Neutral wires complete the electrical circuit back to the panel and are required by most smart switches to power their Wi‑Fi radio and internal electronics, separate from the traveller function entirely.
How much does it cost to install a 3‑way smart switch? The switches themselves range from budget options under $30 per unit to premium kits over $100, with total project cost depending heavily on whether your existing wiring matches the kit's requirements. A straightforward swap costs far less in labour than a job requiring a pulled neutral or rewired travellers, so get a firm estimate before committing to either a DIY kit or a professional install.
This article provides general information on smart switch compatibility and installation. Always confirm current electrical code requirements and consult a licensed electrician for any wiring you're not fully confident handling.
Sources
- Caseta Smart Switch 3 Way Kit, with Remote/Bracket, for All Bulbs or Fans (The Home Depot)
- Kasa Smart 3 Way Switch HS210 KIT (Amazon product listing)