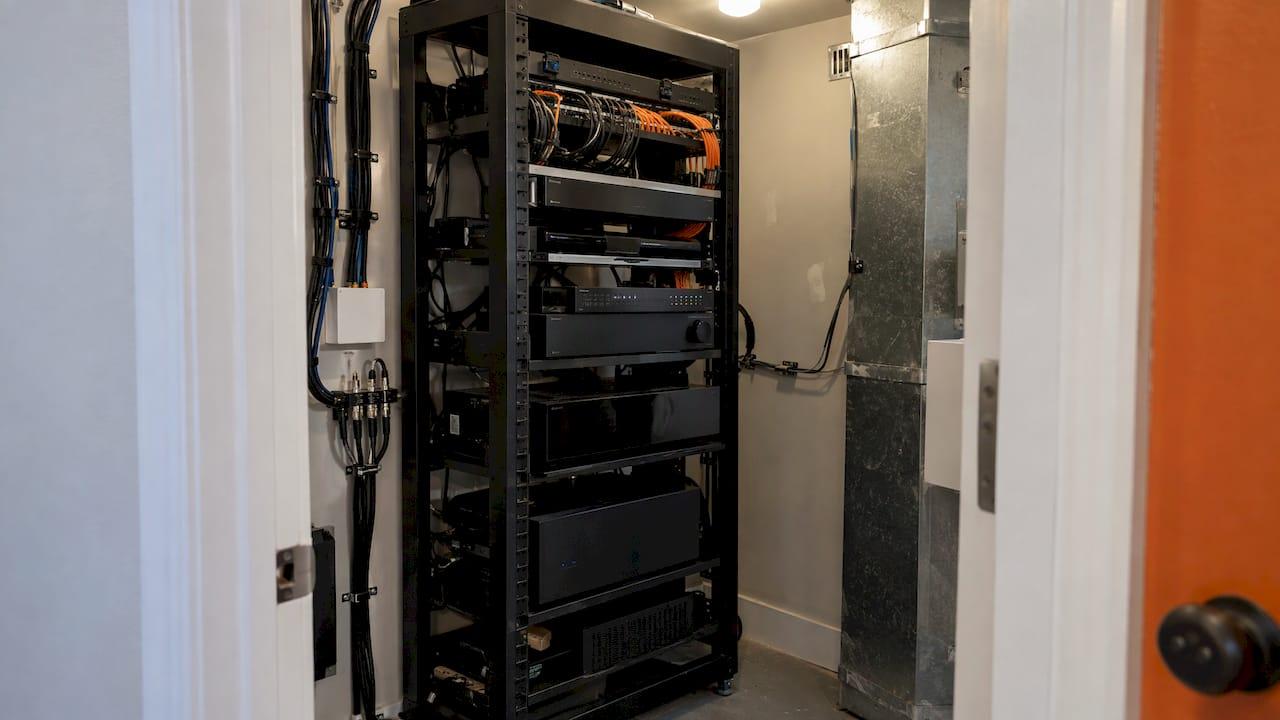
A good media closet is a ventilated, accessible room or cabinet near the centre of the home, sized for the rack plus room to grow, with dedicated power, a planned cable path to every screen and speaker, and a way to move heat out. Get those five things right on the drawings, before drywall, and the system stays quiet, cool and easy to service. Get them wrong and you end up with a hot closet, a noisy fan and a wall you have to open later. At JupiterAV we design and install A/V and low-voltage systems for Calgary homes and builders, and this is the checklist we would hand a client planning a new build or a basement development.
TL;DR
- Put the closet in a central, accessible spot, such as a hall or bedroom closet or the laundry room, not the garage.
- Size it from the real equipment list: dimensions, vent locations, power inlets, plus spare rack space for growth.
- Plan airflow from day one: low intake, high exhaust, and a test under full load with the door closed.
- Run the dedicated circuit and low-voltage conduit before drywall, and pull an electrical permit for new wiring in Calgary.
- Keep panelboards and sub-panels out of clothes closets, and label everything.
Table of Contents
- What a media closet is and what goes in it
- Choose the location first
- Measure for the equipment, not the closet
- Cooling: where most closets fail
- Power, grounding and permits in Calgary
- Low-voltage cabling that stays serviceable
- Doors, access and the remote problem
- Common mistakes to avoid
- Why plan it with a single integrator
- Perspective
- Plan your closet with JupiterAV
- FAQ
- Sources
What a media closet is and what goes in it
A media closet (also called an A/V closet or equipment closet) is the one place where the home's audio, video and network gear lives, so the living room only shows screens and speakers. Typical contents are a rack or shelving unit holding an amplifier or streamer, a network switch and router, a media or control processor, a surge-protected power strip or conditioner, and the cable terminations that feed every room.

The benefit is practical as much as visual. Equipment in one cool, ventilated place lasts better than equipment stacked behind a TV, and a technician can service one location instead of opening walls. For builders it also means one clear rough-in plan instead of scattered boxes.
Choose the location first
Location decides almost everything else: cable lengths, cooling options and how easy the system is to service. Leviton's guidance on structured media enclosures recommends an accessible, central spot such as a hall or bedroom closet or the laundry room, at eye level, near a power outlet, and not in the same stud bay as electrical wiring.
It also warns against the garage. Building codes prohibit that kind of enclosure on the firewall between a house and an attached garage, and the garage's uncontrolled temperatures can damage electronics. In Calgary, where a garage can sit well below freezing in winter and heat up in summer, that is worth taking seriously.
Good candidates in a typical Calgary home:
- Main-floor hall or coat closet near the centre of the plan, which shortens runs to every room.
- Basement utility or mechanical-adjacent room, ideal for networking and whole-home audio, but check it will not be too hot next to the furnace.
- Dedicated closet beside the theatre or great room, best when a projector or large screen needs short HDMI runs.
On acreage builds, a central closet matters even more, because outbuildings, shops and exterior cameras all feed back to one point. If you are planning wiring for several buildings, ask for the closet to be shown on the drawings early.
Measure for the equipment, not the closet
The common mistake is designing the closet and then hoping the equipment fits. Reverse it:
- List every device with its width, depth and height, vent locations and power inlet position.
- Read each manual for the required ventilation gaps, operating temperature range and allowed orientation.
- Measure the closet's usable width, depth and height, subtracting door hinges, trim and shelving.
- Add space for cable bend radius behind the gear and for a person to reach connectors.
If you choose a standard 19-inch rack, equipment heights are counted in rack units. One unit (1U) equals 1.75 inches (44.45 mm) of vertical space under the EIA-310 standard, so a five-device stack of 1U and 2U components adds up quickly once you include blank panels and vent panels.
McGill University's audio-video installation standard is written for institutions, but its habits translate well to homes. It calls for leaving at least one rack unit of space between devices, and for reserving unused space for future expansion. A home theatre processor, a second amplifier or a new network switch will show up within a few years, so plan for it now.
When a closet will need a new opening cut through a floor or a fire-rated wall, think about the fire rating of that opening before you cut. Guidance on service riser openings explains why the fire strategy comes first, and the same logic applies when a builder asks for a cable pass-through between floors.
Cooling: where most closets fail
Heat is the main enemy of a media closet. Amplifiers, media servers and network gear all turn power into warmth, and a closed closet traps it. The usual symptoms are equipment shutting itself down, fans running constantly and shortened component life.
Targets worth designing to
Kaleidescape's AV installation cooling whitepaper gives numbers that installers use widely:
| Measure | Target |
|---|---|
| Air leaving the enclosure | 30°C (85°F) or lower |
| Intake air around the equipment | 23°C (73°F) or lower |
| Add forced airflow when | top-of-rack air passes 35°C (95°F), or heat output passes 500 W (about 1,700 BTU/hr) |
| Dusty environments | inspect intake vents about every four months |
The same paper recommends verifying the design in its final location with all electronics running at full load for at least two hours, with the doors closed and intake and exhaust temperatures measured. That final test is the single most useful habit in this article. A closet that feels fine at idle can behave very differently after a long movie night.
Our own write-up on the 500 W rule and quiet fans for AV rack cooling goes deeper into when passive venting is enough and when a fan is needed.
Passive or active airflow
For a light load, such as a router, a switch and one streamer, passive venting is often enough: an opening low in the closet for cool air to enter and an opening high for warm air to leave, so convection does the work. For heavier loads, add a thermostatically controlled fan.
Two cautions apply. First, a fan only moves air that has somewhere to come from, so a high exhaust fan in a sealed closet does little until you provide a low intake. Second, a decorative grille or a small cable hole is rarely enough ventilation on its own. Size the openings for the heat load and allow for the resistance of grilles and filters.
McGill's standard says enclosed racks need fans for proper airflow, and in small enclosed spaces dedicated HVAC may be required, ideally supplying cool air at the bottom of the rack and drawing warm air from the top. In a home that can mean ducting to the return air, a design choice best made while the ceilings are open.
Noise
A closet that is cool but loud defeats the point, especially if it sits next to a bedroom or home theatre. Institutional specs set the bar clearly: UBC's technical guideline for integrated AV systems (November 2025 revision) says equipment may not produce residual noise above NC 30 measured from the centre of the room, and that equipment must be adequately ventilated for worst-case power dissipation. A home is not a lecture hall, but NC 30 is a good target for a quiet living space. Practical ways to meet it:
- Choose larger, slower fans over small fast ones.
- Mount fans away from the grille or return opening, not directly at it.
- Keep gear with its own loud fans, such as older servers, out of rooms that share a wall with a bedroom.
- Use door and wall assemblies that let the heat out without letting sound out.
Power, grounding and permits in Calgary
A media closet usually needs a dedicated circuit, with receptacles planned at the rack and a separate receptacle behind each screen, so no extension lead ever runs through a wall. Wiring is regulated, so this is a job for a licensed electrician working to the Canadian Electrical Code.
The City of Calgary requires an electrical permit for all new wiring installations and for extending or altering existing branch circuits. Homeowners may add a sub-panel to an existing main service but may not modify the main panel, main breaker or meter base.
The City's homeowner electrical wiring guide (updated September 2026, including 2024 Canadian Electrical Code amendments) matters for closet planning in three ways:
- Panelboards need 1 m of clear, secure floor space in front and at least 2.2 m of headroom.
- Sub-panels are not permitted in clothes closets, bathrooms or stairways.
- No breaker may be more than 1.7 m above the floor.
The practical takeaway: do not combine the electrical panel and the A/V rack in the same clothes closet, and do not bury required electrical access behind permanent joinery. Keep the A/V closet separate from the panel, or confirm the arrangement with the electrical inspector first.
Also plan surge protection at two levels, at the panel and at the rack. Our guide to two-layer surge protection for AV in Canada explains how the layers work together.

Low-voltage cabling that stays serviceable
The closet is only as useful as the cable paths that reach it. Before drywall, every room that needs a screen, speakers, a keypad, a camera or a motorized shade should have its cabling routed to the closet.
Principles that hold up over time:
- Use conduit for anything you may replace. Smooth-walled conduit between the closet and key locations, such as behind the main screen, lets you pull new cable when standards change, instead of opening the wall.
- Separate low-voltage from line-voltage runs. Keep them in their own routes, and not in the same stud bay as electrical wiring.
- Leave a service loop. Extra cable at both ends makes re-termination possible.
- Label both ends. In a rack with sixty cables, labels are the difference between a ten-minute and a two-hour service call.
- Terminate neatly. Patch panels and cable management keep airflow open and make future changes simple.
For wiring plans, these pages from our blog cover each stage in more detail: the prewire smart home checklist, the builder prewire checklist, multi-room audio wiring and structured wiring panel layouts for builders.
Doors, access and the remote problem
The closet is used less than the room it serves, but it is opened for every upgrade and service call, so the door and interior matter.
- Door type. Louvred, vented or perforated doors let heat out. A solid door needs separate intake and exhaust openings.
- Front access. Leave enough room in front of the rack to open the door fully and stand in front of the gear. Rack makers often suggest generous front and rear clearances for servicing, and a closet that only allows front access needs gear that can be fully serviced from the front.
- Remote control. If the closet is not in line of sight, plan an IR repeater or, better, control through an app or a control system so you never aim a remote at a closed door. Test the remote through the actual front before the cabinet is built.
- Lighting. A light on a door switch costs little and saves a lot of fumbling with a phone torch.
- Lock or latch. In a home with children or pets, a latch keeps curious hands off the equipment.
Common mistakes to avoid
Most problems we see on paper come from decisions that were made too late:
- Choosing the closet before the equipment. The rack then doesn't fit, or fits without airflow.
- Treating a grille as ventilation. A decorative grille or small cable hole does not automatically give enough cooling.
- Putting it in the garage. The firewall and temperature problems above apply.
- No spare capacity. A full rack on day one means a rebuild on day 500.
- Extension leads inside walls. This is a fire risk and a code issue; plan receptacles in the right places instead.
- Sealing connections behind fixed panels. Anything that may need servicing should stay reachable.
- Skipping the load test. Run everything for two hours with the door closed and measure.
- Leaving it to the end. Once drywall is up, the cheapest moment has passed.
Why plan it with a single integrator
A media closet touches the electrician, the framer, the HVAC contractor, the drywaller and the A/V installer. When each plans their part separately, the gaps show up as a vent no one cut, a conduit that stops short or a circuit in the wrong stud bay. That is why a single point of contact for design and integration is worth having: someone who reads the equipment list, the drawings and the trades schedule together.
Perspective
We design media closets as part of the architecture, not as an afterthought. Our approach is fully custom engineered: the closet is sized to the space and the equipment, with the cabling and cooling planned so the install disappears into the home.
In our experience the best closets start with a conversation before framing: where will the screens and speakers go, which rooms need control, and how much will the system grow? From those answers we can set out the rack, the conduit paths and the airflow, and coordinate them with the other trades. With one point of contact for the whole A/V and smart home scope, there is one team that knows where every cable goes and who to call afterwards.
We also like to keep things serviceable. Labelled terminations, spare rack space and accessible gear mean ongoing support is simple for the homeowner and for us.
JupiterAV
Plan your closet with JupiterAV
If you are building or renovating in Calgary or the surrounding acreage communities, we can design and install the closet together with the rest of your system: home theatre and sound, smart home control, security and CCTV, and commercial AV. We work with homeowners, businesses and home builders, with best-in-class brands and ongoing support behind the install.

For builders, the best time to call is before framing, when the closet, conduit and circuits can still go where they should. Send us your plans through jupiterav.ca and we will help you place the closet and rough-in.
FAQ
How big should a media closet be?
Size it from the equipment list, not from a standard. Add up device dimensions, vent locations and cable bend space, then add spare rack units for expansion and enough room to reach connectors. Many homes work well with a closet about the footprint of a small coat closet, but a large theatre or whole-home system needs more.
Does a media closet need a fan?
Not always. A light load of network gear and a streamer can often be cooled by passive intake low and exhaust high. Once the rack passes about 500 W of heat output, or exhaust air at the top runs hotter than 35°C, forced airflow is the standard recommendation.
Can I put my media closet in the garage?
It is better not to. Building codes prohibit this kind of enclosure on the firewall between the house and an attached garage, and garage temperatures swing too far for electronics. A central hall, laundry room or basement location is a better choice.
Do I need a permit to add wiring for a media closet in Calgary?
The City of Calgary requires an electrical permit for all new wiring and for extending or altering existing branch circuits. Low-voltage cabling for data and A/V is treated differently from line-voltage circuits, so confirm which parts of your plan need a permit with the City or your licensed electrician.
Sources
- Leviton: Location, Location, Location, where to install your structured media center
- Kaleidescape: AV Installation Cooling Whitepaper
- UBC Technical Guidelines 27 41 16: Integrated AV Systems
- McGill 27 41 02: Standard Audio-Video Installation Practices
- City of Calgary: Homeowners electrical wiring guide
- City of Calgary: Homeowner electrical and plumbing permits