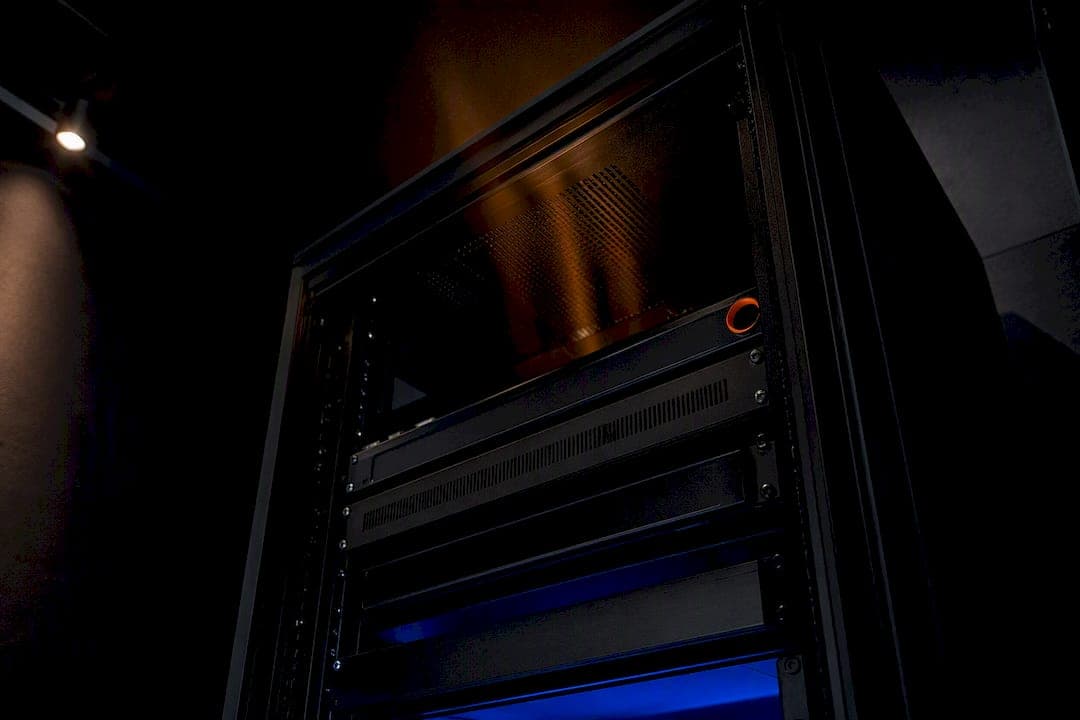
Check your rack's intake temperature and clearances first. If it's a light load, passive convection with proper clearance solves most heat problems on its own. Once total waste heat climbs past roughly 500 watts or intake air creeps toward 35°C, switch to thermostatically controlled forced air. Measure before you buy a single fan, then follow the checklist below to size and tune the system correctly.
TL;DR:
- Passive convection generally suffices for racks producing under 500 watts of waste heat, provided clearances are maintained and intake temperatures stay below 30°C.
- When intake temperatures reach 35°C or heat load exceeds typical limits, thermostatically controlled forced air becomes essential for effective cooling.
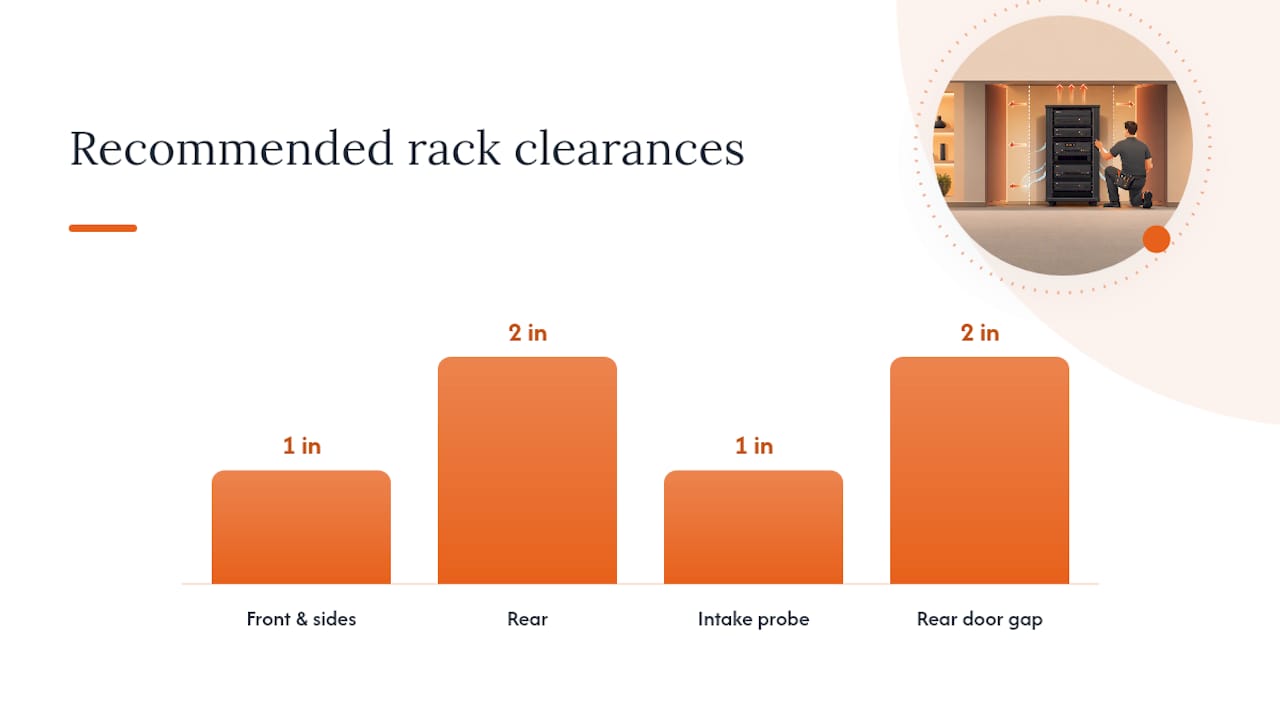
- Ensuring minimum clearance of 1 inch at the front and sides and 2 inches at the rear, along with blanking panels and proper cable routing, reduces recirculation and improves airflow.
- Using larger, slow-spinning fans with thermostatic control offers quieter operation and reduces motor wear compared to smaller, constantly running fans.
- Regular maintenance, including quarterly temperature logging and dust filter checks, helps prevent overheating issues and prolongs cooling system effectiveness.
Table of Contents
- Why AV rack cooling matters and safe intake temperatures
- Passive convection vs forced air: which one do you actually need?
- Clearances, airflow path, and cable management that actually work
- How much airflow do you actually need?
- Controls, noise, and smart activation
- Monitoring, testing, and routine maintenance
- What installers actually see go wrong on site
- Standards and guidance worth consulting directly
- Ready to fix your rack's heat problem for good?
- An installer's take on what the guides get wrong
- Sources
- FAQ
Why AV rack cooling matters and safe intake temperatures
Heat is the quiet killer of AV equipment. Sustained high temperatures shorten component lifespan, trigger thermal throttling on processors and amplifiers, and degrade the reliability of everything from streaming boxes to network switches. In extreme cases, poor ventilation creates a genuine fire risk, particularly with older gear or overloaded power conditioners.
The target intake temperature for most components sits between 18°C and 27°C (65°F to 80°F). Push sustained intake air above roughly 30°C to 35°C and you're gambling with warranty coverage and equipment life, even if nothing fails immediately. AVIXA's rack building standard treats thermal planning as a core requirement, not an afterthought, right alongside rack population and cable management. Kaleidescape's installation guidance backs this up with specific intake limits for its own hardware. Neither treats cooling as optional, and neither should you.
Passive convection vs forced air: which one do you actually need?
Passive convection relies on natural airflow: warm air rises and exits through vents while cooler air enters lower in the cabinet. It's silent, has zero moving parts to fail, and works well for lighter loads. Placing heat-generating components lower in the rack strengthens this chimney effect and pulls more air past hot surfaces naturally.
Forced air brings fans into the equation: fan panels, in-cabinet coolers, or dedicated exhaust fans that pull air through mechanically. You need it when the passive approach can't keep up.
A few thresholds help decide which camp you're in:
- Total waste heat within typical limits for residential AV racks: passive convection with good clearance usually handles it.
- Total waste heat above that threshold, or intake temps creeping toward 35°C: forced air becomes necessary, not optional.
- Sealed or built-in cabinetry with restricted airflow paths: forced air almost always wins, regardless of wattage.
One industry caution worth repeating: experts warn that bolting fans onto a rack doesn't automatically fix a heat problem. The airflow path matters more than fan count. A rack with two fans and a clear intake-to-exhaust route beats one with four fans fighting blocked vents and tangled cable bundles. Thermostatic control, rather than fans running continuously, is the better default for both noise and motor longevity.
Clearances, airflow path, and cable management that actually work
Get the physical layout right and half your cooling problems disappear before you spend a dollar on fans. The clearance numbers below are the ones manufacturer documentation and rack standards repeat consistently:
- Leave 1 inch (2.5 cm) minimum clearance at the front and sides of the rack.
- Leave 2 inches (5 cm) minimum clearance at the rear.
- Measure intake temperature within 1 inch of the component's front intake, per Kaleidescape's environmental specifications.
- Install blanking panels in every empty rack space to stop hot exhaust air recirculating back into the intake stream.
- Route cables vertically along the rack sides rather than bundling them behind hot components, where they trap heat and block airflow.
Pro Tip: If you're working in a tight closet or built-in cabinet, don't just cram in a bigger fan. Try a vented shelf kit or an external exhaust duct first. Redirecting existing airflow is almost always quieter and cheaper than fighting a sealed box with brute force.
Vent plates and blanking panels do more work than most people assume. Without them, cool intake air and hot exhaust air mix inside the cabinet, and your "cooling" system ends up recirculating warm air past components that need cold air. Where possible, keep 2 inches of rear door spacing so cable bulk doesn't crush against the door and choke the exhaust path. For older builds where none of this is feasible, room-level cooling, like a small split unit or an extra supply vent, often solves what rack-level fixes can't.
Managing intake and exhaust flow through the whole equipment room, not just the cabinet, is one detail JupiterAV covers in its conference room AV design work, where cool-air paths matter just as much at room scale as they do inside a single rack.
How much airflow do you actually need?
Start by adding up the heat load or CFM rating for every component in the rack. Most AV gear lists either a wattage figure or a direct CFM requirement in its spec sheet; where only wattage is given, Kaleidescape's cooling whitepaper walks through converting watts to a required CFM figure.
A few things that shift the math:
- Altitude matters. Thinner air at higher elevations cools less efficiently per cubic foot, so installers bump up fan CFM to compensate for the same heat load.
- Installed CFM is not the same as a fan's rated free-air CFM. Once a fan is fighting a filter, a grille, and rack backpressure, its real output drops, sometimes substantially.
- Redundancy matters more than raw power. Two mid-sized fans on separate circuits beat one large fan that takes the whole system down if it fails.
- For sealed or high-density racks, a dedicated cabinet cooler or a room air conditioner often outperforms trying to force enough CFM through a single small vent.
Manufacturer documentation exists precisely because generic spreadsheet math misses rack-specific drag and component quirks.
Controls, noise, and smart activation
Thermostatic control beats a fan running nonstop, every time. Sensor-driven activation only spins fans up when intake temperature actually rises, which cuts unnecessary runtime, reduces motor wear, and keeps a media room from humming all day for no reason. Variable-speed, demand-driven cooling tied to a temperature probe extends fan life measurably compared with always-on operation.
Common setups include fan controllers wired to a dedicated temperature probe, smart fan panels that report status to a control system, and remote alerts that flag a rack running hotter than expected before it becomes a failure.
For noise, bigger and slower usually beats small and fast. A larger, low-RPM fan moves the same air with far less audible hiss than a small fan spinning hard to compensate. Acoustic panelling outside the rack enclosure, or simply locating the rack away from living and sleeping spaces, solves most of what's left. AVIXA's guidance on rack room design treats acoustic planning as part of the same conversation as thermal planning, not a separate problem.
Monitoring, testing, and routine maintenance
Cooling systems degrade quietly, so a short maintenance habit catches problems before they cause a failure:
- Check dust filters and vent openings for obstructions every three months.
- Confirm fan bearings sound smooth, without grinding or rattling, during the same visual check.
- Log intake temperature (measured within 1 inch of the front intake) and exhaust temperature quarterly to track the delta over time.
- Schedule a full service, including cable inspection and blanking panel checks, annually.
A rising delta between intake and exhaust over several quarters, even without a visible fault, is often the first sign a filter is clogging or a fan is losing efficiency. Verifying performance against the original design spec after any installation, and again periodically, catches drift before it becomes a service call. Room-level humidity and temperature swings, especially in unconditioned basements or garages, also shift your baseline readings, so log conditions alongside the rack numbers rather than in isolation.
What installers actually see go wrong on site
Blocked vents top the list, usually because a homeowner or contractor stacked boxes, blankets, or décor against a cabinet without realizing it was doing double duty as a cooling path. Incorrect cable routing runs a close second: bundles piled behind an amplifier or receiver trap heat exactly where it can least escape. The third mistake is treating the rack in isolation and ignoring the room around it, a closet with no ventilation defeats even a well-built cabinet.
A fast site-visit checklist catches most of this:
- Measure current intake temperature with the rack running under normal load.
- Confirm front, side, and rear clearances against the 1 inch and 2 inch minimums.
- List each component's rated CFM or wattage to total the heat load.
- Try passive rearrangement, lower placement for heat sources, added blanking panels, before adding a single fan.
For quieter residential installs, professionals lean on discreet placement and ducting options that pull heat away without a visible or audible cooling unit sitting in the living room. That conversation happens early, before equipment goes in, because retrofitting airflow into a finished cabinet is always harder than designing it in from the start.
Standards and guidance worth consulting directly
AVIXA's rack building standard covers thermal management, cable routing, and rack population as an integrated design problem, useful as a baseline for any install. Kaleidescape's installation documentation gives specific intake-temperature limits and clearance minimums that mirror what most manufacturers expect. The DOE's best-practice guide for data centre design explains why inlet air temperature is the real performance metric, a principle that scales down from server rooms to a home media closet just fine. Always cross-check against your own component's intake-temperature and airflow tables before finalizing a design.
Ambient room conditions push against all of this, too. Basements and garages swing in temperature and humidity across seasons, and research on overheating risk in enclosed spaces shows how quickly a room's baseline conditions undermine an otherwise well-designed cooling plan. A rack cooled correctly for a 20°C room can still overheat in the same closet in August if nobody accounted for room-level drift.
Ready to fix your rack's heat problem for good?
If you've read this far and you're still not sure whether your setup needs passive tweaks or a full forced-air redesign, that's normal. Rack cooling sits at the intersection of electrical load, room conditions, and physical layout, and getting all three right without a walkthrough is genuinely hard. JupiterAV designs and installs custom home theatres, whole-home AV, and commercial AV systems with cooling built into the plan from day one, not bolted on after equipment starts running hot. Whether you need a quiet residential rack tucked into a media closet or a properly ventilated commercial install, a site visit settles the clearance, airflow, and noise questions faster than any spreadsheet.
An installer's take on what the guides get wrong
Most cooling advice treats fans as the default answer, and that's backwards. The airflow path is the actual variable that matters. A rack with perfect clearance, blanking panels, and a strong chimney effect will often outperform a poorly laid-out cabinet stuffed with fans fighting recirculated hot air.
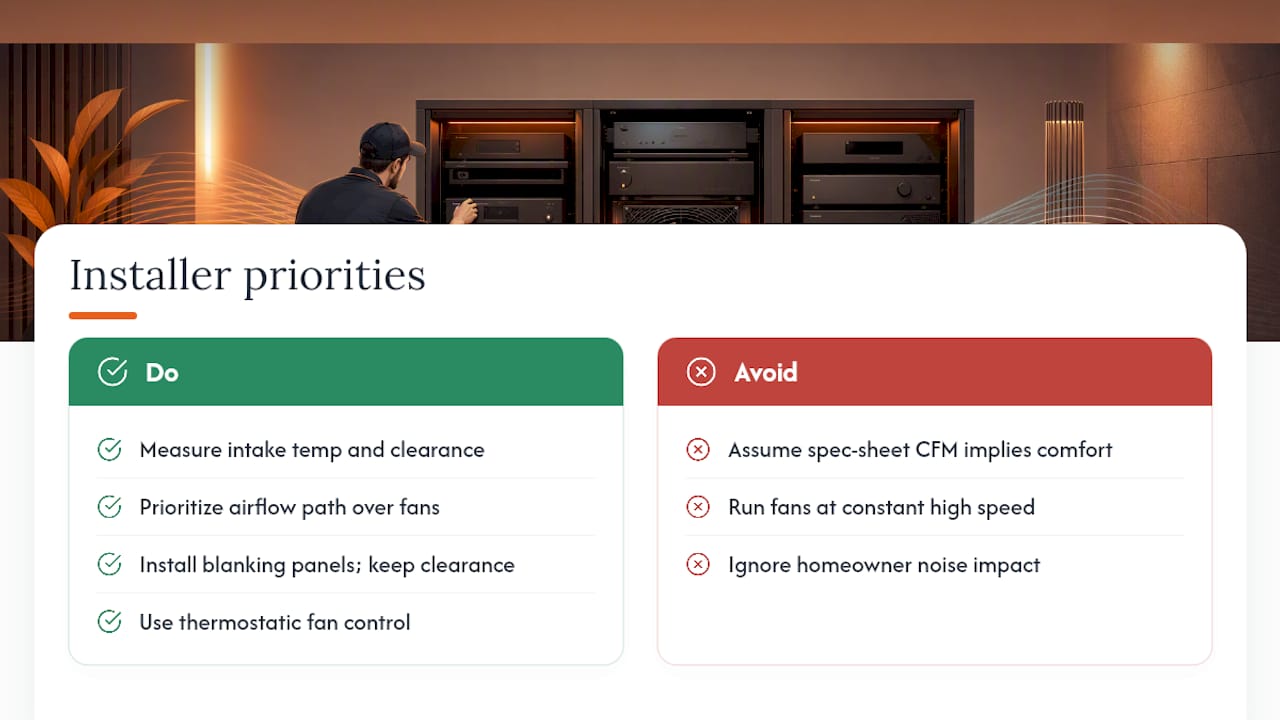
The bigger gap in conventional advice is noise. Plenty of guides talk about CFM and clearance and say nothing about the fact that homeowners live with these systems every day. A fan spec sheet doesn't tell you what a media room sounds like at 11 p.m. with a continuously running exhaust fan two feet from the couch. That's why thermostatic control matters more than raw cooling capacity in a residential context: it's the difference between a system that works and one that gets quietly disabled by a frustrated homeowner six months in.
If there's one thing worth doing before anything else, it's measuring. Intake temperature and actual clearance, not assumed clearance, tell you almost everything about whether passive convection will hold or whether you need to plan for forced air from the start.
— JupiterAV
Sources
- Rack Building for Audiovisual Systems | AVIXA
- Environmental specifications for Kaleidescape components
- 3 myths about AV rack cooling | CE Pro
FAQ
What is the ideal intake temperature for an AV rack?
Aim for 18°C to 27°C (65°F to 80°F) at the component intake, measured within 1 inch of the front of the unit. Sustained temperatures above roughly 30°C to 35°C put equipment lifespan and warranty coverage at risk, according to Kaleidescape's environmental specifications.
Do I need fans, or is passive cooling enough?
Passive convection with proper clearance handles most residential racks generating under roughly 500 watts of waste heat. Above that threshold, or in sealed cabinetry, thermostatically controlled forced air becomes necessary rather than optional.
What clearance does an AV rack need on each side?
Leave a minimum of 1 inch (2.5 cm) at the front and sides, and 2 inches (5 cm) at the rear, a standard repeated across manufacturer documentation and rack-building guidance. Blanking panels in unused rack spaces prevent hot air from recirculating back into the intake path.
How often should I check my rack's cooling system?
Do a quick visual check every three months for dust buildup and vent blockages, log intake and exhaust temperatures quarterly, and schedule a full service annually. A widening gap between intake and exhaust readings over time usually signals a failing fan or a clogged filter before it causes an actual outage.
Can I add cooling without making my media room noisy?
Yes. Larger, low-RPM fans paired with thermostatic sensors run only when needed and move air far more quietly than small fans working hard continuously. Locating the rack away from living spaces and adding acoustic panelling outside the cabinet handles most of what remains.