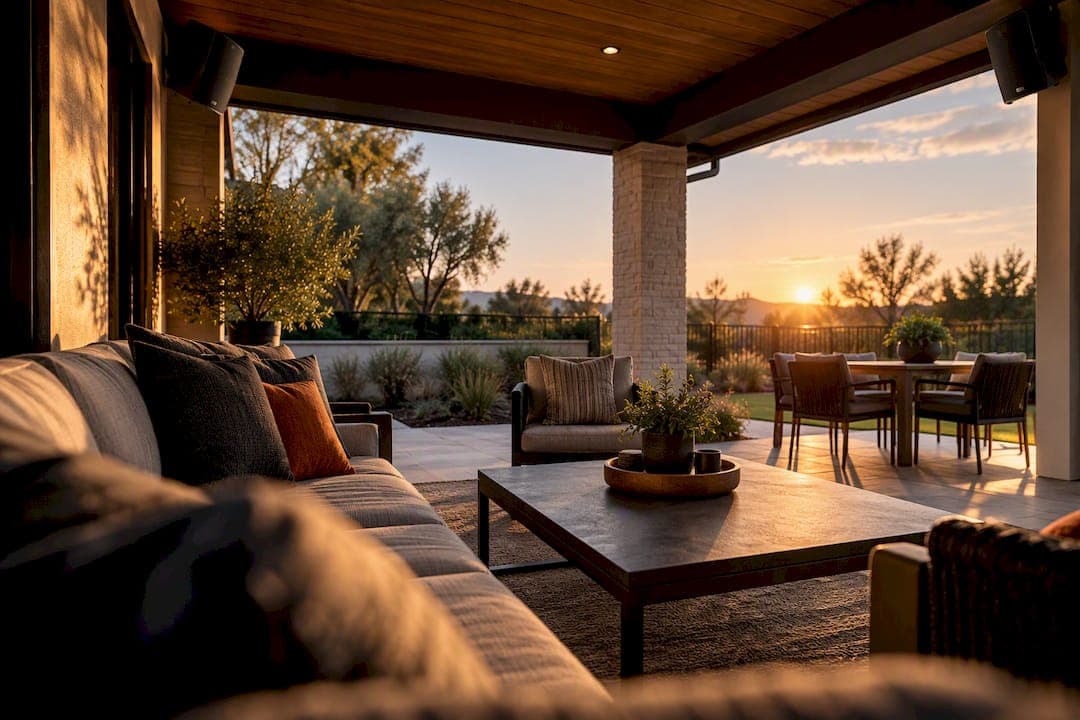
For even outdoor coverage, use several speakers near where people actually sit, mount them at a suitable height under eaves or on walls, angle them down toward the seating, and space them several feet apart across a large yard. This spreads sound evenly at lower volume, so no single speaker has to work hard, and your neighbours stay out of the mix.
TL;DR:
- Proper outdoor speaker placement requires mounting at specific heights, angles, and spacing based on the space type to ensure even coverage and sound quality.
- Using multiple, lower-volume speakers distributed across zones outperforms fewer high-volume speakers trying to cover large areas, reducing distortion and neighbor disturbance.
- Weatherproofing, correct wiring gauge, and security measures are crucial to maintaining outdoor audio system durability and preventing theft or damage.
- Indoor placement rules like the 83% or 38% guidelines do not apply outdoors; instead, focus on aiming speakers toward seating areas and within property boundaries.
- Conducting on-site testing and adjustments with familiar sounds, SPL apps, and professional help ensures accurate placement and optimal sound delivery.
Table of Contents
- Best placement patterns by outdoor space type
- Height, angle and spacing rules that actually work outdoors
- How many speakers and zoning beats blasting volume
- Wiring, mounts and weatherproofing that hold up outdoors
- Common myths and indoor 'rules' that don't apply outdoors
- How to test, tune and verify placement on site
- Installer tips from JupiterAV and questions to ask before hiring or buying
- Safety and security for outdoor speakers to prevent theft or damage
- How wind, ambient noise and reflective surfaces change your layout
- Choosing speaker types for different outdoor environments
- Fitting speakers into your existing or planned audio system
- How to aim speakers so the sound stays on your property
- Authoritative manuals and articles to consult next
- What years of yard installs have taught us about placement
- Sources
- FAQ
Best placement patterns by outdoor space type
Where you mount a speaker depends entirely on what kind of space it's covering. A patio built for quiet dinners needs a different layout than an open lawn hosting forty people.
On a covered patio or deck, wall or under-eave mounts around 7 to 10 feet high work well, angled down toward the furniture. Two speakers in opposite corners give you real stereo separation instead of one point blasting the whole area, a setup This Old House recommends even dispersion in covered zones.
Pool areas add a moisture problem on top of the coverage problem. Speakers rated IPX5 or higher hold up to splash and spray, and This Old House advises keeping them at least 3 feet from the pool edge so they're not standing in a puddle or bouncing sound straight off the water. Mount them around the perimeter, aimed across the pool rather than down into it.
Open lawns are where volume tempts people the most and where it backfires hardest. Instead of two loudspeakers trying to cover a large outdoor area, spread multiple pairs at suitable intervals. For very large areas, look at omnidirectional or distributed layouts rather than relying on a single stereo pair aimed at the whole yard.
Landscaped seating nooks benefit from rock-style, planter, or in-ground speakers tucked near the seating itself, with hedges or low walls behind them reinforcing the sound rather than letting it scatter.
- Patio or deck: wall or eave mounts at 7 to 10 feet, angled down, two speakers per zone for stereo.
- Pool: IPX5 or better, perimeter mounted, aimed across the water, kept 3 feet or more from the edge.
- Lawn or open yard: multiple pairs spaced 15 to 25 feet apart, or a distributed layout for large ground.
- Garden or landscaped seating: rock, planter, or in-ground speakers near seating, using hedges or walls as backing.
Height, angle and spacing rules that actually work outdoors
The numbers matter more than the gear. A $2,000 speaker mounted wrong will sound worse than a modest one placed well.
- Set mounting height first. Covered patios call for 7 to 10 feet, general seated zones do fine at 6 to 8 feet, and anywhere people stand around a grill or bar needs a bit more height to clear heads.
- Angle down toward the seating. Start with a 10 to 20 degree downward tilt aimed at the primary seating area, adjusting in 5 to 10 degree steps until the sound lands where people sit rather than sailing over their heads. This Old House points to angle adjustments as the fastest fix once a speaker is mounted.
- Space for overlap, not gaps. Begin with 15 to 25 feet between speakers on lawns, since each one reliably covers roughly 12 to 15 feet before volume falls off.
- Leave clearance from walls. Keep 6 to 12 inches between the speaker and the wall or eave behind it. That gap uses the surface to reinforce bass without letting it boom.
The same height and aiming logic that governs indoor surround setups applies here: our notes on Atmos speaker placement cover the aiming principles in more detail for anyone mixing indoor and outdoor zones.
Pro Tip: Walk the space with a tape measure before you drill a single hole. Mark heights and angles with tape first, play music, then commit.
How many speakers and zoning beats blasting volume
More speakers at lower volume almost always sound better than fewer speakers turned up. A speaker straining to cover long distances distorts before it gets loud enough, while multiple speakers sharing that coverage can stay clean and quiet.
Split the yard into zones and give each one its own pair rather than aiming one stereo pair at the entire property. This Old House frames this as the core professional approach to outdoor audio: distribute the load, don't crank the source.
- Put roughly 70% of your speakers on the main gathering area, with the remaining 30% covering background or transition zones like a side path or a far corner of the lawn.
- Alternate left and right channels across the main zone so the stereo image holds together instead of collapsing into mono as people move around.
- Add a subwoofer only once the mains are placed and dialed in. Outdoor bass disperses fast with nothing to bounce off, so a single sub near the main zone, not spread across the property, usually does the job. Our guide to subwoofer placement covers positioning for outdoor bass in more depth.
Dividing a backyard into distinct zones for eating, lounging, and games also helps you decide where speakers actually need to go before you start drilling. Divine Landscaping has some useful layout ideas for splitting a property this way.
Wiring, mounts and weatherproofing that hold up outdoors
Placement is only half the job. A perfectly positioned speaker fails fast if the wiring or the hardware behind it wasn't planned properly.
- Run speaker wire through PVC or conduit rather than burying bare cable, and leave a pull line in place for future additions.
- Follow the amplifier and wiring charts for gauge selection at distance. The Sonos Outdoor by Sonance manual lays out specific gauge recommendations tied to run length, and skipping that step is a common cause of weak, muddy sound over long cable runs.
- Choose mounts that match the job: FastMount-style brackets, pole mounts for open lawns, or flush under-eave mounts for patios, all of which the same Sonos manual documents alongside swivel features that let you re-aim later.
- Leave wire slack at every mount so the speaker can pivot without pulling the connection apart.
- Aim for at least an IPX5 rating anywhere near a pool or sprinkler line, and keep speakers out of direct rain runoff, constant sun, and the heat coming off a grill.
Our outdoor TV installation guide walks through similar wiring and weatherproofing questions for anyone planning a combined audio and video setup.
Pro Tip: Label every wire run at both ends before you close up a wall or bury a line. Nobody remembers which cable goes where a year later.
Common myths and indoor 'rules' that don't apply outdoors
Both were built to deal with room modes, the standing waves that build up between four parallel walls indoors. According to Acoustics Insider, these formulas solve a problem that simply doesn't exist in open air, where there are no parallel walls trapping bass frequencies.
What still carries over: aiming speakers toward where people actually sit, and keeping enough separation between left and right channels to preserve stereo imaging. What to drop entirely: any formula based on room length, width, or a percentage distance from a wall.
- Ignore the 83% and 38% rules outdoors. They optimise indoor standing waves, not open-air coverage.
- Keep the idea of stereo separation and aiming toward listeners, since that principle holds in any environment.
- Replace indoor math with zone-based layout, awareness of proximity ratio between speakers, and deliberate overlap in coverage.
How to test, tune and verify placement on site
No amount of planning replaces a walk-around listening test once the speakers are up.
- Play something familiar, then switch to pink noise, and walk every seating zone checking for evenness and tone.
- Adjust angle before height. Small 10 to 15 degree tilts fix more problems than moving a bracket, matching the sequence This Old House recommends for on-site tuning.
- Move height in small steps, 6 to 12 inches at a time, rechecking after each change rather than guessing at a final position.
- Use a smartphone SPL app to compare relative loudness across zones and flag spots that run too hot or too quiet.
- Call in a professional once you're dealing with multi-zone delay alignment or digital signal processing. That's a tuning problem, not a placement one, and it's where a proper install pays off.
Installer tips from JupiterAV and questions to ask before hiring or buying
Years of running wire through backyards teaches a few habits that save headaches later. It is good practice to leave conduit behind for future runs, favour swivel or adjustable brackets over fixed ones, and pick slightly protected mounting spots (under an eave rather than fully exposed) whenever the layout allows it.
Before hiring anyone or buying speakers on your own, ask:
- What's the planned wire route, and is there conduit for future upgrades?
- What IP rating does this model carry, and does it match where it's going?
- What warranty and maintenance terms come with the install?
- What steps will keep sound off the neighbour's patio?
Keep terminal access clear at every mount, and write down where everything is located and how it's wired. That record is what makes seasonal maintenance quick instead of a guessing game. Our notes on ceiling speaker spacing cover a similar future-proofing approach for indoor runs, and the same logic applies outside.
Safety and security for outdoor speakers to prevent theft or damage
An outdoor speaker sitting at eye level near a fence line is an easy target, so placement is also a security decision. Mounting speakers 7 feet or higher, as recommended for coverage anyway, has the side benefit of putting them out of easy reach.
Tamper-resistant mounting hardware, the kind that needs a specific tool rather than a screwdriver anyone owns, adds a real barrier without changing how the speaker sounds. Rock-style and in-ground speakers have a security advantage built in: they don't look like speakers, which makes them far less appealing to grab on the way out of a yard.
Keep speakers away from spots that double as convenient exits, like a low fence next to a side gate, and avoid mounting anything expensive where it's visible from the street. Running wire through conduit rather than leaving it exposed also protects against accidental damage from lawn equipment or curious pets, which is a far more common cause of failure than theft.
For anyone integrating speakers into a broader property setup, a security camera covering the same zone as the speakers does double duty: it protects the audio gear and the rest of the yard at once.
How wind, ambient noise and reflective surfaces change your layout
Outdoor sound behaves nothing like indoor sound, and the biggest reason is that nothing contains it. Wind bends sound waves and adds its own noise floor, which is why a placement that sounds perfect on a calm morning can feel thin on a windy afternoon. Positioning speakers with some wind shelter, behind a low wall or under an eave, keeps the sound more consistent across different weather.

Ambient noise, whether from a nearby road, a pool pump, or a neighbour's air conditioner, competes directly with your system. Rather than raising volume to fight it, moving speakers closer to the listening zone lowers the level you need to overcome that background noise.
Reflective surfaces work in your favour when you use them on purpose. A wall or fence behind a speaker reinforces bass and can extend coverage, which is part of why boundary mounting is common practice. Water is the surface to watch near a pool: it reflects high frequencies in ways that can smear clarity, which is another reason to aim pool speakers across the water rather than down into it.
Choosing speaker types for different outdoor environments
Not every outdoor speaker suits every yard. A rock speaker tucked into a garden bed works beautifully for ambient background music but won't project far enough for a lawn full of guests. A larger wall-mounted or pole-mounted speaker throws sound farther and suits open areas, patios, and anywhere coverage distance matters more than blending into the landscape.
In-ground and landscape speakers make sense for gardens and walkways where visual discretion matters and the listening distance is short. Pool areas need models built for splash exposure, at IPX5 or better, regardless of shape or mounting style. For a large lawn hosting groups, distributed layouts using several smaller speakers at lower volume outperform a pair of large speakers trying to cover the whole space.

Match the speaker type to the job it needs to do in that specific zone rather than picking one model and using it everywhere.
Fitting speakers into your existing or planned audio system
Outdoor speakers need an amplifier or receiver sized to drive them, and that decision shapes how many zones you can run and how they're controlled. A receiver with multiple zone outputs lets you run separate volume levels for the patio, the pool, and the lawn independently, which supports the zone-based approach that makes outdoor placement work in the first place.
Impedance and wire gauge both matter more outdoors, where runs tend to be longer than a typical indoor setup. The Sonos Outdoor by Sonance manual lays out wiring charts for exactly this reason, matching gauge to distance so the amplifier isn't straining to push signal down a run that's too thin for its length.
If you're adding outdoor speakers to a system that already includes indoor zones, plan the amplifier or receiver's outdoor channels from the start rather than retrofitting them later. It's far easier to run conduit and wire during planning than to open up a finished patio a year down the road.
How to aim speakers so the sound stays on your property
Aiming is the cheapest, most effective tool for keeping sound where you want it and off your neighbour's patio. Angling speakers down and inward toward the seating area, rather than outward toward a fence line, keeps most of the energy contained within your own yard.
Lower mounting heights combined with a steeper downward tilt reduce how far sound carries past the property line, since less energy escapes upward and outward. Distributing more speakers at lower volume, the same approach This Old House recommends for even coverage, has the added benefit of reducing how far any single speaker's peak level travels.
Fences, hedges, and walls between your gathering area and a neighbouring property act as natural sound barriers when speakers are aimed to use them. Position speakers so the boundary structure sits between the speaker and the neighbour's yard, not between the speaker and your own seating.
Authoritative manuals and articles to consult next
For deeper detail, check manufacturer manuals for wire gauge and mounting specifics, This Old House for practical zoning examples, and the Purdue coverage lecture notes for the design theory behind multi-speaker layouts.
What years of yard installs have taught us about placement
Measured placement beats raw power every time. The biggest gains rarely come from a bigger speaker, they come from moving one 2 feet or tilting it 10 degrees. Test your layout before committing, and if you'd rather have a second opinion, consider a professional who reviews outdoor layouts and handles installation when you want it done right the first time.
— JupiterAV
Sources
- The Ultimate Guide to Outdoor Speakers - This Old House
- Speaker Placement Rules: Which Ones Actually Matter?
- Lecture notes — coverage and level variance (Purdue)
- SONOS OUTDOOR by SONANCE user manual (installation and placement guidance)
FAQ
Where should outdoor speakers be placed?
Outdoor speakers work best mounted near the actual listening zone, at roughly 7 to 10 feet high on covered patios and angled down toward seating. For open lawns, spread multiple speakers 15 to 25 feet apart rather than relying on one loud pair, a layout This Old House recommends for even coverage.
What is the 83% rule for speakers?
The 83% rule is an indoor placement formula meant to reduce room mode problems in rectangular rooms with parallel walls. According to Acoustics Insider, it has no real application outdoors, where there are no parallel walls creating standing waves.
What is the 38% rule for speaker placement?
It doesn't transfer to open-air spaces, since Acoustics Insider ties both the 83% and 38% rules specifically to indoor room acoustics.
What is the golden rule for speaker placement outdoors?
The closest thing to a golden rule outdoors is placement over volume: use more speakers at lower volume, spread across zones, rather than pushing a couple of speakers harder. This Old House frames this as the professional standard for even, neighbour-friendly outdoor sound.
Does JupiterAV help plan outdoor speaker layouts?
JupiterAV designs and installs outdoor audio systems as part of its wider AV and smart home services, including Immersive Sound & Cinema work extended to outdoor spaces. Pricing for a layout review or installation is available on request.