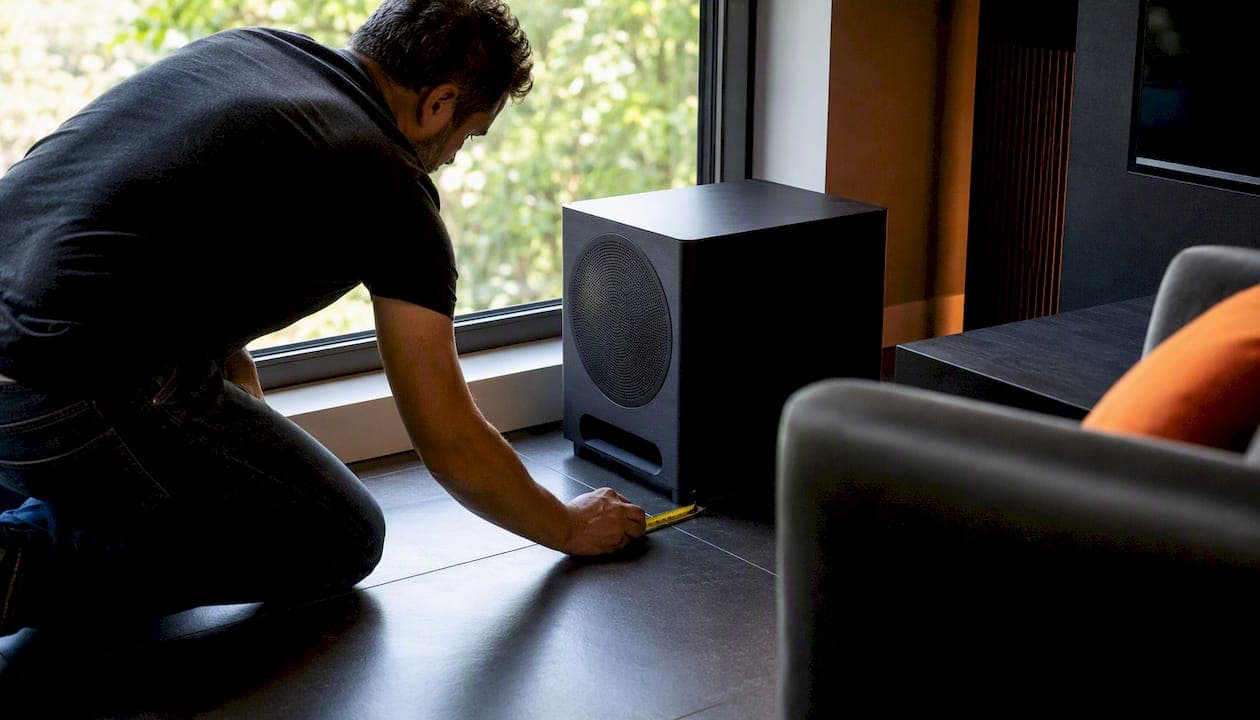
Start the subwoofer in the front half of the room, on the same wall as your main speakers, roughly one-third of the way in from either side. That single decision eliminates most timing and phase problems before you touch a single setting. From there, a quick subwoofer crawl confirms whether you've landed on a good spot or whether a two-foot shift would make a meaningful difference.
A few quick exceptions worth knowing before you dive in:
- Tiny rooms (under 10 ft × 12 ft): front-wall placement can still boom badly; a mid-wall or even rear position sometimes flattens things out faster.
- Open-concept living areas: the room boundary is irregular, so the crawl matters more than any fixed starting rule.
- Rented spaces with no furniture flexibility: work with what you have, then use DSP to compensate.
Key takeaways
The single most effective thing you can do for subwoofer performance is test placement before adjusting any settings — a 20-minute crawl and a two-foot move routinely outperform any EQ fix.
| Point | Details |
|---|---|
| Start front-third, near mains | Place the sub on the front wall, one-third in from either side, at least 8–12 inches from the wall. |
| Run the subwoofer crawl | Temporarily place the sub at the listening seat, crawl the room, and mark the two or three best-sounding spots. |
| Calibrate crossover and phase | Start at 80 Hz crossover, set sub gain to 75%, toggle phase by ear, then verify with REW and a calibrated mic. |
| Two subs beat one for whole-room bass | Symmetric dual placement (front-left/right or diagonal) flattens room modes across more listening positions. |
| JupiterAV for complex installs | For in-wall subs, multi-sub systems, or persistent room modes, JupiterAV provides measurement-backed installation and Dirac Live calibration in Calgary. |
Table of Contents
- What's the fastest way to find a good subwoofer position?
- How to do the subwoofer crawl step by step
- Where you place the sub changes everything — here's why
- How do you set crossover, phase, and level correctly?
- Why do two subwoofers outperform one?
- When placement and EQ aren't enough: room treatment options
- Common placement mistakes and how to fix them fast
- When should you hire a professional installer?
- JupiterAV's take on what actually moves the needle
- Professional subwoofer placement and calibration in Calgary
- Sources
What's the fastest way to find a good subwoofer position?
A 15–30 minute session is all it takes to move from guesswork to a noticeably better result. Work through this in order:
- Measure the room. Note the length, width, and ceiling height. Identify hard surfaces (bare floors, glass, drywall) and where the main furniture sits.
- Set a starting position. Place the sub on the front wall, roughly one-third in from either side. If the room is narrow, centred on the front wall works as a fallback. Polk Audio's placement guidance confirms the rule-of-thirds heuristic reduces the odds of landing at a strong room-mode peak or null.
- Pull it away from the wall. At least 8–12 inches of clearance from any wall is a practical starting rule. Corner placement increases output through boundary reinforcement, but it almost always produces boomy, uneven bass in return.
- Mark three candidate spots with painter's tape. Label them A, B, C. You'll compare them in the next step.
- Play two short tracks. Use something with sustained, low bass (a bass sweep or a familiar track with a prominent kick drum). Listen from the primary seat, not from beside the sub.
Pro Tip: The loudest spot is rarely the best spot. You're listening for evenness and definition, not volume. If the bass sounds like it's coming from a specific location in the room rather than "everywhere," that's a sign the position needs work.
Bose recommends placing the sub on the same wall as the mains and experimenting from there — a sensible starting point that aligns with how most AV receivers handle distance and delay calculations.
How to do the subwoofer crawl step by step
The subwoofer crawl is a reciprocity-based listening test: the spot in the room where bass sounds most even to your ears is the spot where the sub will perform most evenly for you. Popular Mechanics describes it as one of the highest-value audio tweaks a homeowner can do in minutes. Here's the full method:
- Move the sub to your listening seat. Place it at roughly ear level — on the seat cushion or on a chair directly in front of where your head sits. This temporarily turns the sub into the "listener."
- Play continuous pink noise or a bass sweep at moderate volume. A 20–80 Hz sweep works well. Familiar bass-heavy music is fine if you know it well enough to hear subtle changes.
- Crawl around the room with your head at sub level. Move slowly along the front wall, then the side walls, pausing every foot or two. You're listening for where the bass sounds fullest and most consistent, not loudest.
- Mark the two or three best-sounding spots. Use tape or a sticky note. These are your candidates.
- Move the sub to each marked spot and re-listen from your seat. This is the confirmation step. What sounded good during the crawl should translate to a better seat experience.
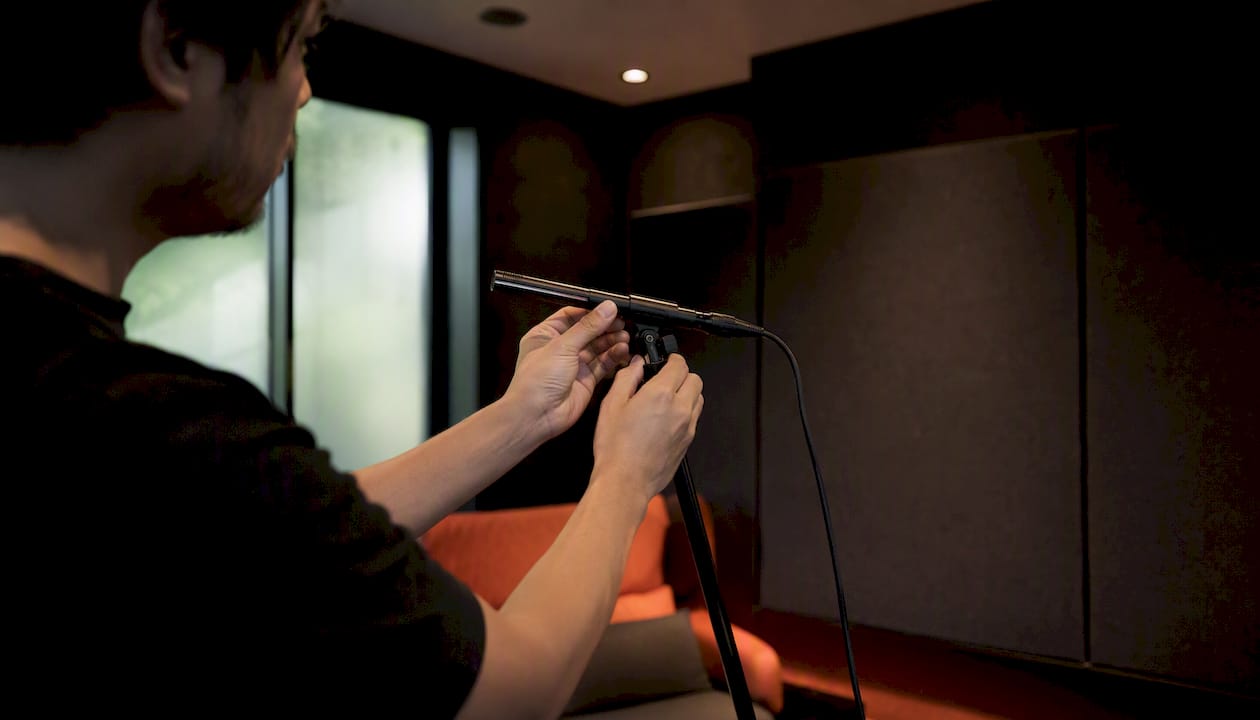
- Choose the flattest-sounding position. If you have access to Room EQ Wizard (REW) and a calibrated microphone like the MiniDSP UMIK-1, overlay the frequency responses from each candidate spot. The flattest curve wins, even if it wasn't the "loudest" position subjectively.
Moving a subwoofer by as little as two feet can shift bass output at the listening position by 10 dB or more at certain frequencies. That's the difference between tight, defined bass and a one-note boom.
Pro Tip: Time-box the crawl to 20 minutes. After that, ear fatigue makes subtle differences harder to hear. If two spots sound nearly identical, pick the one that works better with your furniture. A "second-best" acoustic position that doesn't require moving a couch is often the right call.
Where you place the sub changes everything — here's why
Front wall and rule of thirds
The front-third position (roughly one-third of the room's length from the front wall) is the most reliable starting point for most rectangular rooms. It avoids the strongest axial mode peaks that cluster near walls and corners. AES research on room mode behaviour confirms that room geometry and boundary conditions dominate low-frequency response, which is exactly why a few feet of distance from a wall can change the character of bass entirely.
Corner placement
Corners amplify output by coupling the sub to three room boundaries at once. For a budget sub that needs every dB of help it can get, that's sometimes useful. For anything mid-range or better, the trade-off is uneven, boomy bass that smears transients and makes kick drums sound like they're coming from a cardboard box. If a corner is your only option, pull the sub at least 6–8 inches out, and consider sealing the port if it's a ported design.
Behind the listening position and mid-wall
Counter-intuitive but often effective, particularly in open-plan rooms or rooms with irregular geometry. Controlled tests across five rooms found that corner placement was the best position in only one of the five rooms tested; mid-wall placements produced flatter responses in most cases.
Under furniture, inside cabinets, and in-wall options
| Location | Typical result | Key consideration |
|---|---|---|
| Under a couch | Reduced high-bass output, muffled attack | Works better with sealed subs |
| Inside a cabinet | Significant colouration, port chuffing risk | Avoid unless custom-built for it |
| In-wall / in-floor | Clean integration, no floor footprint | Requires professional installation |
| Freestanding, front wall | Best overall starting point | Easiest to adjust and measure |
Pro Tip: Renters who can't move furniture much should prioritise the crawl and DSP over physical perfection. A well-calibrated sub in a second-best position usually outperforms a poorly calibrated sub in the "ideal" spot.
Common distance guidelines to keep handy:
- Maintain at least some clearance from any wall as a starting point
- Maintain some distance from a corner if corner placement is unavoidable
- At least 3 feet from the primary listening seat to avoid localisation (hearing the sub as a separate source)
How do you set crossover, phase, and level correctly?
Getting the sub to "disappear" into the mix is the real goal. A sub you can hear as a separate object in the room is a sub that hasn't been integrated properly.
- Run your receiver's auto-calibration first. Systems like Audyssey (Denon/Marantz), Dirac Live, or Yamaha's YPAO set distances, levels, and crossover points automatically. Use this as your baseline, not your final answer.
- Set the crossover at 80 Hz as a starting point. This is the THX standard and works well for most bookshelf and satellite speakers. If your mains roll off higher (check the spec sheet for their -3 dB point), add roughly 10 Hz to that figure for the crossover setting.
- Align phase by ear first. Play a bass-heavy track and toggle the phase switch (0° vs. 180°) while seated. The setting that sounds louder and fuller at the listening position is the better phase match. KEF's guidance on phase and positioning notes that distance between the sub and mains is the primary driver of phase shift — small position changes often solve what a phase knob alone cannot.
- Set sub gain to roughly 75%, then adjust receiver trim. This leaves headroom on the sub's amplifier and lets the receiver manage the final level. Tweak by ear, then verify with an SPL meter or REW.
- Measure and compare. Use REW with a MiniDSP UMIK-1 to capture the frequency response at the listening seat. Look for peaks above 6 dB and nulls deeper than 10 dB — both are worth addressing through position changes before reaching for EQ.
| Parameter | Starting value | Verification method |
|---|---|---|
| Crossover frequency | 80 Hz | Adjust ±10 Hz to match mains' low-frequency limit |
| Phase | 0° (toggle if bass sounds thin) | Toggle switch; pick the fuller-sounding setting |
| Sub gain | 75% | Adjust receiver trim to match reference level |
| Distance (receiver) | Measured from sub to seat | Use auto-cal or tape measure |
Pro Tip: Phase is not purely a knob problem. Position determines much of the phase relationship between the sub and mains. If toggling the phase switch makes no audible difference, the sub likely needs to move, not just be adjusted.
Why do two subwoofers outperform one?
A single sub excites room modes unevenly. Two subs placed symmetrically excite complementary sets of modes, which tends to flatten the in-room bass response across more listening positions. The benefit isn't just more output — it's more consistent bass for everyone in the room, not just the person in the sweet spot.
Common placement patterns for dual subwoofer placement:
- Front-left + front-right (stereo pair): mirrors the main speaker layout; works well in rectangular rooms and integrates naturally with stereo content.
- Diagonal pair (front-left + rear-right, or vice versa): often the most effective pattern for reducing axial modes in square or near-square rooms.
- Front/back split (front wall + rear wall, centred): addresses front-to-back modes directly; useful in long, narrow rooms.
A few practical notes on two subwoofers placement:
- Identical subs are not required, but matching models simplifies gain matching and crossover alignment considerably.
- Set both subs to the same gain level initially, then use the receiver's individual sub trim (if available) or a Y-splitter with inline attenuator to balance them.
- Run auto-calibration after placing both subs — Audyssey and Dirac Live both handle multi-sub setups and will account for the combined response.
Pro Tip: Start with symmetric positions (front-left and front-right, or diagonal), measure with REW, then refine. Asymmetric rooms sometimes benefit from asymmetric sub positions, but symmetric is always the right starting hypothesis.
When placement and EQ aren't enough: room treatment options
Some bass problems are structural. A deep null at 60 Hz caused by a room mode won't be fixed by repositioning alone — EQ can reduce a peak, but it cannot fill a null that physics has removed from the room.
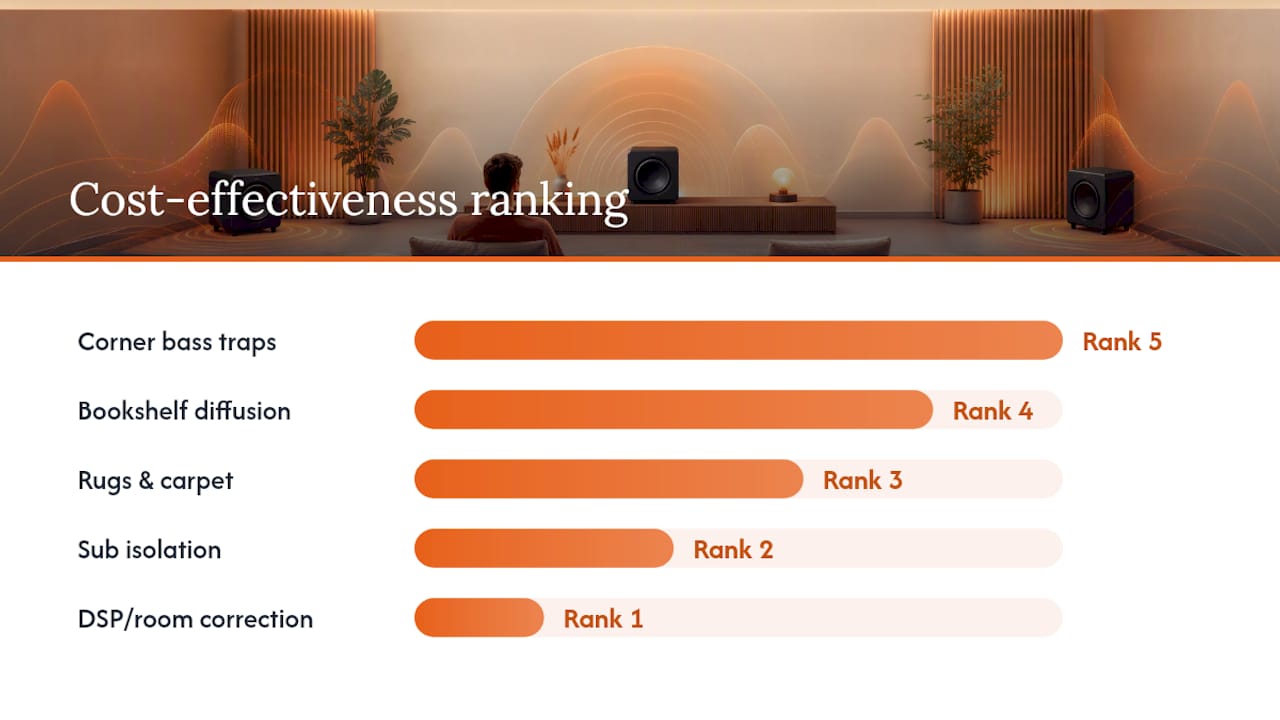
Practical treatment options, roughly in order of cost-effectiveness:
- Bass traps in corners: floor-to-ceiling corner traps absorb low-frequency energy most efficiently. Rigid fibreglass or mineral wool (Rockwool Safe'n'Sound is widely available in Canada) works better than foam for frequencies below 200 Hz.
- Bookshelves as diffusers: a floor-to-ceiling bookshelf filled with irregularly sized books breaks up mid-bass reflections without looking like a recording studio. Genuinely effective and renter-friendly.
- Rugs and carpet: reduce flutter echo and high-frequency reflections; modest effect on bass, but every bit of damping helps in a live room.
- Sub isolation: place the sub on isolation feet or a platform (Auralex SubDude is a common option) if it's on a hardwood or laminate floor. Reduces structural transmission to the floor and neighbouring rooms.
- DSP and room correction: Dirac Live and Audyssey MultEQ XT32 can tame peaks effectively. They cannot fix deep nulls — a null is an absence of energy, and boosting EQ at that frequency just drives the amplifier harder without recovering the lost bass.
Pro Tip: Treat corners first, then address first-reflection points on the side walls. That order gives you the most acoustic improvement per dollar spent, and it's the sequence professional installers follow before reaching for DSP.
Common placement mistakes and how to fix them fast
The loudest spot is not the best spot
Selecting a position because it produces the most bass at the listening seat is the single most common mistake. Loudness at one frequency usually means a room-mode peak — and a peak at 60 Hz means a null somewhere nearby. You want even bass across the range, not maximum output at one note.
Sub pushed directly against the wall or stuffed in a cabinet
Symptoms: one-note bass, slow attack, muddy kick drums. Fix: pull the sub at least 8–12 inches from the wall, run the crawl, and re-listen.
Quick troubleshooting sequence when bass sounds wrong:
- Move the sub to the listening seat and run the crawl from scratch.
- Try the top two crawl candidates and compare from the seat.
- Toggle the phase switch and listen for the fuller result.
- Check the crossover setting — if it's above 100 Hz with full-range mains, lower it.
- Run a REW sweep at the listening position and look for peaks and nulls above 6–10 dB.
- If a null persists after repositioning, consider a second sub or targeted bass trapping at that frequency.
When a null won't move regardless of sub position, the room geometry is the cause. A second sub in a complementary position is often the most practical solution — more effective than any amount of EQ.
When should you hire a professional installer?
Some rooms and systems genuinely need professional measurement and calibration. The DIY crawl gets you most of the way there in a straightforward rectangular room with a single sub. Beyond that, the returns on professional help increase quickly.
Signs it's time to call a pro:
- Multiple subwoofers that need gain matching, delay alignment, and room correction simultaneously
- In-wall or in-floor sub installation (requires carpentry, wiring, and acoustic modelling)
- Persistent room modes that repositioning and bass traps haven't resolved
- A dedicated home theatre where calibration to reference levels matters
- Multi-room or whole-home audio systems where the sub is one component in a larger network
What a professional installer brings to the job:
- Calibrated measurement with REW or similar software and a reference microphone
- Dirac Live or Audyssey MultEQ XT32 tuning with manual verification
- Acoustic analysis of the room before any gear is purchased or positioned
- In-wall sub integration with proper enclosure design and low-voltage wiring
- A written report of before/after measurements so you can see the improvement
Before contacting an installer, have this information ready:
- Room dimensions (length, width, ceiling height)
- Current gear (sub model, receiver model, main speakers)
- Photos of the room from each corner
- Your listening priorities (music, home theatre, both)
- Any known problem frequencies ("bass sounds boomy around 60 Hz")
A brief site visit with a calibrated microphone is often enough to predict how much improvement is achievable and what it will take to get there — before any commitment is made.
Pro Tip: Ask any installer whether they provide before/after REW measurements as part of the job. If they don't measure, they're guessing. Measurement is what separates a calibrated install from an expensive rearrangement.
JupiterAV's take on what actually moves the needle
The most common cause of bad bass we see in Calgary homes isn't a cheap subwoofer. It's a good sub sitting in the wrong spot, pushed into a corner because that's where the cable reached. A 20-minute crawl and a two-foot move regularly produce more improvement than upgrading to a larger driver.
Small moves matter more than most people expect. The physics of room modes means that a position change of even one foot can shift bass response by several decibels at the listening seat. Spending money on a bigger sub before testing placement is almost always the wrong order of operations.
That said, some rooms genuinely need professional help. Complex geometry, multi-sub systems, and in-wall installations are where measurement-backed calibration pays for itself. JupiterAV handles the full scope — from a single-sub tune-up to a complete custom home theatre build with Dirac Live calibration and in-wall sub integration.
Professional subwoofer placement and calibration in Calgary

JupiterAV provides sales, installation, and calibration of subwoofers and full home theatre systems across Calgary and the surrounding area. Whether you need a single sub dialled in with Dirac Live, a dual-sub system gain-matched and measured, or a full in-wall subwoofer integrated into a custom home theatre build, the team handles it with calibrated measurement tools and a written before/after report.
Services include Audyssey and Dirac Live room correction, low-voltage wiring, in-wall and in-floor sub installation, and whole-home audio integration with Sonos and WiiM systems. Every install includes a listening verification at the primary seat.
Ready to stop guessing and hear what your room is actually capable of? Request a site visit or quote from JupiterAV and get a measurement-backed assessment of your space.
Sources
- How to set up a subwoofer for best room position and sound - Digital Trends
- 5 Tips for Perfect Subwoofer Placement | Polklore
- Subwoofer crawl tested in 5 rooms: what actually works
- Subwoofer placement explained — HomePicturesCinema
- AES eLibrary entry 13680