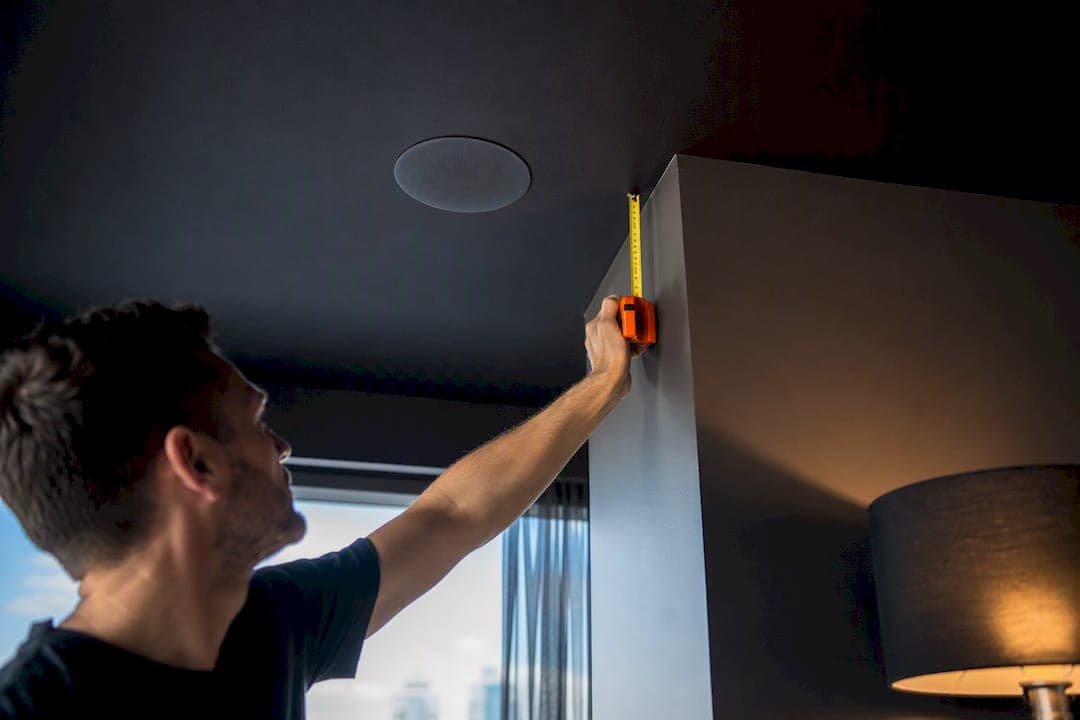
Put in-ceiling speakers 18 to 24 inches (0.5 to 0.6 m) from any wall, and space stereo pairs 6 to 10 feet (1.8 to 3 m) apart, adjusted with the 2× listening-height rule. Smaller rooms need a few speakers, medium living spaces a moderate number, and open-plan layouts several, spread on an even grid. For Dolby Atmos, two overhead pairs are better than one, but a single pair mounted slightly forward of your seat still works.
TL;DR:
- Speakers should be placed 18 to 24 inches from walls and spaced 6 to 10 feet apart for optimal stereo and sound coverage.
- Overhead Atmos speakers perform best when mounted forward of the listening position, with placement influenced by ceiling height and dispersion patterns.
- Proper prewiring involves checking cavity clearance, avoiding duct or joist conflicts, and running rated wiring before drywall installation.
- Room size and usage determine the number of speakers needed, with larger or open spaces requiring more units to ensure even sound distribution.
- Fix placement issues like close walls, clustering, or proximity to noisy appliances with simple adjustments such as EQ, adding speakers, or relocating units.
Table of Contents
- What is the two-foot rule for ceiling speaker placement?
- How many ceiling speakers do you need, and where do they go?
- Placing overhead speakers for Dolby Atmos and home theatre
- Prewire checklist before you cut into the ceiling
- Getting the acoustics right once speakers are in
- Common ceiling speaker mistakes and how to fix them without a reinstall
- What installers actually check that homeowners miss
- Why we'd rather you prewire now than retrofit later
- Get your ceiling speaker layout right the first time
- Sources
- FAQ
What is the two-foot rule for ceiling speaker placement?
The "two-foot rule" everyone quotes is really an 18 to 24 inch buffer between a speaker and the nearest wall. Push a speaker right up against a wall or into a corner, and low frequencies pile up there. That boundary effect makes bass sound boomy in one spot and thin everywhere else in the room. Crutchfield's own installation guidance treats that 18 to 24 inch clearance as a baseline for both home theatre and everyday music listening, and it's the first number worth writing on your ceiling plan.
Spacing between speakers matters just as much as spacing from walls. For a basic two-channel setup, left and right ceiling speakers typically sit 6 to 10 feet apart for solid stereo separation without a hole in the middle of the soundstage.
For distributed audio across a bigger room, the math gets more specific. The 2× listening-height rule says: spacing equals twice the distance between the ceiling and your ears. If your ceiling is 9 feet high and you're normally seated with your ears at 4 feet, that gap is 5 feet, so speakers should land roughly 10 feet apart. Drop the ceiling to 8 feet with the same 4-foot ear height, and the gap shrinks to 4 feet, pushing your spacing down to about 8 feet. This formula, laid out in detail by Lecovita, is the difference between a room with even coverage and one with a "hot spot" directly under each speaker and a dead patch between them.
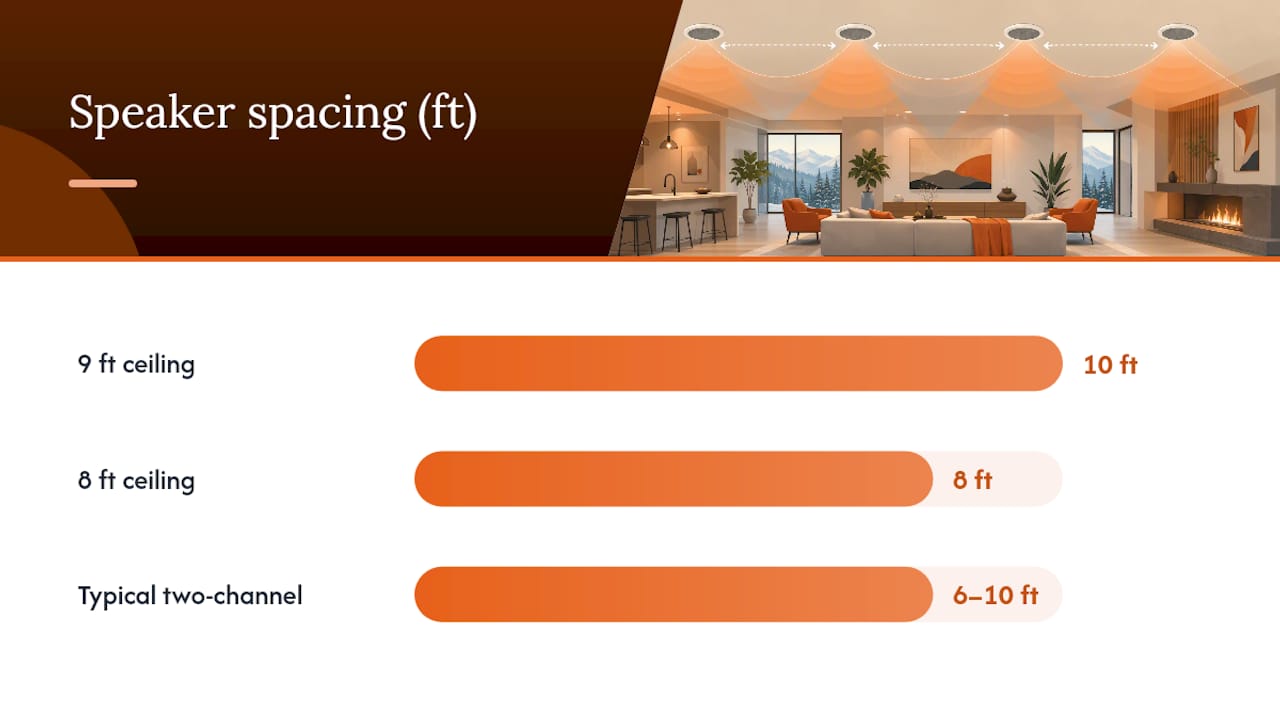
That dead-zone problem comes down to dispersion cones. Every ceiling speaker throws sound in a cone shape, usually somewhere between 90 and 120 degrees depending on the tweeter and any waveguide it uses. Space speakers too far apart and their cones never overlap, leaving gaps where the sound noticeably drops off. Space them too close and you get uneven volume, plus comb filtering where overlapping high frequencies cancel each other out. The 2× listening-height math is really just a shortcut for keeping those cones touching without stacking on top of each other.
A few conversions worth keeping handy while you measure:
- 18 inches = 0.46 m; 24 inches = 0.6 m (your wall clearance)
- 6 feet = 1.8 m; 8 feet = 2.4 m; 10 feet = 3 m (typical spacing range)
- 8 foot ceiling = 2.4 m; 9 foot ceiling = 2.7 m; 10 foot ceiling = 3 m
A hexagonal or staggered grid gives more uniform coverage than a straight square grid, since it avoids lining up dead zones in rows. It's harder to eyeball, though, so most homeowners stick with a square grid aligned to joists and just accept slightly less even coverage at the edges.
How many ceiling speakers do you need, and where do they go?
Room size drives speaker count more than anything else, but room use decides where they sit.
- Small rooms (under 150 sq ft) like a powder room or home office usually need just one speaker, or a single stereo ceiling speaker that packs both channels into one unit.
- Medium rooms (150 to 300 sq ft), such as a kitchen or bedroom, typically call for two speakers positioned symmetrically off the room's centre line.
- Large rooms (300 to 500 sq ft), including open-concept living and dining areas, usually need three or four speakers to avoid a loud centre and quiet corners.
- Open-plan layouts over 500 sq ft often need five or more speakers on a grid, particularly if the space doubles as a kitchen, dining, and lounge zone with background music running most of the day.
That last point matters: background-music rooms need more even coverage than a dedicated theatre room, because people are moving through the space rather than sitting still in one seat. A theatre room can get away with fewer, more carefully aimed speakers because everyone's in the same seats every time.
Kitchen. Run speakers down the perimeter, not the centre, and keep them well clear of the stove. Grease and heat rising off a hob will coat a speaker grille over time and can affect the driver, so avoiding placement directly over cooking appliances is a rule worth following even when the ceiling layout tempts you otherwise.
Bathroom. For anything smaller than a typical ensuite, a single stereo ceiling speaker rated for moisture usually beats two separate units, both for coverage and for keeping the ceiling visually clean. Keep it away from the shower head's direct spray zone regardless of the speaker's moisture rating.
Bedroom. Two speakers positioned symmetrically around the bed, roughly following the 6 to 10 foot spacing rule, works for most rooms. Avoid centring one directly over the headboard. It puts sound too close to one ear and throws off the stereo image.
TV or home theatre room. Speaker placement here follows the seating, not the room's geometry. More on that below.
Open-plan living. Treat it as multiple zones rather than one giant room. Dining tables are a common trap: a speaker directly overhead puts the loudest point right above people's heads while they're trying to talk, so offset it toward a sideboard or walkway instead.
Placing overhead speakers for Dolby Atmos and home theatre
Atmos was designed around two overhead pairs: one set roughly above and slightly in front of the main listening position, the other behind it. That front and rear split is what creates the sense of sound moving overhead rather than just sitting above you, and it's the standard recommendation most calibration guides start from.
Most homes don't have the ceiling real estate, budget, or patience for four overhead speakers, though. If you're only installing one pair, mount it slightly forward of the primary seating position rather than directly overhead. That position captures more of the front-heavy overhead effects most Atmos mixes lean on, without leaving the rear of the room completely silent.
A few things shift your exact placement:
- Distance from the front speakers. Overhead speakers generally sit roughly in line with, or slightly behind, your front left/right speakers, not stacked directly above the screen.
- Offset from the listening seat. Aim for roughly one to two feet forward of dead centre over the main seat if running a single pair.
- Ceiling height. A vaulted or higher ceiling changes both the dispersion pattern and the power needed to fill the room, since sound has farther to travel before it reaches your ears. Speakers with tighter dispersion or higher sensitivity ratings tend to perform better in tall rooms.
- Speaker type matters more overhead than anywhere else. Directional or angled-tweeter models aimed at the seating area outperform flat, straight-firing speakers when your ceiling geometry won't let you centre things perfectly. Our Atmos placement guide covers golden-triangle alignment for overhead pairs in more depth.
If you're integrating ceiling speakers with an existing soundbar or AV receiver, check that the receiver actually decodes height channels before you cut any drywall. A lot of "5.1" soundbar setups simply can't route audio to a ceiling pair no matter how well you place it.
Prewire checklist before you cut into the ceiling
The single biggest cause of a botched ceiling speaker install isn't bad placement math. It's cutting a hole before checking what's above it.
- Map every proposed speaker location against your lighting layout, HVAC ductwork, sprinkler heads, and structural joists before anyone picks up a drill.
- Drill a small pilot hole first and use a flexible inspection camera or a bent wire hanger to confirm clear cavity space, and that you're not about to hit a duct or a joist dead centre.
- Use rough-in brackets ahead of drywall install wherever possible. They set the exact cutout position and give the drywall crew a clean edge to work around, which saves a second round of patching later.
- Run UL-rated in-wall/in-ceiling speaker cable, not generic wire, and add fire-rated hoods on kitchen and multi-storey installs where local code or your municipality's building requirements call for it.
- Back-boxes aren't just for bass response. They also limit sound bleeding through to the room above, which matters a lot if that's a bedroom.
Pro Tip: Measure and mark speaker positions as horizontal coordinates on the floor directly below the intended location, not as a distance along the ceiling. It's a small shift in thinking, but it makes cutting the hole in the right spot far less error-prone once you're staring up at drywall with a laser level.
If your ceiling has more than one joist bay conflict, multiple existing HVAC runs, or you're planning a full Atmos setup with in-ceiling and in-wall speakers on the same circuit, that's the point to bring in a professional rather than push through solo. A proper site visit brief should include your room dimensions, ceiling height, existing wiring, and a rough sketch of where you want speakers, even if the final positions shift once a pro sees the cavity. Our prewire checklist covers what to run before drywall goes up, even if the actual speaker install is still months away.
Getting the acoustics right once speakers are in
Placement math gets you most of the way there, but the room itself finishes the job — adding soundproof media units can greatly improve acoustic performance by treating reflective surfaces and enhancing audio clarity. Hard floors, bare windows, and glass-front cabinets all bounce sound back into the room, and that reflected sound arrives at your ears a fraction of a second after the direct sound, smearing clarity and making voices sound harsher than they should.
A rug under the main seating area, curtains over a large window, and a couple of acoustic panels placed at the first reflection points on adjacent walls fix most of that without turning a living room into a recording studio. You don't need to treat the whole room, just the specific spots where sound bounces directly into the listening position.
Where the speaker itself allows it, aim the tweeter toward the seating area rather than straight down. Many in-ceiling models built for home theatre include a pivoting tweeter for exactly this reason, and it's worth checking for that feature before buying, especially for speakers that will sit off to one side of a couch rather than directly overhead. Directional models solve the same problem for speakers that can't be repositioned once they're cut in.
Once everything's mounted, a few basic calibration steps make a bigger difference than most people expect:
- Check that every speaker is wired in the same polarity. One reversed speaker cancels bass and thins out the whole system, and it's an easy mistake to make with bare-wire connections.
- Level-match each speaker using your AV receiver's built-in test tones or a phone-based SPL meter app, so no single speaker dominates the mix.
- Play a familiar test track, something with a clear vocal and steady bassline, and walk the room listening for spots where the sound thins out or gets harsh.
- Apply modest EQ correction only after physical placement and levels are sorted. EQ can't fix a speaker that's badly positioned.
If your system includes a subwoofer running alongside the ceiling speakers, get its placement right too. Boundary effects hit low frequencies even harder than they hit ceiling speakers, and our subwoofer placement guide walks through keeping bass even rather than boomy in one corner.
Common ceiling speaker mistakes and how to fix them without a reinstall
Most placement problems fall into three categories, and none of them require ripping speakers out of the ceiling to fix.
- Speakers mounted too close to walls or corners. This is the boundary effect from earlier, and it shows up as boomy, uneven bass. If moving the speaker isn't an option, a slight EQ cut in the 80 to 150 Hz range at your receiver often tames it enough to sound natural again.
- Speakers clustered together instead of spread across the room. This creates one loud zone and dead corners elsewhere. Adding one more speaker to fill the gap is usually cheaper and less disruptive than relocating the existing ones.
- Speakers placed over noisy appliances or in wet zones without a rated enclosure. A dishwasher, range hood fan, or shower can both damage an unrated speaker and mask its output with ambient noise. Swap in a moisture-rated model or, if repositioning is possible, move it a foot or two clear of the source.
After any fix, walk the room again with the same test track you used during calibration. If you still hear a dip in coverage between two speakers, check whether their dispersion cones actually overlap at your ear height. That's often the real culprit hiding behind what looks like a wiring or EQ problem.
What installers actually check that homeowners miss
On a real job site, the placement math is the easy part. What takes the time is confirming cavity clearance, checking for duct runs that cross the exact spot you marked, and deciding between a sealed back-box and an open-back speaker based on what's actually above the ceiling.
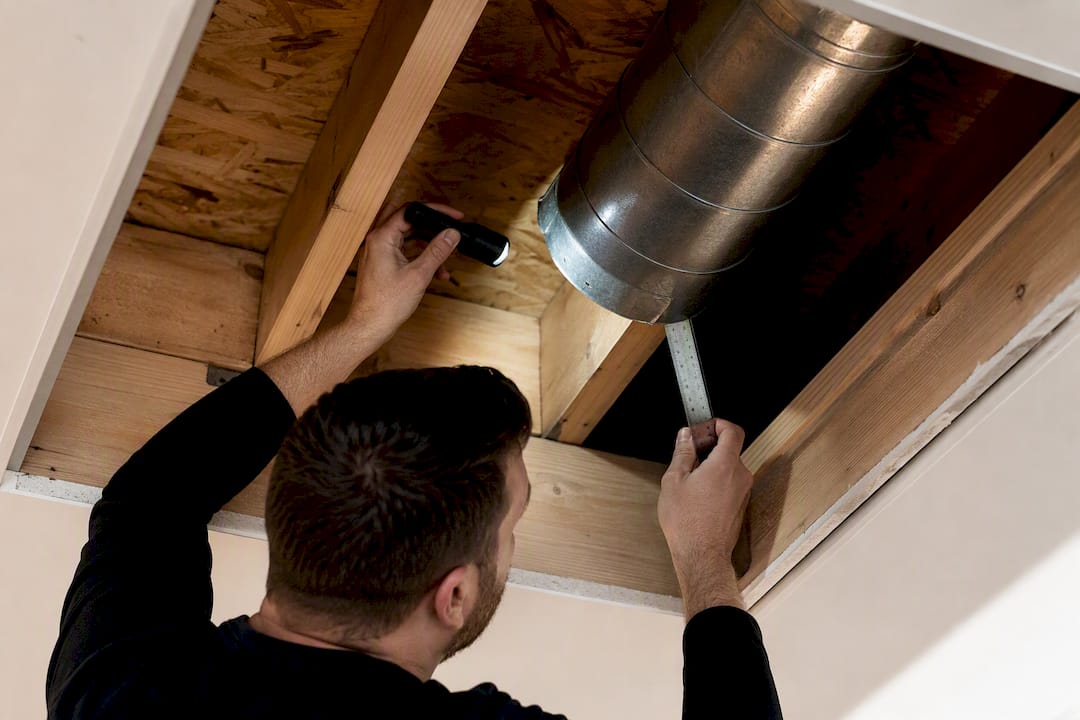
When a joist or duct blocks the ideal spot, an installer won't force a speaker into a compromised position just to hit a symmetrical grid. The more common move is to stagger the pair slightly and switch to a directional model aimed back at the listening position, which preserves the sound field even when the physical layout isn't perfectly even. It's a trade-off homeowners rarely anticipate until they're standing under an open ceiling cavity with a tape measure.
Why we'd rather you prewire now than retrofit later
Concealment and performance pull in different directions. A perfectly flush, paintable grille looks clean, but a speaker mounted dead centre in a room isn't always where the sound performs best relative to your seat. We'd rather see a homeowner run conduit and cable early, even if the actual speakers go in a year later, than cut corners on wiring now and fight ceiling access later. Talk to your contractor about rough-in locations before drywall goes up, even if the room's final layout is still a guess.
— JupiterAV
Get your ceiling speaker layout right the first time
Placement math gets you close. A site visit gets you exact, because no formula accounts for the duct that's sitting right where your spacing calculation says a speaker should go. Professional AV companies handle the full path from planning to finished install: sales, wiring, and setup for in-ceiling speakers, whole-home audio, and full Dolby Atmos home theatres across homes and businesses.

DIY placement math works fine for a single stereo speaker in a home office. It gets a lot harder once you're running multiple zones, integrating with a Control4 or Sonos system, or trying to fit Atmos into a ceiling with existing ductwork and joists that don't cooperate. That's the point where a second set of eyes, and the right test equipment, saves you from a hole in the wrong spot. Request a consultation and we'll walk your room, confirm cavity clearance, and give you a layout that matches both your ceiling and your seating position, not just a generic spacing chart.
Sources
- In-wall and ceiling speaker placement and installation
- The Beginner's Guide to In-Ceiling Speakers
- How to Calculate In-Ceiling Speaker Spacing for Perfect Coverage - Lecovita
- Ceiling Speakers for Home Audio: A Planning Guide — Home Technology Experts
- How To Place Your Ceiling Speakers For The Best Sound
FAQ
What is the 83% rule for speakers?
It matters indirectly because your seating position, set by screen size, is what your speaker layout should centre around.
What is the 38% rule for speaker placement?
The 38% rule refers to positioning your main listening seat at roughly 38% of the room's length from the front wall, a spot many acoustic guides identify as a sweet spot for bass response. It applies to your seating position more than to ceiling speaker mounting itself.
How do I make my in-ceiling speakers sound better?
Check polarity and level-match every speaker first, since a single reversed wire cancels bass across the whole system. From there, move speakers at least 18 to 24 inches from walls, add acoustic treatment at first reflection points, and aim any directional tweeters toward your listening position.
How far apart should ceiling speakers be?
Left and right stereo pairs typically sit 6 to 10 feet apart, while multi-speaker background audio zones should use the 2× listening-height formula, doubling the gap between your ceiling and your ears, to set exact spacing for even coverage.
Do I need two overhead speakers for Dolby Atmos?
Two overhead pairs, one front and one rear, give the fullest Atmos effect, but a single pair mounted slightly forward of your main seat still delivers most overhead effects if your ceiling or budget only allows for one.