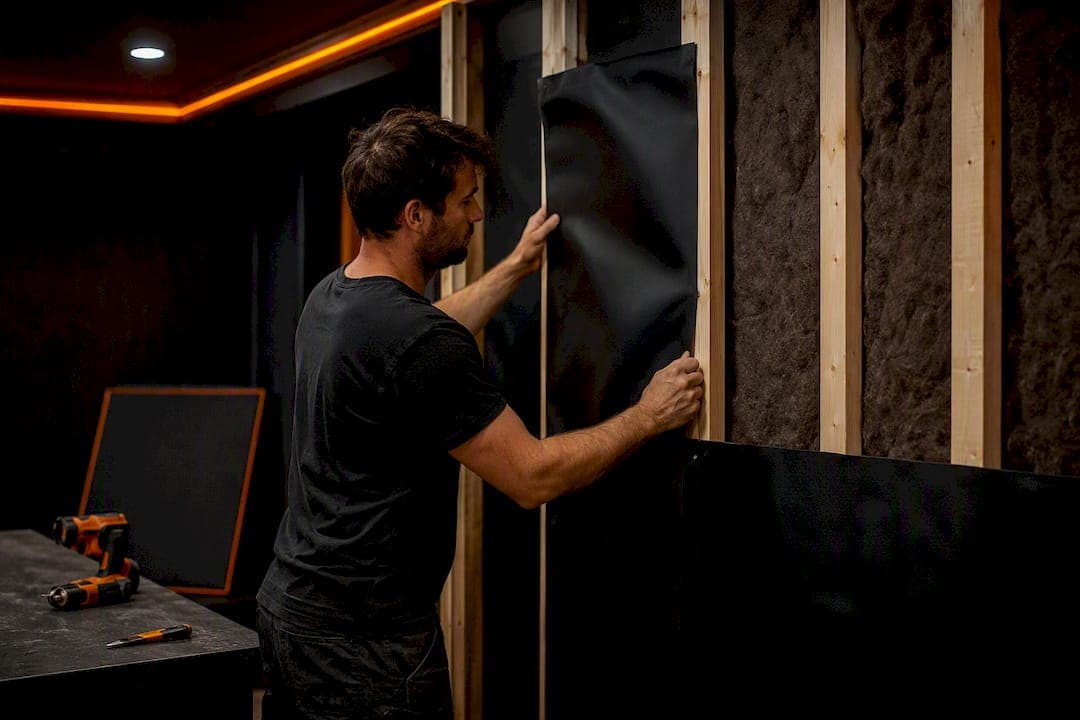
Stop the leaks first, then treat the room. That's the whole strategy in one sentence: seal every gap sound can escape through (doors, outlets, vents, windows), then add absorption, diffusion and bass traps to fix what you hear inside. Skip the order and you'll waste money.
Five fixes deliver most of the improvement before you touch drywall:
- Swap the hollow door for a solid-core door with a full perimeter gasket and an automatic door bottom.
- Run acoustic caulk around every outlet, baseboard and penetration.
- Address the HVAC run into the room, since a dead vent or open duct undoes hours of sealing work.
- Install absorption panels at the first-reflection points beside the screen.
- Add bass traps in every corner.
Pro Tip: Full low-frequency isolation, the kind that stops a subwoofer from rattling the room next door, usually needs structural work. A realistic retrofit goal is making dialogue unintelligible outside the door, per the NRC's guidance on residential sound isolation, and cutting neighbour or family complaints to near zero.
Key Takeaways
Effective soundproofing for a home theatre always sequences sealing before structural mass and structural work before acoustic treatment, since each stage only works once the previous one is done.
| Point | Details |
|---|---|
| Seal before you build | Door gaskets, acoustic caulk, and sealed outlets stop most leakage for a fraction of construction costs. |
| Isolation and treatment are separate jobs | Mass and decoupling stop sound transfer; absorption and diffusion fix clarity inside the room. |
| HVAC is a common weak point | Muffler boxes and dead vents let air flow while blocking a direct sound path through ductwork. |
| Panel thickness must match target frequency | Use 4-inch corner bass traps for low end and 2-inch panels at reflection points for clarity. |
| Professional help scopes flanking paths | JupiterAV's room assessment maps shared joists, ducts and plumbing before recommending a treatment plan. |
Table of Contents
- Your soundproofing home theatre checklist before you buy anything
- Soundproofing vs. acoustic treatment: what's the actual difference?
- Sealing the gaps that leak the most sound
- Adding mass, damping and decoupling to walls, floors and ceilings
- Choosing and placing acoustic panels, bass traps and diffusion
- Where should you put speakers and seats to fix room modes?
- Keeping HVAC and equipment noise out of your theatre
- Should you DIY this or hire a professional?
- What a professional room assessment actually delivers
- What most soundproofing advice gets backwards
- Get a professional assessment for your home theatre
- Sources
Your soundproofing home theatre checklist before you buy anything
Walk the room with a notepad before you order a single panel.
- Audit leakage points: door gaps, HVAC vents, window frames, outlets, and any wall penetration for wiring or a projector mount.
- Find your first-reflection points by sitting in the main seat and having someone slide a mirror along the side walls. Wherever you see the speaker in the mirror, that's a treatment spot.
- Mark the room corners. That's where bass traps go, regardless of anything else you decide.
- Set a budget and decide which jobs you'll DIY versus hand to a contractor.
Your starting materials list: acoustic caulk, a door sweep and gasket kit, mass-loaded vinyl (MLV), mineral wool insulation, and enough broadband absorption panels to cover the reflection points you just found.
Soundproofing vs. acoustic treatment: what's the actual difference?
These solve two different problems, and confusing them is the single most common mistake homeowners make. Soundproofing, more precisely called sound isolation, stops sound from crossing a boundary using mass, damping and decoupling. Acoustic treatment changes how sound behaves inside the room using absorption, diffusion and bass trapping.
- Isolation keeps your movie from waking the kids upstairs.
- Treatment keeps dialogue from sounding muddy in the seat you paid for.
- Neither one substitutes for the other.
Absorption panels on the walls will do nothing to stop bass from travelling through a shared floor joist. Adding drywall mass will do nothing to fix a room that sounds boomy and unclear. You need both, applied to the right problem.
Homeowners who buy a stack of foam panels expecting quieter neighbours are solving the wrong equation. STC ratings measure transmission loss between spaces, while RT60 measures reverberation inside a room, and that distinction alone should guide where your budget goes.
Sealing the gaps that leak the most sound
Air gaps leak sound disproportionately to their size. A one-centimetre gap under a door can undo the isolation value of an entire wall assembly, which is why door work comes first on every retrofit list.
- Replace a hollow-core door with a solid-core door, then add a full perimeter gasket kit and an automatic door bottom that drops a seal against the threshold when closed.
- Run acoustic caulk (not standard latex caulk) around the drywall perimeter, baseboards, and any electrical box or speaker wire penetration.
- Pack foam backer rod into larger gaps before caulking over top, especially around window and door frames.
- Fit sealed outlet gaskets behind switch plates on shared walls.
For windows, layer your defence: heavy, dense soundproof curtains for a low-cost start, a window plug (a removable insulated panel that friction-fits into the frame) for serious attenuation, or secondary glazing if the window stays in daily use. Sealing perimeter gaps and penetrations with acoustic caulk and heavy-duty door seals remains the highest-leverage retrofit move available, and it's the one most homeowners skip.
Adding mass, damping and decoupling to walls, floors and ceilings
Once the room is sealed, structural upgrades tackle whatever sound still gets through solid materials. Three strategies exist, and each solves a different part of the problem.
- Mass: A second layer of drywall, or a sound-engineered drywall product, adds weight that resists vibration. Mass-loaded vinyl (MLV) sandwiched between layers adds mass without much thickness, but mass alone struggles against low frequencies. That kick drum and subwoofer energy travels through structure regardless of how many drywall layers you stack.
- Damping: A viscoelastic compound like Green Glue, applied between two layers of drywall, converts vibrational energy into heat instead of letting it pass through. It's a low-labour upgrade during any drywall replacement.
- Decoupling: Resilient channels, or hat channel and clips, physically separate the drywall from the framing so vibration can't travel directly across. Double-stud or staggered-stud wall assemblies take decoupling further but eat into room dimensions.
Combining mass, damping and decoupling together outperforms any single strategy by a wide margin, and decoupling specifically is what determines how much bass actually escapes the room. For a straightforward retrofit, damping compound between an added drywall layer is the best cost-to-benefit ratio. Full decoupling belongs in a room going down to studs.
Choosing and placing acoustic panels, bass traps and diffusion
Panel thickness determines what frequencies get absorbed, and this is where a lot of DIY setups go wrong: thin foam panels look the part but do almost nothing below 500Hz.
- 2-inch panels handle mid and high frequencies well and work best at first-reflection points and behind the screen wall.
- 4-inch panels or corner bass traps reach down into low-mid and bass frequencies where thin foam is essentially transparent.
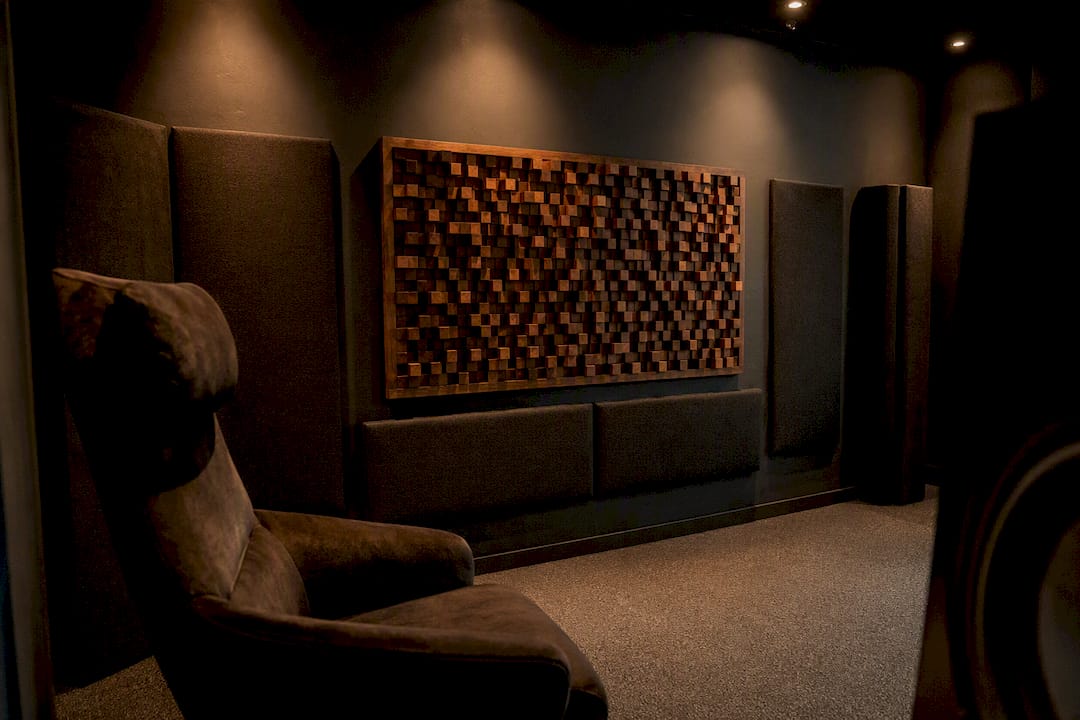
- Diffusion panels on the rear wall scatter sound rather than absorbing it, keeping the room lively instead of dead.
Balancing absorption with diffusion protects clarity without killing the room's energy, and corner bass traps do the heavy lifting on low-frequency buildup that panels alone can't touch.
Cover roughly 20 to 30% of your rear wall in diffusion, and consider a ceiling cloud above the main listening seat for early reflections you can't otherwise reach. Our own guide to acoustic panel placement and counts walks through this room-by-room.
Where should you put speakers and seats to fix room modes?
Panels and traps only work as well as your speaker geometry lets them. Bad placement creates bass nulls and peaks that no amount of treatment fully cures.
- Keep front left and right speakers equidistant from the main seat, angled slightly inward (toed in) so the tweeters cross just behind the listener's head.
- Test subwoofer placement in multiple corners; a sub near a wall boundary reinforces bass but can also create uneven peaks depending on room dimensions. Running two subs in opposite corners smooths response far more reliably than one big sub in one corner. Our subwoofer placement guide covers the walk-around test in detail.
- Avoid putting the main seat flush against the back wall. Boundary pressure zones there exaggerate bass in a way no absorption fixes.
Pro Tip: Walk the room with a phone-based RT60 or SPL meter app after any change. Cheap tools still catch obvious room mode problems before you commit to permanent treatment placement.
Keeping HVAC and equipment noise out of your theatre
An oversized duct with a dead vent (a bend that blocks direct sound travel while air still flows) is the standard fix for HVAC noise entering a theatre. Undersized ducts run fans harder and louder, so bigger is almost always quieter.
- Install a muffler box or labyrinth vent to attenuate airflow noise without choking CFM.
- Move noisy gear, especially the AV rack, outside the room or into a ventilated closet.
- Set the projector and any fan-cooled equipment on anti-vibration or soft-mount pads.
HVAC noise is frequently the overlooked flaw that undermines an otherwise well-built room, and getting duct sizing and muffler design right typically calls for an HVAC specialist rather than guesswork. If you're still deciding between a projector and a large-format TV, worth noting that projectors bring their own fan noise into the equation.
Should you DIY this or hire a professional?
Sealing work, panel installation, and basic bass traps are well within reach for a handy homeowner with a weekend and the right caulk gun. Decoupling a wall, redesigning HVAC ductwork, or floating a floor slab are different animals entirely, and they're where a professional installer earns their fee.
- Get quotes for sealing and treatment separately from structural work, since the labour and skill requirements differ enormously.
- Ask any contractor how they'll handle flanking paths (shared joists, ductwork, plumbing) rather than just the four walls.
- Scope the visit around your actual goals: isolation, clarity, or both.
- DIY-friendly: door seals, caulking, panel mounting, basic corner traps ($500 to $2,000).
- Pro territory: resilient channel walls, HVAC redesign, floating floors ($5,000 to $25,000+, several weeks).
What a professional room assessment actually delivers
A proper assessment starts with a walkthrough that maps every flanking path, not just the four walls of the room. Shared joists, ductwork and plumbing runs all carry sound past whatever treatment you put on drywall, which is why comprehensive projects map structural transmission paths early rather than treating symptoms room by room.
A typical JupiterAV project deliverable includes a room report, a panel layout keyed to your actual seating position, and ventilation recommendations sized to your HVAC system rather than a generic template.
A room built without checking the shared duct run or the joist bay above the ceiling is a room that gets "fixed" twice: once during construction, and again after the client hears the leak nobody planned for.
The panel placement and count guide and subwoofer placement resource referenced earlier both come out of that same assessment process.
What most soundproofing advice gets backwards
The conventional advice treats soundproofing and acoustic treatment as one project with one shopping list. That's the core error, and it costs homeowners money in both directions: some spend $3,000 on panels expecting quieter neighbours, and get nothing but a slightly clearer sound inside a room still leaking bass through the floor joists. Others frame an entire wall with resilient channel to chase isolation they didn't need, in a room where nobody outside really minds the noise.
The order matters more than the budget. Seal first, because gaps leak disproportionately to their size and cost almost nothing to fix. Treat second, because absorption and bass trapping only matter once the sound staying in the room is worth hearing clearly. Structural work, the double stud walls and decoupled ceilings, comes last and only if the first two stages don't get you where you need to be.
Most homeowners overbuild the parts that photograph well (foam panels) and underbuild the parts that don't (door gaskets, duct silencers). Fix that order and the budget almost always shrinks.
— JupiterAV
Get a professional assessment for your home theatre
Reading a checklist gets you most of the way there. Knowing exactly which walls carry flanking noise, which duct run needs a muffler box, and how many panels your specific room geometry actually needs is where a site visit pays for itself. JupiterAV handles the full scope: room assessment, acoustic treatment supply and installation, HVAC coordination for quiet ventilation, and relocating noisy equipment like AV racks out of the listening space entirely.

A consultation typically walks through your room's flanking paths, current door and window condition, and existing HVAC layout, then delivers a room report with a panel layout and ventilation recommendations sized to your equipment. If you're planning a new build or a retrofit and want a plan built around your actual room instead of a generic panel count, book a home theatre consultation with JupiterAV and get a scoped assessment before you buy a single panel.
Sources
- Innovative sound control strategies — Construction Canada
- Soundproofing 101: How to keep your home theater quiet — Sound & Vision
- Complete guide to home theater acoustics — HiFiReport
- Practitioner guidance on sound isolation — NRC publications