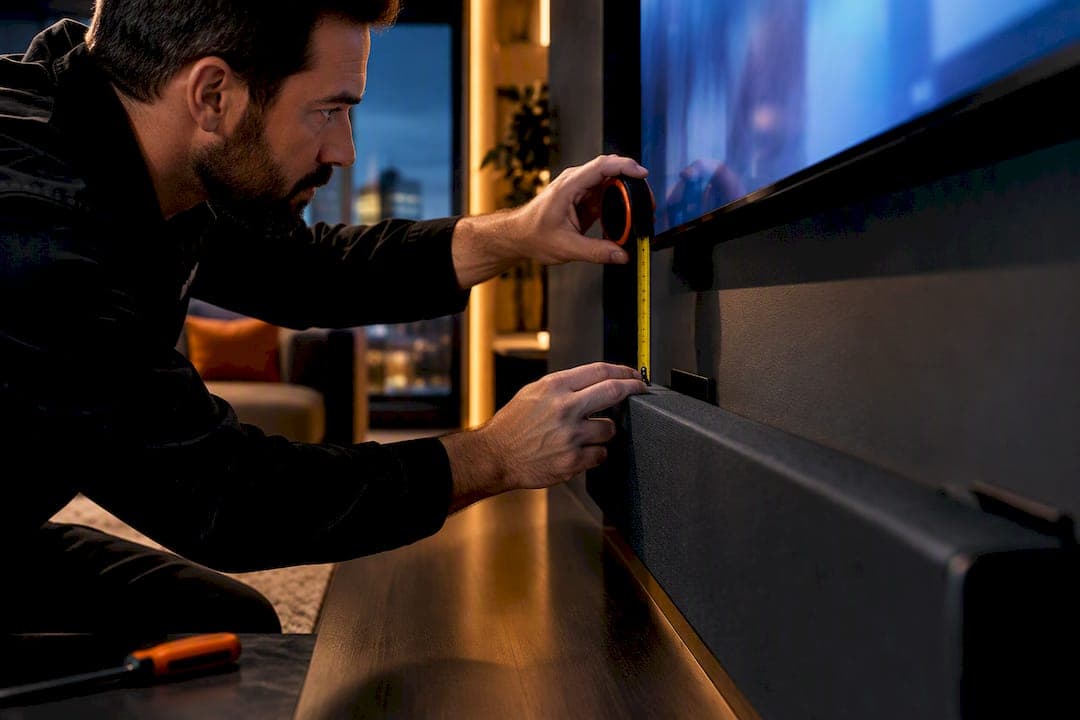
The best approach for most homes is to mount the soundbar below the TV at seated ear height, using a bracket rated for its weight or attaching it directly to an existing TV mount. This keeps dialogue aimed at your ears instead of the ceiling. The main exceptions are Dolby Atmos soundbars, which need clear ceiling reflections, and TVs mounted high over a fireplace, where a tilt mount often works better. Whatever method you choose, confirm the soundbar's weight and the mounting hardware's rating before you drill anything.
TL;DR:
- Mount the soundbar below the TV at seated ear height, leaving 1 to 2 inches of clearance to avoid blocking sensors and drivers.
- Use a bracket rated for the soundbar's weight, and consider wall mounting if you want precise height and placement control.
- For Atmos soundbars, ensure the ceiling beneath is flat and unobstructed for proper reflection of overhead channels.
- When mounting to a TV or wall, confirm all hardware ratings and use stud anchors or masonry anchors as appropriate for your wall type.
- Regularly inspect the mount every 6 to 12 months and after impacts to prevent hardware failure and potential falls.
Table of Contents
- Where should you place a soundbar relative to your TV?
- Which mounting method actually fits your room?
- How do you attach a soundbar to your TV step by step?
- How do you wall mount a soundbar under the TV?
- How should you connect and troubleshoot the soundbar after mounting?
- How often should you inspect the mount for safety?
- What do installers actually prioritize when mounting a soundbar?
- When does it make sense to call in a professional installer?
- Where can you find manufacturer guidance before you start?
- Sources
- FAQ
Where should you place a soundbar relative to your TV?
Sound quality depends more on height than most people expect. The soundbar's acoustic centre, not just its case, should sit close to your seated ear level, and you should leave a small gap, roughly 1 to 2 inches of clearance, under the TV so the bar doesn't block infrared sensors or its own front-firing drivers.
Placement below the TV is the more common choice because it lines up naturally with ear height for most seating and keeps the screen unobstructed. Mounting above the TV works when there's no room underneath, such as a TV sitting directly on a low console, but it usually means angling the bar down slightly so dialogue doesn't sound like it's coming from above your head. Our guide to TV mounting height covers the viewing-ergonomics side of this same decision.
If the soundbar has upward-firing drivers for Dolby Atmos, the rules shift again. Those drivers need an unobstructed path to the ceiling so the overhead channels can bounce back down to the listening position.
- Keep the acoustic centre close to seated ear height, not the top or bottom edge of the cabinet.
- Leave 1 to 2 inches of clearance below the TV for drivers and sensors.
- For Atmos bars, check for a flat, unobstructed ceiling directly above the listening area.
- Angle the bar toward the seating position if it must sit above the TV.
Our piece on Atmos speaker placement goes deeper into ceiling reflections if you're setting up an object-based surround system.
Which mounting method actually fits your room?
Before picking up a drill, match your situation to one of four common methods. Each has a different failure point, so the right choice depends on what your TV and wall already give you.
- Attach to the TV or its existing mount: if the TV has VESA mounting posts and the soundbar bracket is compatible, this keeps the soundbar aligned with the screen even if the TV is later repositioned.
- Wall-mount under the TV independently: this suits TVs with no accessible mounting posts, or rooms where the soundbar needs a slightly different height than the TV for acoustic reasons.
- Attach to an articulating or full-motion arm: when the TV will be tilted, pulled out, or swivelled, mounting the soundbar to the same arm keeps the sound aimed correctly no matter the angle.
- Place it on a console or shelf: the simplest fallback, with no drilling required, though it depends on having enough depth in front of the TV and can trap sound if the shelf has a lip or overhang.
The first option is usually the cleanest for standard flat-wall installs. The third matters more than people assume: an articulating mount that only supports the TV, with the soundbar fixed separately to the wall, will throw the sound off-axis every time the TV is angled. Console placement remains popular for its simplicity, but a soundbar sitting inside a cabinet or behind a lip will lose clarity compared with one mounted in open air at the same height.
How do you attach a soundbar to your TV step by step?
Once you've confirmed the soundbar has mounting slots or screw posts on its back or underside, and that the bracket or TV mount can carry its weight, the installation itself is straightforward.
Tools and hardware: a stud finder, a level, a tape measure, a drill with the correct bit sizes, the mounting screws included with the bracket (or matched to the TV's VESA posts), and anchors rated for the wall type if you're not hitting a stud.
- Check the TV's rear panel or mount plate for VESA-style posts or slots that match the soundbar bracket's spacing.
- Confirm the combined weight of the soundbar sits within the bracket's and TV mount's rated capacity.
- Measure and mark the mounting points, keeping the 2-inch clearance manufacturers commonly recommend below the TV.
- Hang the bracket on the posts or fasten it to the mount, then secure the soundbar to the bracket with the included screws.
- Give the soundbar a firm tug test and check it doesn't shift, tilt, or rattle before running cables.
Pro Tip: Hold the soundbar in place with painter's tape for a minute before final fastening: it lets you check IR sensor line-of-sight and driver clearance without redrilling.
The most common mistakes are mismatched hole spacing between bracket and soundbar, using only one or two screws where the bracket calls for four, and mounting too close to the TV bottom so that the drivers or remote sensor could be blocked.
How do you wall mount a soundbar under the TV?
Independent wall mounting gives you more control over height but shifts the responsibility for a secure hold entirely onto the wall itself. Start by deciding which bracket type suits the room: a fixed bracket for a standard flat-wall install, a tilt bracket if the soundbar sits above ear level and needs angling down, or an articulating bracket if it must share movement with an articulating TV arm.
Locate studs with a stud finder before drilling. Drywall anchors rated above the soundbar's weight are acceptable for lighter bars on their own, but for anything beyond a small unit, aim to land at least some fasteners into a stud, or use a mounting plate that spreads the load across two studs.
Masonry, stone, and fireplace surrounds change the job considerably: standard drywall anchors won't hold, and drilling into stone risks cracking the surface if you don't use the right masonry bit and anchor. Our guide on mounting a TV on stone covers the anchor types that work, and the same principles apply to a soundbar bracket. If the TV itself sits over a fireplace, our TV over fireplace guide walks through when a tilt mount becomes necessary.
- Match the bracket's weight rating to the soundbar's actual weight, not just its size class.
- Locate studs first, and use rated anchors only when studs aren't an option.
- Treat stone, brick, and concrete as jobs needing masonry-specific anchors and bits.
- Level the bracket before final tightening, and leave room for cable access behind the bar.
How should you connect and troubleshoot the soundbar after mounting?
Connection order matters as much as the physical mount. HDMI eARC or ARC should be your first choice, since it carries Atmos audio and lets the TV remote control the soundbar's volume through HDMI-CEC. Optical is the next best option if your TV lacks ARC, with Bluetooth or an analog cable as a last resort for basic stereo sound.
After mounting, check three TV settings: audio output set to the external speaker or ARC device, HDMI-CEC enabled, and the digital audio format set to bitstream or pass-through rather than PCM if you want surround formats to pass through intact. If cables run behind drywall, follow local electrical code and keep low-voltage AV lines separate from power, leaving a pull-string or accessible conduit for future upgrades.
- No sound: recheck the TV's audio output setting and confirm the correct HDMI input is selected.
- Remote doesn't control volume: verify HDMI-CEC is turned on for both TV and soundbar.
- Lip-sync issues: power-cycle both devices in sequence, TV first, then soundbar.
- Atmos not engaging: confirm the format is set to bitstream, not PCM.
Our Sonos for TV audio piece has more on aligning sound systems with TV placement if you're troubleshooting a multi-device setup.
How often should you inspect the mount for safety?
Give the bracket and fasteners a visual and mechanical check every 6 to 12 months, and immediately after any bump or impact, tugging gently to confirm nothing has loosened. Prioritize screws into studs over drywall anchors alone, and match anchor ratings to the combined weight of the soundbar and bracket, not just the bar's listed weight.

A Canadian recall of wall-mounted speaker mounts was issued after reports that mounts could detach and fall, posing an injury risk to anyone nearby. It's a reminder that hardware failure isn't a hypothetical, and that checking your mount periodically costs a lot less than dealing with a fallen soundbar. Call a professional for masonry, in-wall wiring, or any surface that isn't standard drywall over studs.
What do installers actually prioritize when mounting a soundbar?
Professionals set TV height for viewing first, then align the soundbar to the listening position rather than the other way around. In practice that often means a tilt mount, a recessed low-voltage run to hide cables, or a custom bracket built for an odd surface. A fireplace surround, a stone accent wall, or a multi-room audio system are the situations where a custom solution earns its cost: the acoustic gain and the cleaner look are hard to match with an off-the-shelf bracket.

When does it make sense to call in a professional installer?
DIY mounting works well for a standard drywall install with a compatible bracket, but stone surrounds, fireplace surrounds, and any job needing in-wall power or low-voltage runs raise the stakes considerably. Sales, installation, and service for home theatre and whole-home audio setups, including soundbar and speaker mounting, can be part of broader immersive sound and smart living solutions.

- Stone, brick, or fireplace surrounds where standard anchors won't hold.
- In-wall power or low-voltage cable runs that need code-compliant work.
- Multi-room or Atmos systems where placement affects the whole room's acoustics.
If your install falls into any of those categories, or you'd simply rather not be the one on the ladder, you can request a quote or on-site assessment through JupiterAV's site.
Where can you find manufacturer guidance before you start?
Check your soundbar's own install manual for exact hole spacing and weight limits, since these vary by model even within the same brand. For Atmos-specific placement, Dolby's own setup guide covers ceiling reflection requirements in more detail than most retail packaging does.
Sources
- How (and Where) To Mount a TV and Sound Bar — Yamaha hub
- Dolby Atmos sound bar setup guide — Dolby Professional
- How to connect a soundbar to a TV — The Product Analyst
- VIVO mount recall — Government of Canada recall database
- Soundbar mount height guide — SoundbarHQ
- Samsung soundbar install manual — Samsung
FAQ
Do all soundbars have mounting holes or slots?
No, not every soundbar is built for wall or bracket mounting. Check the underside and rear of your model for screw posts or slots before buying a bracket, since some compact or budget bars are designed for shelf placement only.
Should you mount a soundbar above or below the TV?
Below is the more common and generally preferred placement because it lines up with seated ear height and avoids blocking the screen. Above the TV works when there's no space underneath, though the bar often needs a slight downward tilt to aim sound at the seating area.
How do you install a soundbar mount on a TV?
Confirm the TV has VESA posts or slots matching the bracket, check the combined weight against the mount's rating, then fasten the bracket to the TV or its mount before securing the soundbar. A full step-by-step sequence includes measuring for clearance and testing the connection for stability before running cables.
Does mounting a soundbar affect sound quality?
Yes, height and obstruction both change how the sound reaches your ears. Placing the acoustic centre near seated ear level with clear space around the drivers preserves clarity, while a soundbar tucked into a shelf or blocked by a TV edge can dull dialogue and reduce the range of Atmos overhead effects.