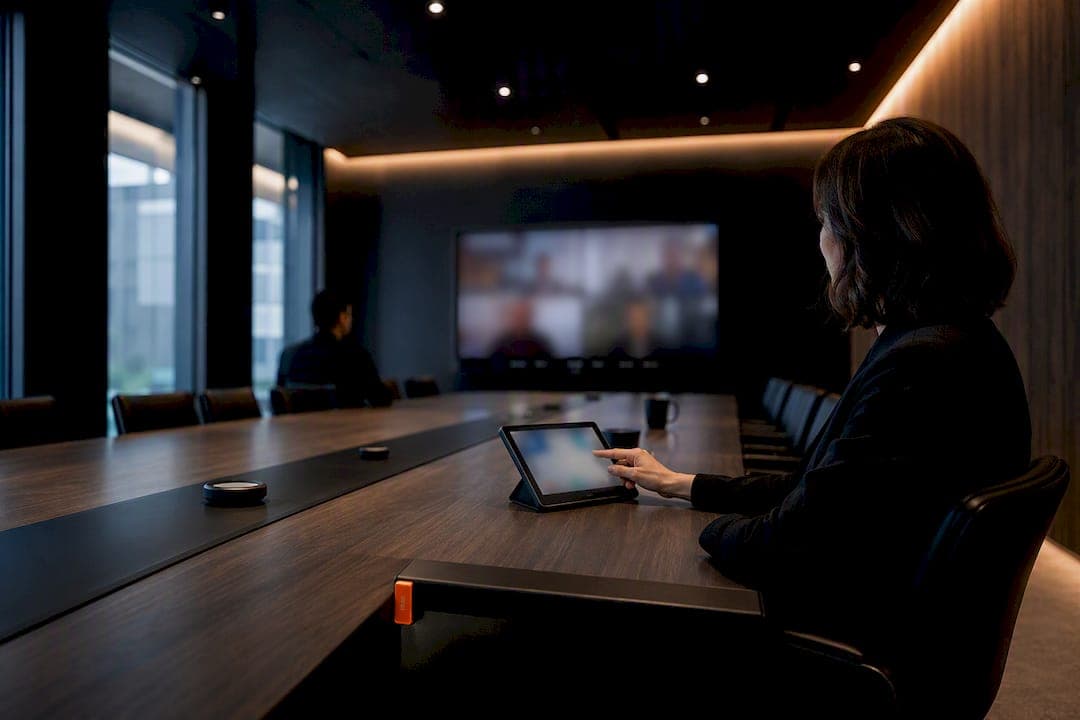
Good conference room AV design starts with audio, not screens. Fix sightlines and platform compatibility next, then classify every room into a tier: huddle spaces get a soundbar and a wide-angle camera, standard rooms need microphone arrays and AI framing, and boardrooms demand multi-camera coverage with dedicated DSP. Anything past a small huddle room needs formal commissioning and a qualified integrator to sign off before anyone books a meeting there.
TL;DR:
- Microphone arrays should be chosen based on room size and table layout, with larger rooms requiring multi-zone microphones for full coverage.
- Camera selection depends on room depth, with fixed wide-angle cameras suitable for small rooms and multi-camera setups necessary for large spaces over 20 feet.
- Display size must ensure visibility from the farthest seat, following the 4H, 6H, or 8H legibility rules, and should incorporate high brightness for rooms with natural light.
- Acoustic treatment should target an RT60 of 0.4 to 0.6 seconds, covering 25% to 40% of exposed hard surfaces with absorptive material to improve speech clarity.
- Budgeting should prioritize audio and commissioning over display resolution or secondary cameras, with typical costs scaling from moderate for small rooms to higher for larger, multi-camera configurations.
Table of Contents
- What is conference room AV design?
- The six-layer AV stack and what belongs in your BOM
- How do you design conference room audio that actually works?
- Which camera setup fits your room's depth and shape?
- How big should your display be and where should it go?
- What acoustic and lighting targets should you design to?
- Planning cabling, PoE, network and rack infrastructure
- Choosing control systems and platform-certified hardware
- What should a commissioning and UAT checklist include?
- What does a conference room AV budget actually look like?
- What should you require in an AV procurement RFP?
- Lessons from the field on installation and handover
- Designing for how people actually sit and use the room
- What accessibility and industry standards apply to AV design?
- Editorial view: design around people, not product logos
- How JupiterAV designs, installs and commissions conference rooms
- Where to go for deeper technical standards
- Sources
- FAQ
What is conference room AV design?
Conference room AV design is the process of specifying, laying out and integrating the display, camera, audio, compute and control systems that let people in a room communicate with people who aren't. That last part matters more than it used to. AVIXA's guidance for AV professionals frames the whole discipline around human experience rather than gear lists, and that shift explains why so many "upgraded" rooms still frustrate the people using them.
The old model specified for the people physically in the room: a big screen, a ceiling mic, done. The current model has to serve two audiences simultaneously, in-room and remote, and remote users are almost always the ones who get shortchanged. They can't see who's talking, can't hear the person at the far end of the table, and can't read the whiteboard someone is scribbling on. Boardroom AV setup and standard meeting room technology now live or die on how well they solve that asymmetry, not on how sharp the display looks to the people already in the seats.
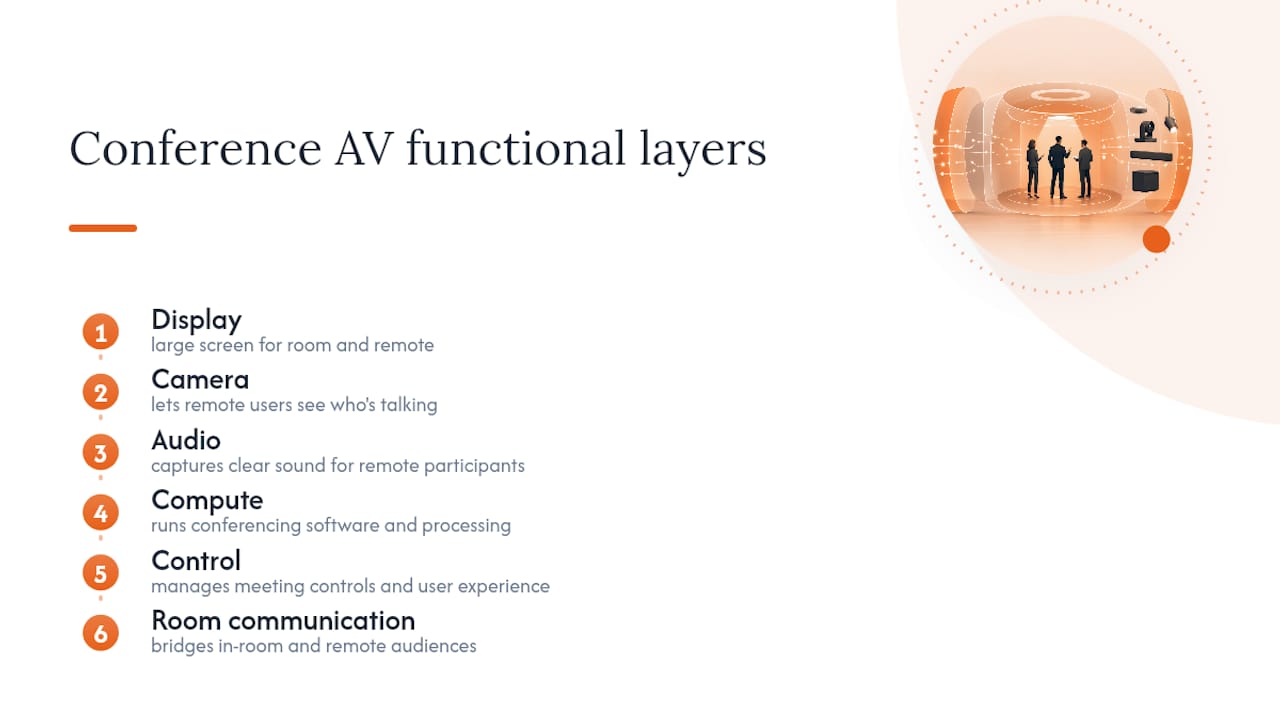
Think of the room as a stack of six functional layers rather than a shopping list. Buyers who spec by product name (a particular camera model, a specific soundbar) tend to overspend in one layer and starve another. Buyers who spec by function get balanced systems that actually work on day one.
The six-layer AV stack and what belongs in your BOM
Vibe's setup guide frames the stack this way, and it holds up across room sizes.
- Display layer: screen or projector sized to room depth, plus mounting hardware and any anti-glare treatment.
- Camera layer: fixed wide-angle, AI auto-framing, or PTZ units, chosen by room depth and table shape.
- Audio layer: microphones, speakers, and acoustic echo cancellation hardware, specified for coverage rather than aesthetics.
- Compute layer: the room PC, appliance, or bring-your-own-device (BYOD) hub that actually runs the meeting platform.
- Platform integration layer: certified peripherals and drivers for Zoom Rooms, Microsoft Teams Rooms, or Webex.
- Collaboration tools layer: digital whiteboarding, wireless content sharing, and note-taking integrations layered on top.
A bill of materials organized by these six layers, rather than by brand, forces a useful conversation with any integrator: what exactly is being spent in each layer, and does that allocation match how the room will actually be used? A generic BOM line-item set includes the display and mount, camera and mounting arm, microphone units and cabling, DSP or mixer, speakers, the compute appliance, licensing for the platform, and a control touch panel. Rooms that skip the DSP line to afford a bigger screen are the ones that generate the most support tickets six months later. Latentech's setup guide makes the same point from the installer's side: undocumented, mis-balanced BOMs are the single biggest cause of rework.
How do you design conference room audio that actually works?
Audio failures ruin meetings faster than video failures, and it isn't close. A slightly soft camera image is tolerable. Garbled or echoing audio ends the meeting early, every time. That's why audio-first prioritization shows up across nearly every serious AV design reference: get the microphones, speakers, and digital signal processing (DSP) right before spending another dollar on the screen.
Microphone selection should follow room tier and table geometry, not personal preference. Huddle rooms under roughly 100 square feet can run on the built-in array in a video bar. Standard rooms need ceiling or table microphone arrays with beamforming, typically one array per 8 to 10 feet of table length. Boardrooms and larger rooms need multiple zoned microphones with independent gain control, because a single array can't cover a 20-foot table without picking up HVAC noise at the far end.
Pro Tip: Walk the room and talk in a normal conversational voice from every seat before finalizing microphone placement. If you have to raise your voice to be heard across the table, the remote participants definitely can't hear you either.
DSP handles two jobs that make or break call quality: acoustic echo cancellation (AEC) and automatic gain control (AGC). AEC strips the far-end audio out of what the near-end microphones pick up, so remote participants don't hear their own voice looping back. AGC evens out volume so a soft-spoken person and someone leaning into the mic sound comparably loud on the other end. For enterprise deployments, hardware DSP units generally outperform the processing baked into consumer soundbars, mostly because dedicated DSP hardware doesn't get overloaded when multiple microphones and speakers are running simultaneously in a larger room.
Speaker deployment matters just as much as microphone placement. A few working rules:
- Distribute speakers rather than relying on one central unit, especially in rooms over 20 feet long.
- Keep speakers away from hard, reflective surfaces like glass walls or bare tables to reduce flutter echo.
- Match speaker output to room volume, not room square footage. A room with a 12-foot ceiling needs more headroom than a room with an 8-foot ceiling at the same floor area.
- Pair speaker placement decisions with the acoustic treatment plan. Good Atmos speaker placement principles for overhead coverage translate directly to conference room ceiling speaker layouts, even outside home theatre contexts.
Which camera setup fits your room's depth and shape?
Camera choice depends almost entirely on how deep the room is and how the table is shaped, not on budget alone. A fixed wide-angle camera works fine in a huddle room where everyone sits within 8 feet of the screen. Push that same camera into a 25-foot boardroom and the people at the far end become unreadable dots.
Room depth maps to camera type roughly like this:
- Under 12 feet (huddle/small rooms): a single wide-angle camera with a 120 degree or wider field of view.
- 12 to 20 feet (standard rooms): AI auto-framing cameras that detect speakers and crop the image, or a single PTZ (pan-tilt-zoom) unit.
- Over 20 feet (large rooms and boardrooms): multi-camera setups combining a wide room shot with a PTZ or auto-tracking camera for close-ups, switched automatically based on who's speaking.
Placement rules matter as much as camera type. Mount cameras at eye level relative to a seated participant, roughly 48 to 52 inches from the floor, so remote attendees get a natural face-on view rather than looking up someone's nose. Never place a camera with a window directly behind the presenter; backlighting turns faces into silhouettes regardless of camera quality. Where possible, mount the camera directly above or below the display so eye contact reads as natural rather than off-axis.
Table geometry changes everything about camera planning. A boat-shaped or U-shaped table dramatically improves remote framing compared with a long rectangular table, because it naturally angles participants toward the front of the room instead of lining them up in profile. Where a rectangular table is unavoidable, mount the camera on the long wall rather than the short wall, since that orientation captures faces rather than the backs of heads. Rooms with rectangular tables longer than 16 feet almost always need a second camera to avoid the "far end of the table looks like a hostage video" problem that plagues badly planned boardrooms.
How big should your display be and where should it go?
Display sizing follows a simple rule that most rooms get wrong: the screen has to be legible from the farthest seat, not just look impressive from the front row. Standard sizing guidance uses the 4H, 6H, or 8H rules, meaning the farthest viewer should sit no more than four, six, or eight times the display height away, depending on whether the content is detailed (spreadsheets, fine text) or simple (video, slides with large fonts). A simpler shortcut for boardrooms: the display diagonal should be roughly half the room's depth. A 24-foot-deep boardroom wants close to a 12-foot equivalent of screen real estate, usually split across two displays.
Brightness matters more in rooms with windows than most buyers plan for. Rooms with significant natural light need displays rated for at least 700 to 1,000 nits to stay legible against glare; a standard 350-nit commercial display will wash out completely by mid-afternoon in a west-facing room.
- Mount displays with the bottom edge roughly 48 inches from the floor so seated viewers aren't looking up.
- Use dual displays when the room needs to show both video participants and shared content simultaneously, rather than switching between them.
- Keep the primary display centred above or beside the camera to preserve natural eye contact.
- In rooms combining displays with acoustically transparent screens, confirm speaker placement behind the screen doesn't compromise the display's viewing cone.
What acoustic and lighting targets should you design to?
Acoustics and lighting decide whether a well-specified AV system actually performs, and both are cheaper to fix before the gear goes in than after. RT60, the time it takes sound to decay by 60 decibels in a room, is the number to ask for. Recommended RT60 targets generally sit between 0.4 and 0.6 seconds for standard meeting rooms, tightening toward 0.4 seconds for boardrooms where speech clarity for remote participants is critical.
The room that looks finished isn't always the room that sounds finished. A glass-walled boardroom with a polished table and no acoustic treatment can measure well over 1.0 second RT60, more than double the recommended target, which means every remote call sounds like it's happening in a stairwell.
Hitting that target usually means treating 25% to 40% of exposed hard-surface area with absorptive material, whether that's acoustic panels, fabric wall coverings, or ceiling baffles. A practical office acoustic treatment guide covers panel placement and coverage math in more depth than most integrators walk clients through.
Lighting targets run parallel to acoustic ones. Aim for even illumination on faces, roughly 300 to 500 lux measured at seated head height, using 4000K colour temperature for a neutral, non-yellow, non-clinical look on camera. Manage windows with motorized blinds rather than relying on manual ones nobody adjusts consistently, since backlit windows defeat even a well-placed camera.
- Target RT60 of 0.4 to 0.6 seconds depending on room tier.
- Treat 25% to 40% of hard surfaces with absorptive material.
- Keep face-level lighting at 300 to 500 lux, 4000K colour temperature.
- Specify HVAC systems rated NC-30 or quieter for rooms adjacent to mechanical equipment.
HVAC noise deserves its own line item. A room with excellent microphones and acoustic panelling still sounds bad on calls if the ceiling diffuser is rated NC-40 or louder. NC-30 is the practical ceiling for rooms where speech intelligibility matters, and it's worth confirming with mechanical engineers before construction locks in duct sizing.
Planning cabling, PoE, network and rack infrastructure
Infrastructure planning determines whether a room stays reliable for five years or turns into a maintenance headache within six months. Cisco's medium collaboration room design guide lays out concrete mounting, power and cabling specs worth borrowing regardless of which platform a room ultimately runs.
- Rack layout should leave airflow clearance front and back, with heat-generating gear (amplifiers, DSP, network switches) spaced to avoid stacking hot components together.
- Label every cable and port at both ends; unlabelled racks are the number one reason service calls take twice as long as they should.
- Budget Power over Ethernet (PoE) capacity with 20% spare port capacity for future cameras, access points, or displays.
- Choose conduit, core drilling, or floor raceways based on the building: conduit for new construction, core drilling for concrete-slab retrofits, and floor raceways when running cable through occupied floors without disruption.
- Put AV traffic on its own VLAN with quality-of-service (QoS) prioritization so video conferencing doesn't compete with general office traffic during peak hours.
Choosing control systems and platform-certified hardware
The biggest experience gap in conference rooms isn't hardware quality, it's how many steps it takes to start a meeting. Appliance-based rooms, where a dedicated room computer runs a certified platform interface, consistently outperform bring-your-own-device (BYOD) setups on reliability, because the room isn't dependent on someone's laptop having the right drivers or dongle.
Certified conferencing appliances simplify day-to-day operation because a single manufacturer's tested hardware and software combination reduces the troubleshooting surface compared with mixing components from different vendors. Rooms built around Zoom Rooms, Microsoft Teams Rooms, or Webex certified devices tend to generate fewer support tickets than ad hoc BYOD rooms, largely because certification testing already caught the compatibility problems before installation.
Minimum control features worth requiring in any RFP:
- One-touch join, so calendar-integrated meetings start without dialing codes or searching for links.
- Saved presets for camera framing and microphone zones by room configuration.
- Centralized lighting and motorized blind control accessible from the same touch panel running the meeting.
- Remote monitoring so IT can diagnose issues before someone walks into a dead room five minutes before a client call.
What should a commissioning and UAT checklist include?
Commissioning is the step most rushed installations skip, and it's the single biggest predictor of whether a room works reliably or generates complaints in its first month. Cisco's UAT criteria for video-centric rooms include cross-platform test calls and saved configuration backups, both worth requiring from any integrator.
- Run test calls on every platform the organization actually uses (Zoom, Teams, Webex), not just the primary one.
- Verify microphone coverage from every seat, including corners and the far end of the table.
- Confirm echo cancellation performance with a real two-way call, not a single-ended test.
- Validate camera framing across typical seating scenarios, including a nearly empty room and a fully occupied one.
- Require the integrator to hand over a signal flow diagram, finalized BOM, rack elevation drawing, and configuration backup files.
- Schedule a training session for facilities staff and frequent room users, plus a documented escalation path for ongoing support.
What does a conference room AV budget actually look like?
Budget ranges vary enormously by tier, and layer-level budget guidance is useful for setting expectations before a formal quote comes in. The ranges below reflect equipment and installation for typical rooms; they exclude construction, structural work, or major electrical upgrades.
| Room tier | Typical capacity | Approximate budget range | Primary cost drivers |
|---|---|---|---|
| Huddle | 2 to 4 people | Moderate budget typical for basic AV | Video bar, mounting, basic cabling |
| Standard | 5 to 10 people | Moderate to higher budget typical for mic arrays, DSP, dual displays | Mic arrays, DSP, dual displays, control panel |
| Large / Boardroom | 10 to 20+ people | Higher budget typical for multi-camera and zoned audio systems | Multi-camera systems, zoned audio, acoustic treatment, custom rack |
The biggest mistake in budgeting is treating audio and commissioning as optional line items to cut when a project runs over. Cut display resolution before you cut microphone count. Cut a secondary camera before you cut the DSP unit. Hidden costs that catch buyers off guard include structural blocking for wall-mounted displays, acoustic treatment discovered necessary only after a room measures poorly, and electrical work needed to add dedicated circuits for rack equipment. Budget an extra 10% to 15% contingency for any room in an existing building rather than new construction.
What should you require in an AV procurement RFP?
A well-structured RFP separates integrators who understand the work from those quoting off a product catalogue. Require these deliverables before comparing prices:
- A documented site survey, including photos and measurements of the actual room, not a generic template.
- Signal flow diagrams and rack elevation drawings submitted with the proposal, not promised after the contract is signed.
- A line-item BOM broken out by the six functional layers, so you can compare apples to apples across bids.
- A written commissioning and UAT plan with specific test criteria, not a vague "we'll test it" line.
Ask every bidder pointed questions: which platforms are their proposed devices certified for, what's the warranty term on major components, do they stock spare parts locally, and will they provide as-built documentation at handover. A bid that skips the site survey, quotes generic equipment lists without room-specific reasoning, or can't answer basic certification questions is a red flag worth rejecting outright, regardless of price.
Lessons from the field on installation and handover
Years of installing boardroom AV setups across businesses of every size teaches you where theory and practice diverge. Wire routing matters more than most spec sheets suggest: running speaker cable and network cable in separate conduits, even short runs, prevents interference issues that are miserable to diagnose after drywall closes. Discreet speaker placement, ceiling-recessed rather than surface-mounted where structurally possible, keeps a boardroom looking like a boardroom rather than a home theatre showroom.
At handover, the integrator typically provides configuration backups, a labelled rack diagram, and pre-configured presets so staff aren't relearning the system every time someone new books the room. Combined with services spanning security and CCTV integration and low-voltage wiring, that documentation habit carries over from residential installs to commercial AV projects alike.
Designing for how people actually sit and use the room
Ergonomics decides whether a technically excellent room gets used correctly or gets fought with daily. Control placement is the clearest example: a touch panel mounted at the head of the table works for whoever sits there, but if the panel isn't reachable or visible from the doorway, people default to fumbling with cables instead of using the system as designed.
Seating arrangement affects more than comfort. A table that forces people to twist away from the camera to see the shared display creates awkward, disengaged body language on remote calls, even when the technology performs flawlessly. Position the display and camera so the natural sightline toward content also faces the camera, not perpendicular to it.
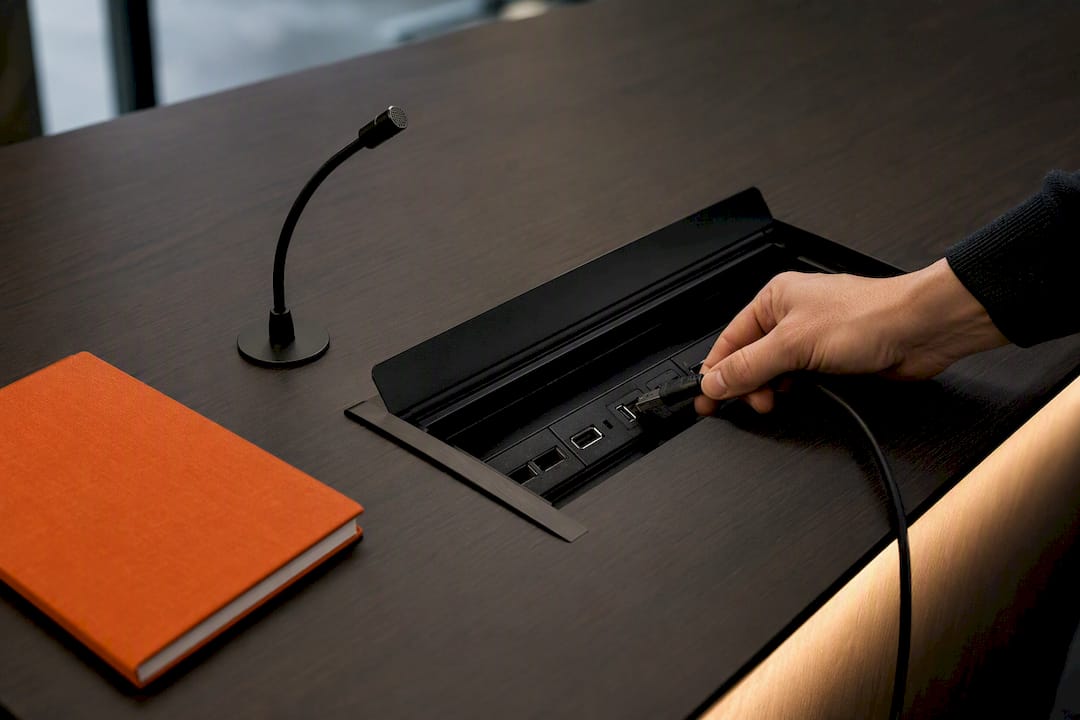
Cable management at the table itself matters more than most designs account for. Pop-up connectivity boxes with HDMI and USB-C, recessed into the table surface, keep people from routing cables across the floor or reaching under furniture. Rooms with poor table-level connectivity see far more BYOD friction, because people default to wireless casting workarounds that add latency and connection failures.
Height-adjustable elements, whether that's the display mount, the table itself, or camera positioning, matter for accessibility as much as comfort. A control panel mounted too high for someone using a wheelchair isn't a minor oversight, it's a functional failure of the room's core purpose: letting everyone participate equally.
What accessibility and industry standards apply to AV design?
Accessibility compliance isn't optional in most commercial and institutional settings, and it shapes several design decisions beyond the obvious ones. Control panels and touch interfaces should sit within reach ranges compliant with accessibility standards like the Americans with Disabilities Act (ADA) in the US or equivalent accessibility codes elsewhere, generally between 15 and 48 inches from the floor depending on approach direction. Closed captioning support on the meeting platform should be enabled by default, not treated as an optional feature someone has to remember to turn on.
Industry certification matters on the equipment side too. Devices certified for Zoom Rooms, Microsoft Teams Rooms, or Webex have passed vendor interoperability testing, which reduces the chance of firmware conflicts or dropped features after a platform update. AVIXA's Certified Technology Specialist (CTS) credential is worth asking about when vetting integrators, since it signals training against recognized industry standards rather than ad hoc installation practices.
Beyond formal codes, good design anticipates diverse needs: hearing loop compatibility for participants using hearing aids, adjustable table heights or clear floor space for wheelchair users, and visual alerting alongside audio alerts for emergency notifications. None of this is exotic engineering. It's mostly a matter of specifying it up front instead of retrofitting it after a complaint.
Editorial view: design around people, not product logos
The industry's biggest mistake is letting product catalogues drive design decisions instead of starting from how a room actually gets used. Specify for the people and the use cases first, meetings with three people versus meetings with fifteen, frequent external clients versus internal-only teams, then let those answers dictate the six-layer stack, not the other way around.
Future flexibility deserves more weight than most procurement processes give it. Rooms built around modular components, a DSP that accepts add-on cards, a rack with spare PoE capacity, a mounting system that accommodates a larger future display, cost marginally more up front and save entire re-installations down the line. Collaboration tools that live inside the room's core workflow rather than bolted on as separate apps reduce daily friction in ways a spec sheet never captures.
— JupiterAV
How JupiterAV designs, installs and commissions conference rooms
Every hybrid meeting exposes bad design fast, and fixing it after the fact costs more than getting it right the first time. The company works directly with businesses and property managers across the design, installation and commissioning process for boardrooms, standard meeting rooms and multi-room commercial buildouts, starting with a site survey and ending with training and handover documentation usable by facilities teams.

A typical engagement starts with a needs assessment covering room usage patterns, platform requirements, and existing infrastructure, followed by a design proposal broken out by function rather than brand name. From there, the provider handles procurement, installation, low-voltage wiring, and rack build-out, then runs full commissioning and cross-platform test calls before handover. Beyond conference rooms, the same team supports Commercial AV & Sales, security and CCTV integration, and smart building automation, so a single point of contact can scope a boardroom alongside adjacent building systems instead of coordinating three separate vendors. Reach out through JupiterAV's site to schedule a site survey and get a proposal built around your room's actual dimensions and use cases, not a generic package.
Where to go for deeper technical standards
For sizing rules, sightlines, and acoustic targets, AVIXA's conference room design guidance remains the reference most AV professionals build from. Cisco's medium collaboration room design guide covers mounting and commissioning specifics in more depth than most buyers need day to day, but it's a solid check against a proposed design. Before finalizing equipment, check the current certification pages for Zoom Rooms, Microsoft Teams Rooms, and Webex directly, since certified device lists change as platforms update their requirements. Coordinating conduit and blocking with architectural drawings is easier with a proper BIM clash detection workflow if your project involves new construction.
Sources
- Conference room design guide for AV professionals | AVIXA
- Medium collaboration room — video centric design guide | Cisco
- Conference room AV setup guide | Vibe
- Conference room AV setup guide | Latentech AV
FAQ
What is an AV system in a conference room?
An AV system in a conference room combines display, camera, microphone, speaker, and control components so people in the room and joining remotely can see, hear, and collaborate on equal footing. The six functional layers, display, camera, audio, compute, platform integration, and collaboration tools, work together as one system rather than as separate purchases.
How do I set up an AV system for a meeting room?
Start by classifying the room's tier (huddle, standard, or boardroom), then design audio and camera coverage before finalizing display size, since audio problems ruin meetings faster than video ones. Follow that with acoustic and lighting checks, infrastructure planning for cabling and power, and a formal commissioning process before the room goes live.
What are the recommended design standards for a conference room?
Recommended standards include RT60 targets of 0.4 to 0.6 seconds depending on room size, display sizing using the 4H/6H/8H legibility rules, and lighting around 300 to 500 lux at 4000K on participants' faces. Platform certification for Zoom Rooms, Teams Rooms, or Webex and accessibility compliance for control placement are also standard expectations in professional installs.
What AV equipment do I need for a conference room?
At minimum, expect a display sized to room depth, a camera matched to room depth and table shape, a microphone and speaker system with dedicated DSP, a compute appliance or certified room system, and a control panel for one-touch meeting join. Larger rooms add multi-camera systems, zoned audio, and centralized lighting and blind control.
How much does conference room AV design cost?
Conference room AV system costs vary significantly depending on room size and equipment tier. For current pricing, consult JupiterAV's site.