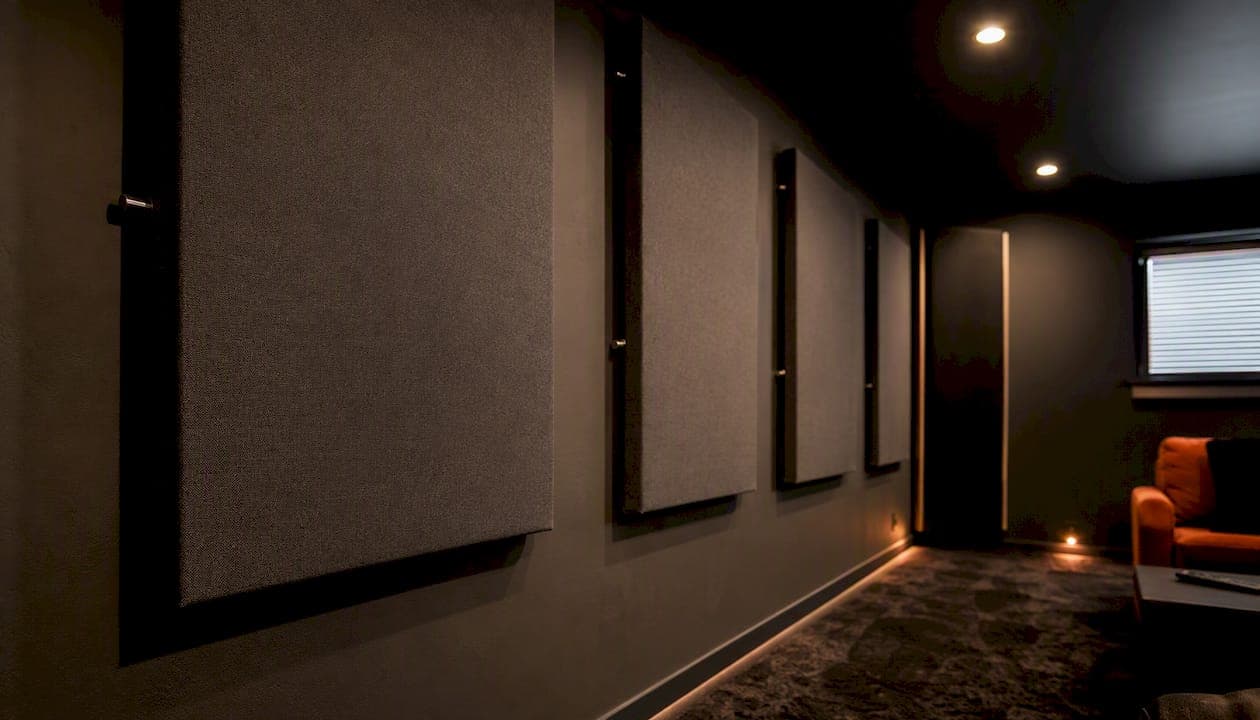
Acoustic panels will meaningfully improve most home theatres when you treat first reflections and corners first. Start with the mirror test to find your side-wall and ceiling reflection points, add four corner bass traps, and you will hear a difference before you hang a single decorative panel. In Canada, a basic DIY treatment runs roughly $300–$700 CAD for a small room; a mid-range prebuilt panel setup lands around $800–$1,800 CAD; and a professional design-and-install package typically starts at $2,500–$5,000 CAD depending on room size and finish.
Quick first steps:
- Run the mirror test to locate your first reflection points (side walls and ceiling)
- Add four corner bass traps before anything else
- Treat the two lateral first-reflection points and add a ceiling cloud if the budget allows
- Aim for significant wall coverage as a starting target
- Check every panel's NRC rating and fire-safety certification before buying
Key takeaways
Acoustic panels improve home theatre sound most when you treat first reflections and corners before covering any other surface.
| Point | Details |
|---|---|
| Mirror test first | Use the mirror test to locate side-wall and ceiling reflection points before buying any panels. |
| Corner bass traps are non-negotiable | Place four corner bass traps before treating any other surface; they fix bass modes that EQ cannot. |
| Coverage target: a substantial portion of wall surface area | Small rooms need roughly 8–12 panels; medium rooms 12; large rooms — per TheaterCalc guidance. |
| Check NRC and fire ratings | Look for NRC 0.85+ and CAN/ULC-S102 or Class A (ASTM E84) certification on every panel you buy. |
| JupiterAV for turnkey installs | JupiterAV provides site survey, treatment plan, panel supply, and professional installation in Calgary. |
Table of Contents
- What do acoustic panels actually do, and how are they different from soundproofing?
- Which panel types and materials actually perform in a home theatre?
- Where exactly should you place panels in a home theatre?
- How many acoustic panels do you need?
- Why bass traps matter more than most people realise
- Mounting methods, fire ratings, and Canadian installation considerations
- DIY vs. hiring a pro: how do you decide?
- How a Canadian AV installer approaches a home theatre treatment
- What most installers get wrong about small home theatres
- JupiterAV handles the whole process for Calgary home theatres
- Sources
What do acoustic panels actually do, and how are they different from soundproofing?
Acoustic panels absorb mid and high frequencies, reducing the reflections that cause echo, harshness, and blurred imaging. Soundproofing is a completely different problem: it reduces sound transmission between rooms and requires mass, decoupling, and air sealing. Panels do almost nothing for soundproofing, and soundproofing materials do almost nothing for room acoustics. Mixing up the two is the single most common and expensive mistake home theatre owners make.
Diffusers scatter reflections rather than absorbing them, which preserves a sense of space and liveliness. GIK Acoustics recommends a three-part approach: broadband absorption in the front half of the room, bass trapping in the corners, and diffusion or hybrid treatment on the rear wall to keep the room from sounding dead.
NRC (Noise Reduction Coefficient) is the number to check on any spec sheet. It runs from 0 to 1.0, where 1.0 means the panel absorbs all incident sound. For a home theatre, look for panels rated NRC 0.85 or higher. Thickness matters too: a 2-inch panel handles mid frequencies well, but a 4-inch panel or one mounted with a 2-inch air gap behind it starts absorbing lower-mid frequencies that a thin panel misses entirely.
Pro Tip: Mount panels with a 2-inch air gap from the wall surface. The gap shifts the effective absorption down in frequency without adding any material cost.
Which panel types and materials actually perform in a home theatre?
Not all panels are equal, and the decorative foam tiles sold at big-box stores are the worst offenders: they look like acoustic treatment but absorb only the very top of the frequency range.
Material performance at a glance:
- Open-cell foam: Lightweight and cheap, but effective only above roughly 1,000 Hz. Thin foam wedge tiles are nearly useless for a home theatre. Thicker foam (3–4 inches) performs better but degrades over time and rarely carries a fire rating.
- Rigid fibreglass or mineral wool (e.g., Owens Corning 703/705, Rockwool Safe'n'Sound): The workhorse of serious acoustic treatment. Dense, stable, and available in 2-inch and 4-inch thicknesses. Fabric-wrapped panels built on these cores deliver NRC ratings of 0.90–1.0 and last decades.
- Compressed wool panels: A greener option with solid mid-frequency absorption. Less common in Canada but available through specialty suppliers.
- Engineered broadband absorbers: Thicker panels (4–6 inches) designed to reach down into the low-mid range. More expensive but reduce the number of separate bass traps needed.
- Diffusers (QRD, skyline, or 1D): Best placed on the rear wall or the ceiling at a distance from the listening position. GIK Acoustics notes that diffusers need distance to let scattered reflections blend before they reach the listener, so a rear wall at least 8–10 feet behind the seat is the minimum for them to work properly.
On fire ratings: look for Class A (ASTM E84) or UL-listed ratings on the product page. In Canada, the National Building Code references CAN/ULC-S102 for surface burning characteristics. Check your local municipality's requirements before installing panels in a finished basement or dedicated theatre room, especially if the room has a single egress point.
Where exactly should you place panels in a home theatre?
Placement drives results more than brand or price. A $50 panel in the right spot beats a $200 panel on the wrong wall.
-
Run the mirror test for each seat. Sit in your primary listening position. Have a helper slide a mirror along the side wall at ear height. Every point where you can see a speaker reflected in the mirror is a first reflection point. KEF's guide to the mirror test recommends marking these points for every seat in the room and treating the shared zones first.
-
Treat the left and right side walls first. These lateral first reflections do the most damage to stereo imaging and dialogue clarity. Place panels at ear height, centred on the reflection mark. For multiple seats, a panel that spans the full reflection zone works better than a single small tile.
-
Add a ceiling cloud. The ceiling reflection between the speakers and the listening position is the second priority. A ceiling cloud (one or two panels mounted flat or angled) cleans up the top-end smear that makes dialogue sound congested. Acoustic Geometry confirms that side walls and the ceiling between speakers and listener deliver a disproportionately large improvement relative to surface area treated.
-
Place four corner bass traps. All four vertical corners of the room, floor to ceiling if possible. Bass builds up in corners regardless of room size, and treating them before the rear wall gives you more audible return per dollar.
-
Address the rear wall. A mix of absorption and diffusion works best here. Full absorption on the rear wall can make the room feel claustrophobic; a hybrid panel or a diffuser panel in the centre with absorbers on either side is a common and effective solution.
-
Front wall (behind the screen). Often overlooked. A broadband absorber behind or around the screen reduces early reflections from the front wall bouncing back toward the listener.
Keep panels symmetrical left-to-right. Asymmetric treatment shifts the stereo image and is one of the harder problems to diagnose after the fact.
How many acoustic panels do you need?
The honest answer: more than most people expect, fewer than they fear. TheaterCalc's panel guide provides the following rules of thumb:
Worked example for a small room (10 × 12 ft):
Total wall surface area (ignoring ceiling for now): roughly 352 sq ft (four walls at average 8-ft ceiling).
Why bass traps matter more than most people realise
Bass traps are not a studio luxury. In a small home theatre, low frequencies below 300 Hz behave like standing waves, building up in corners and creating boomy, one-note bass that no amount of EQ fully fixes. How-To Geek explains that correct corner placement, combined with an air gap behind the trap, significantly extends low-frequency absorption compared to a panel mounted flush against the wall.
Practical corner-placement options:
- Triangular (tri-trap) panels: Fit neatly into vertical corners. Stack them floor to ceiling for maximum effect. A single tri-trap covers roughly 2–3 linear feet of corner.
- Soffit traps: Built-in corner structures that can be framed into the room during construction or renovation. GIK Acoustics notes that soffits and floor-to-ceiling traps capture lower frequencies more effectively than compact units, and that stacking demi units is a practical compromise where space is tight.
- Broadband panels at 45°: A 4-inch mineral wool panel mounted diagonally across a corner at 45° creates an air cavity behind it, which extends absorption down into the 80–150 Hz range where subwoofer modes are most problematic.
- Leave an air gap. Even a 2-inch gap between the trap and the wall surface meaningfully improves low-frequency reach.
Prioritise the four vertical corners first. Horizontal corners (where walls meet the ceiling or floor) are secondary but worth treating in a dedicated room.
Mounting methods, fire ratings, and Canadian installation considerations
Getting panels on the wall safely matters as much as choosing the right material.
Common mounting methods:
- Z-clips (impaling clips): The most secure option for heavy fibreglass panels. Two clips per panel, rated for the panel weight. Easy to remove and reposition.
- French cleats: Excellent for larger or heavier panels. A router or table saw cuts the 45° bevel; the cleat system lets you slide panels horizontally for fine-tuning placement.
- Picture wire and D-rings: Works for lighter panels (under 5 kg). Less precise but fast to install and easy to adjust.
- Adhesive mounting (construction adhesive or heavy-duty hook-and-loop): Permanent and load-limited. Avoid for panels over 3 kg or in rooms with temperature swings (basements in Alberta winters can cause adhesive failure).
On fire ratings: GIK Acoustics recommends verifying NRC and fire-safety ratings on product pages before purchase. In Canada, look for CAN/ULC-S102 compliance or a Class A (ASTM E84) rating. Fabric-wrapped mineral wool panels from reputable suppliers typically carry these ratings; decorative foam tiles often do not. If your theatre room is in a finished basement with limited egress, your local building inspector may require fire-rated materials on any wall or ceiling surface.
For aesthetics, fabric colour and texture can be matched to the room's design. Panels do not need to look clinical. Concealing HVAC vents and speaker wire runs before mounting panels saves a lot of rework. If you are integrating in-ceiling speakers, plan their locations before finalising panel placement so you are not cutting around a panel you just hung.
DIY vs. hiring a pro: how do you decide?
Most homeowners can handle a basic first-reflection and corner treatment themselves. The decision to hire a professional comes down to a few clear factors.
-
Room complexity. Irregular shapes, vaulted ceilings, or open-plan rooms with no defined boundaries make DIY placement guesswork. A pro uses measurement tools to identify where energy is actually building up.
-
Multiple subwoofers or a dedicated screening room. When bass management involves multiple subs, room correction software, and precise placement, the margin for error on acoustic treatment narrows. Getting it wrong costs more to fix than getting it right the first time.
-
Aesthetic demands. Built-in soffits, fabric-wrapped wall systems, and concealed panels require carpentry and finishing work. For new builds, coordinating acoustic treatment with the builder early saves significant cost. A resource like this smart home integration guide for new builds covers how to plan these elements before drywall goes up.
-
Budget and timeline. A DIY first-reflection and corner treatment takes a weekend and costs $300–$800 CAD in materials. A professional site survey, treatment plan, and install in Calgary typically runs $2,500–$5,000 CAD for a small-to-medium room, with larger or more complex rooms going higher. That quote usually includes the site visit, a written treatment plan, all materials, installation, and a post-install listening session.
How a Canadian AV installer approaches a home theatre treatment
A professional installation follows a repeatable workflow, not a gut feeling.
Site visit checklist:
- Room dimensions, ceiling height, and any irregular geometry
- Wall and floor finishes (drywall, concrete, hardwood, carpet)
- Speaker and subwoofer locations, seating plan, and screen position
- HVAC vents, doors, windows, and any penetrations that affect the acoustic envelope
- Existing furnishings (a large sectional sofa and thick carpet already provide meaningful absorption)
Measurement and diagnosis:
- Mirror test for each seat to map first-reflection zones
- Simple listening tests: a hand clap, a voice, or a mono pink noise burst reveals flutter echo and room modes immediately
- Optional REW (Room EQ Wizard) measurements with a calibrated microphone to generate a waterfall plot and RT60 figure. A target RT60 of roughly 0.3–0.5 seconds is appropriate for a home theatre; TheaterCalc notes that over-treating causes a dead room, so the goal is controlled, not anechoic.
Treatment plan and execution:
- Prioritise first reflections and corners in the written plan
- Source panels with verified NRC ratings and fire certifications
- Install, then listen before finalising rear-wall treatment
- Iterate: add or reposition panels based on a second listening session
- Client walkthrough with before/after comparison using a reference track
What most installers get wrong about small home theatres
The most common mistake is treating the room like a recording studio. Studios aim for near-anechoic conditions in control rooms; a home theatre needs controlled reflections, not eliminated ones. Covering every surface with 2-inch foam tiles produces a room that sounds muffled and fatiguing, not accurate.
The second mistake is skipping corner bass traps because they look industrial. Bass modes are the hardest acoustic problem to fix with EQ alone, and four corner traps do more for perceived bass quality than any DSP correction. A rug on a hard floor handles the floor reflection for free. Pulling the main speakers 2–3 feet from the front wall reduces early reflections before you hang a single panel.
On day one of an install, the first thing worth doing is the clap test: stand in the listening position, clap once sharply, and listen for the flutter echo that bounces between parallel walls. That echo tells you exactly where to start. Treat the surfaces that produce it first, measure or listen again, and then decide whether more panels are actually needed. Most small rooms are fully treated with 10–14 panels and four corner traps. Anything beyond that is diminishing returns unless the measurements say otherwise.
JupiterAV handles the whole process for Calgary home theatres
Measuring, sourcing, and mounting acoustic treatment in a home theatre is straightforward when you know what you are doing. When you would rather spend the weekend watching films than running REW measurements, JupiterAV offers a complete turnkey service: site survey, written treatment plan, panel supply, professional installation, and a post-install walkthrough.

JupiterAV's home theatre installs in Calgary cover everything from first-reflection panel placement and corner bass trapping through to screen, speaker, and control system integration. Every quote includes the site visit and a written plan so you know exactly what you are getting before any work begins. Panels are sourced with verified NRC ratings and Canadian fire certifications. Aftercare and service are included.
Jupiterav to get a local installer's assessment of your room and a clear price before committing to anything.
Sources
The sources below support the guidance in this article and are worth bookmarking if you want to go deeper on any specific topic.
- Best Acoustic Panels for Home Theater 2026: Bass Traps, Panels & Diffusers | TheaterCalc
- Guide to Home Theater Acoustic Treatment – GIK Acoustics
- Why Bass Traps Matter for Superior Home Theater Sound
- First reflections and the mirror test | KEF (blog)
- First reflection points explained: improve sound clarity & stereo imaging | Acoustic Geometry
For a local assessment of your room in Calgary, contact JupiterAV to arrange a site visit.