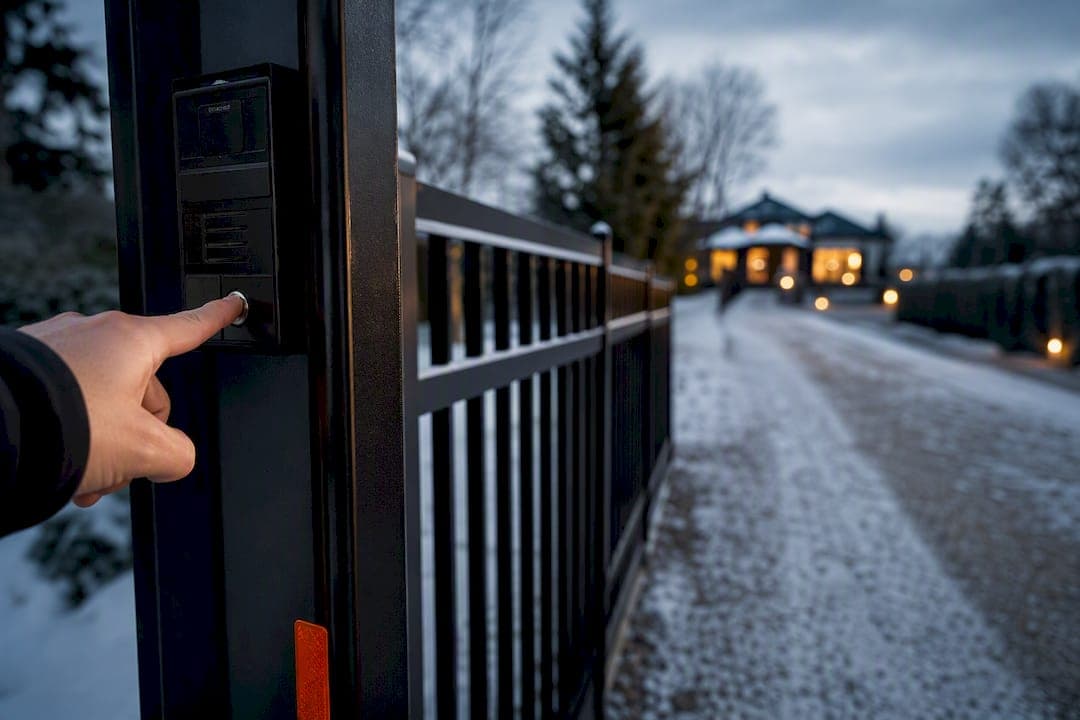
For most residential driveways, the best starting point is a video, app-enabled gate intercom paired directly to the gate operator, with cellular connectivity chosen whenever the gate sits far from the house or Wi-Fi coverage is unreliable. The main exceptions are gates with no power run at all, driveways stretching past a few hundred metres, and properties under HOA rules that restrict visible hardware. Budget for a proper site survey before you buy anything, and expect installation costs and any recurring fees to hinge on trenching and power, not the intercom unit itself.
TL;DR:
- Cellular intercoms are often the best choice for remote or long driveways where Wi-Fi signals are unreliable or unavailable.
- Proper site surveying is essential to confirm power, conduit, signal strength, and relay compatibility before purchasing and installing a driveway intercom system.
- Weatherproof ratings like IP65 and impact resistance grades such as IK07 are crucial for outdoor intercom durability against weather and vandalism.
- Installation costs vary significantly based on trenching, power access, and site civil work, potentially reaching over $10,000 for complex setups.
- Upgrading to remote app control with features like push notifications and visitor PINs enhances usability, but proper wiring, relay matching, and site prep are critical to system reliability.
Table of Contents
- What does a driveway gate intercom actually do?
- Audio, video, or smart app: which connectivity actually fits your driveway?
- What should you check before hiring an installer?
- How does installation actually happen, from survey to working system?
- How weatherproof does a gate intercom need to be?
- How do you control the gate remotely once it's installed?
- What does a driveway gate intercom actually cost?
- What surprises installers most on driveway intercom jobs?
- Get a site survey before you buy a driveway gate intercom
- Sources
What does a driveway gate intercom actually do?
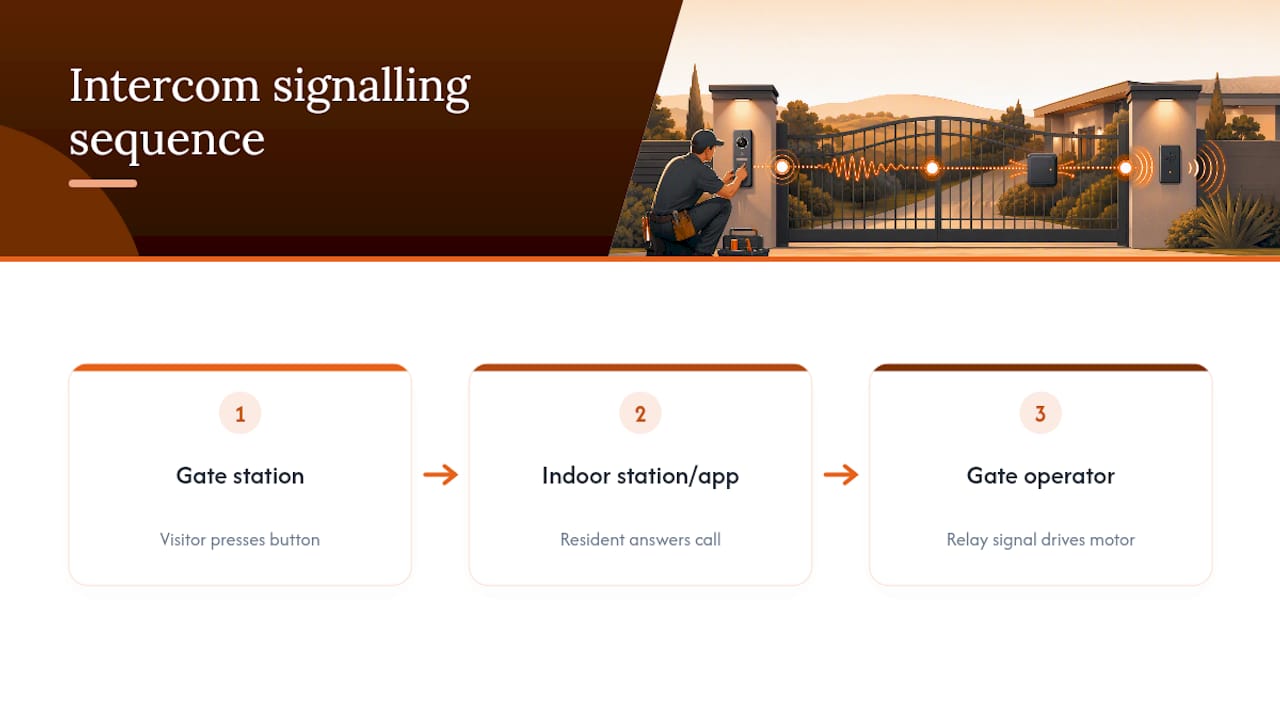
A driveway gate intercom lets a visitor at your gate reach someone inside the house, then lets that person open the gate without walking outside. The system has three working parts: the gate station (the weatherproof unit mounted at the driveway), the indoor station or smartphone app, and the connection into the gate operator that handles the actual unlocking.
Every unit splits into audio-only or video-capable hardware. Audio intercoms handle the basic job: a visitor presses a button, a phone rings inside, someone talks and releases the gate. Video adds a camera feed so you can see who's standing there before you buzz them in, and it's become the default expectation on new installs. Single-family homes need one gate station tied to one household's phones or a shared app. Multi-tenant properties, like a gated community or a commercial building with several units, need directory-style routing so a visitor can select which resident or office to call.
The signalling sequence stays the same regardless of hardware tier: a visitor triggers the call, the resident answers on an indoor unit or a phone app, and a decision to unlock sends a relay signal to the gate operator, which drives the motor. That relay handshake is the part installers spend the most time getting right, because a mismatched relay type is the single most common reason a system gets installed and then doesn't reliably open the gate.
Audio, video, or smart app: which connectivity actually fits your driveway?
Audio-only intercoms still make sense for a short driveway where you mainly need to confirm identity by voice before hitting a button. They're cheaper, simpler to wire, and have fewer points of failure. Video intercoms cost more but let you actually see delivery drivers, visitors, or a plate number before you commit to opening the gate, which matters more the longer your driveway runs and the less direct sightline you have from the house.
Connectivity is where most buying decisions actually get made, and it breaks into three categories:
- Wired (Ethernet or dedicated low-voltage cable): the most reliable option and the cheapest to run monthly, but it demands trenching or existing conduit between the gate and the house, which is the biggest driver of install cost on older properties.
- Wi-Fi: works well when the gate sits within solid range of your router or a mesh extender, and it avoids monthly data fees, but a lot of homeowners overestimate their signal strength at the property line.
- Cellular: the practical default for remote gates, long driveways, or retrofit jobs where running new wire isn't realistic. Cellular intercoms are often the best starting point for remote gates and retrofit projects, and if you can't prove stable Wi-Fi with an actual on-site speed test at the gate location, you should plan around cellular or wired service instead of assuming Wi-Fi will hold up.
For extremely long or rural driveways, a dedicated wireless option like a MURS-band gate intercom can bridge distances without trenching, though it trades away app features and often needs clear line-of-sight to work reliably.
As a rule of thumb: short driveways with a clear line to the house favour Wi-Fi or wired audio, long driveways favour cellular or wired video, and retrofits where trenching is impractical almost always land on cellular.
What should you check before hiring an installer?
Buying the right hardware means nothing if it can't talk to your existing gate operator, so run through a compatibility check before you sign anything.
Site and compatibility checklist:
- Measure the actual distance from the gate to the house and to your nearest Wi-Fi access point.
- Confirm whether mains power already reaches the gate post, or whether you're starting from zero.
- Check for existing conduit between the gate and the house; if none exists, trenching becomes part of the quote.
- Test Wi-Fi signal strength at the gate itself, not from inside the house.
- Identify your gate operator's relay type and confirm it supports a dry contact or the intercom's specific output.
- Ask whether loop detectors or safety edges already exist and how the new intercom will interact with them.
When you talk to an installer, ask direct questions rather than accepting a generic quote, and consider open standards, edge resilient access control insights for best integration practices. Ask how they plan to wire the relay connection into your specific operator brand, what backup power option they recommend if utility power drops, what the warranty actually covers (hardware versus labour are often separate), whether the system supports remote commissioning for troubleshooting, and how visitor codes and access changes get managed after install. Confirming relay inputs and safety devices before work begins avoids the most common source of rework on these jobs.
Watch for quotes that don't separate hardware cost from labour, that skip mentioning trenching as a line item, or that promise Wi-Fi reliability without an actual signal test at the gate.
Pro Tip: Ask your installer to run a live speed test at the gate post, not near the house router, before they finalize whether you need cellular service. A signal that reads fine from your porch can drop to nothing 60 metres down the driveway.
How does installation actually happen, from survey to working system?
Installation follows a fairly predictable sequence, and knowing the stages helps you spot when a quote is missing something.
- Site survey. An installer checks distance, power availability, existing conduit, and signal strength, and confirms your gate operator's relay type.
- Trenching or conduit work. If no existing pathway connects the gate to the house, this stage adds the most time and cost to the project.
- Mounting and wiring the gate station. The unit gets fixed to a post or pillar and wired into power and, if applicable, the low-voltage line back to the house.
- Connecting to the gate operator. The intercom's relay output ties into the operator's input terminals so an accepted call can trigger the open cycle.
- Network and app commissioning. The installer configures Wi-Fi or cellular service, links the mobile app, and tests the full call-to-unlock cycle from a phone off-site.
Power options vary by site. A mains connection with a step-down transformer is standard where electrical service already reaches the gate. Battery-backed 12 to 24 VDC systems with solar trickle charging suit sites without nearby power, and a small UPS is worth adding wherever you want the gate to keep answering calls through a short outage.
A straightforward retrofit with existing power and conduit often wraps in a single day. Add trenching, a new power run, or municipal permitting for work near a roadway, and the timeline stretches to several days or longer.
Pro Tip: If your property already has irrigation or landscape lighting conduit running near the driveway, ask the installer to check whether it has spare capacity. Reusing an existing conduit run can cut trenching costs substantially.

How weatherproof does a gate intercom need to be?
Outdoor gate hardware takes a beating from freeze-thaw cycles, direct sun, and the occasional bump from a car mirror or delivery cart, so the rating on the box matters more than most buyers realize. Outdoor intercom hardware should use weatherproof housings and account for impact resistance in exposed locations, which in practice means checking two separate rating systems before you buy.
IP ratings describe protection against dust and moisture. Look for at minimum IP54, with IP65 or higher preferred for units mounted where wind-driven rain or snow will hit them directly. IK ratings describe impact resistance. Anything at a gate accessible from the street benefits from an IK07 or higher rating given the risk of vandalism or accidental contact.
A basic seasonal maintenance routine keeps the system reliable:
- Check the camera lens and speaker grille for ice, dust, or spider webs each season.
- Verify battery backup capacity annually if the unit runs on solar or battery power.
- Confirm firmware is current; regular firmware updates measurably cut down on false alarms and connectivity drops over the life of the system.
- Test the full call-and-unlock cycle from outside cellular range if you rely on Wi-Fi, to confirm failover works.
Warranty terms typically split hardware coverage from labour, so ask specifically what happens if the gate station itself fails within the first year versus what happens if a wiring fault shows up after installation.
How do you control the gate remotely once it's installed?
Most current systems stream the video call directly to a smartphone app, which fits how people already expect to manage their homes. High mobile device adoption means homeowners commonly expect to answer calls and control entry from a phone rather than a wall-mounted indoor station alone, and manufacturers have built around that expectation.
Realistic features to expect on a mid-range to higher-end system:
- Push notifications straight to your phone when someone calls the gate, even away from home.
- Temporary visitor passes issued as a QR code or one-time PIN for guests, contractors, or deliveries.
- Call logs showing who buzzed in and when, useful for property managers tracking access across a building.
- Multi-contact routing, so a call can ring several household members or staff in sequence if the first doesn't answer.
Some households integrate the intercom into a broader smart home setup, bridging it into a system like Control4 so gate calls and unlock commands sit alongside lighting and security controls in one interface. Whichever path you choose, build in redundancy: a cellular failover on top of a primary Wi-Fi connection means a router outage doesn't leave your gate unreachable.
What does a driveway gate intercom actually cost?
Price ranges swing widely based on how much civil work the site needs, not the intercom hardware itself. Residential projects commonly run from a few thousand dollars for a simple retrofit up to $10,000 or more once trenching, new power, and smart home integrations enter the picture.
Costs typically break down across a few categories:
- Hardware: the gate station, indoor unit or app licence, and any relay interface module.
- Labour and civil work: mounting, wiring, and trenching if no conduit exists, which is usually the single biggest cost swing between quotes.
- Recurring fees: cellular data plans for cellular-connected units, cloud video storage subscriptions, and any managed monitoring service.
When comparing quotes, ask each installer to itemize hardware, labour, trenching, and recurring fees separately. A bundled lump-sum number makes it impossible to tell whether one company is cheaper because of better pricing or because they've quietly excluded trenching from the scope.
What surprises installers most on driveway intercom jobs?
Three things catch homeowners off guard almost every time. Weak cellular or Wi-Fi signal at the gate post itself, tested from inside the house and assumed to carry outside, is the most common. Hidden conduit problems come second: a homeowner remembers running a line years ago, but it's collapsed, wrong gauge, or shares a trench with something incompatible. Mismatched relay logic rounds it out, where a gate operator expects a normally-open signal and the intercom ships configured for normally-closed.
Starting with a site survey that checks all three issues before any hardware gets ordered can avoid the change orders that turn a quoted job into an expensive one. Homeowners can speed things along by locating their gate operator's model number and any past wiring diagrams before the survey. If you're not sure what your existing setup can support, a professional assessment answers that faster than guessing.
— JupiterAV
Get a site survey before you buy a driveway gate intercom
Most driveway intercom problems trace back to skipping a proper site assessment, and a thorough site survey is the recommended first step. The survey should check distance, power availability, conduit condition, and signal strength at your actual gate post, then ensure compatible hardware sized to what your gate operator can support is supplied, rather than a generic bundle picked off a shelf.

Rather than relying on researching relay types and hoping a quote covers trenching, a professional installer runs the survey, handles the wiring, and commissions the system so the app, video feed, and gate operator all work together from day one. The intercom can be connected into broader smart home setups, including systems like Control4, so a gate call integrates with existing lighting and security controls rather than operating on its own app. A professional installation typically includes manufacturer warranty coverage and ongoing service support, which can be important if firmware updates or relay setting adjustments are needed years later. If you're weighing options for a Calgary-area property, request a site survey with JupiterAV and get a quote based on what your gate actually needs.
Sources
- Gate intercom systems: how to choose + costs, wiring, and best options (2026) | Swiftlane
- Watchman WXL & WXL2 | 11" touchscreen video intercom system
- G.E. Security — access control product recommendations
- Mobile technology fact sheet | Pew Research Center