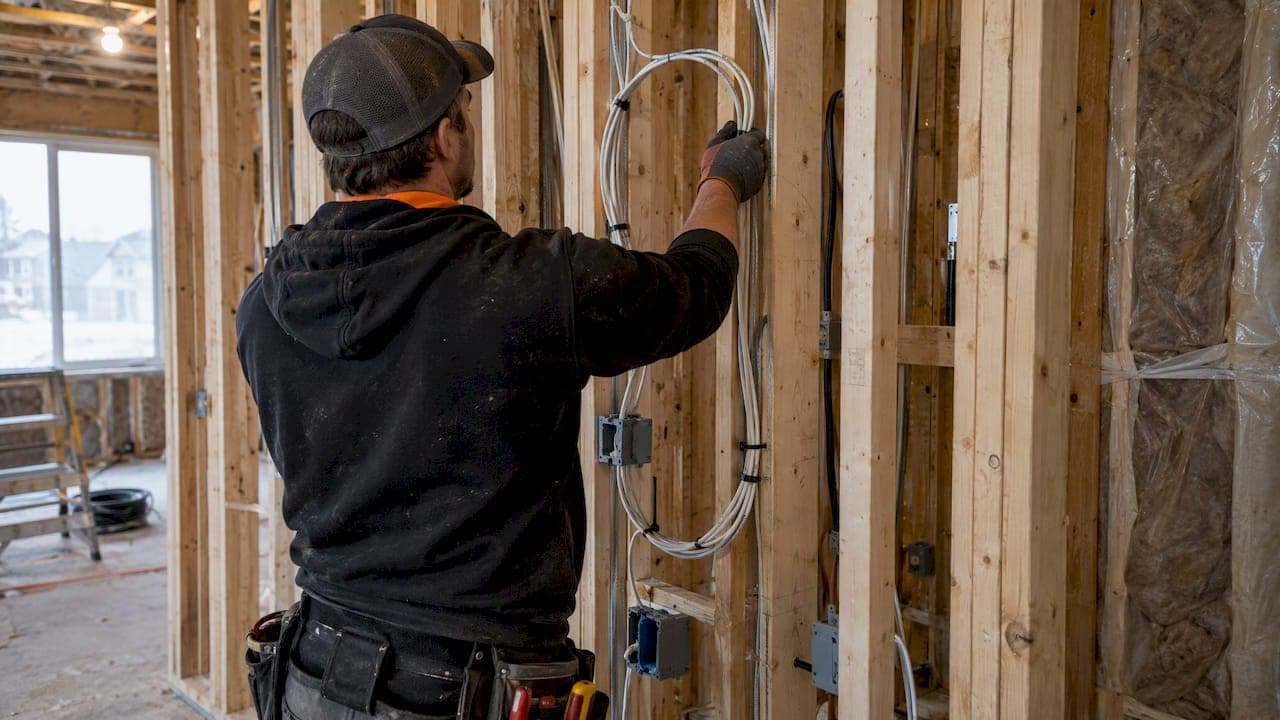
An audio rough-in checklist confirms that rack location, speaker positions, in-wall rated cable, empty conduit, low-voltage boxes with nail plates, dedicated power, spare runs, labelling and photo documentation are all done before drywall closes the walls. These are typically integrated into every pre-drywall visit for whole-home audio and home theatre projects, checked against code and manufacturer standards.
TL;DR:
- Running in-wall rated speaker cables (CL2 or CL3) and RG6 for video is essential, with FT4 or FT6 ratings required for cables passing through air-handling spaces.
- Leave two to three spare cable runs and install conduit with pull-strings to facilitate future upgrades without reopening walls.
- Proper labeling, photographic documentation, and building a detailed wiring map at this stage save time and costs on future systems or troubleshooting.
- Dolby Atmos requires matching ceiling speaker pairs with dedicated runs, and planning this thoroughly during rough-in prevents additional ceiling openings later.
- Dedicated power circuits of 20 A for the rack and separate circuits for the projector or AV equipment help prevent hum, dropout, and interference during use.
Table of Contents
- The audio rough-in checklist: step-by-step tasks to finish before drywall
- Speaker placement and channel planning, including Dolby Atmos basics
- Cable types, conduit, boxes and code considerations
- Power planning: circuits, dedicated outlets and rack power placement
- Termination, plates, labelling and documentation
- Testing and verification before and after drywall
- Why a pro checklist saves time and retrofit cost
- How JupiterAV can help with prewire planning and installation
- Where to check the standards yourself
- Sources
- FAQ
The audio rough-in checklist: step-by-step tasks to finish before drywall
Getting this stage right saves a builder from cutting drywall twice. Work through the tasks in order and check each one off before the inspector or drywall crew arrives.
- Pick the central AV rack location. Look for clearance for ventilation, easy access for service, and a short cable path to the main listening area.
- Mark every speaker location on the framing: front left, centre, right, surrounds, any height or Atmos positions, and the subwoofer spot.
- Run in-wall rated speaker cable to each location, plus RG6 wherever a pre-amp or self-powered speaker needs a signal feed.
- Add two to three spare runs to the rack and to key rooms so a future upgrade does not mean opening the wall again.
- Install empty conduit from the rack to the display or projector location and leave a pull-string inside for later.
- Fit low-voltage workboxes sized for the number of runs going through them, and mount nail plates anywhere wire crosses a stud.
A few habits make the difference between a clean rough-in and a callback six months later:
- Keep low-voltage cable at least one stud bay away from electrical Romex where the layout allows it.
- Leave a 2 to 3 foot service loop coiled inside every box rather than pulling cable tight.
- Photograph each run before it disappears behind drywall, and note the measurement from a fixed reference point like a door frame or corner.
- Label both ends of every cable with a unique ID that matches a written wiring map.
- Confirm with the electrician where dedicated power circuits and outlets will land relative to the rack and seating.
- Book a continuity and polarity check before drywall closes, then a full functional test once the system is installed.
Pro Tip: Photograph every run with a tape measure in frame. It takes thirty seconds and can save an afternoon of drywall guesswork later.
Speaker placement and channel planning, including Dolby Atmos basics
Channel count decides how many cable pairs you're pulling, so settle the layout before the framing crew moves on. A basic 2.1 system needs two speaker pairs and one subwoofer run. A 5.1 setup adds centre and surround pairs, while 5.1.2 or 7.1.4 layouts add overhead or height channels that each need their own dedicated run.
- Front left, centre and right speakers generally sit at or near seated ear height for the best imaging.
- Surrounds sit slightly above ear height, angled toward the seating position.
- Height and Atmos ceiling speakers follow their own elevation and spacing guidance from Dolby's installation guidelines, which recommend adding them in pairs to keep the overhead sound field balanced.
- The classic equilateral triangle between the left, centre and right speakers and the main seat remains the simplest way to check a layout before wiring.
Because Atmos speakers are added in pairs, plan matching ceiling cutouts and cable runs from the start rather than adding one at a time. Our Atmos speaker placement guide walks through layout choices in more detail, and our piece on ceiling speaker clearances covers the framing gaps installers need before the ceiling closes up.
Cable types, conduit, boxes and code considerations
Use in-wall rated speaker cable, commonly marked CL2 or CL3, for every speaker run, and RG6 for video and signal feeds. These ratings tell you the cable has been tested for use inside walls rather than in open air, according to Audioholics' prewire primer.
- Where cable passes through a plenum or an air-handling space, it may need to meet FT4 or FT6 fire-and-smoke performance instead of a standard in-wall rating.
- Run empty PVC or non-metallic raceway conduit between the rack and the ceiling or display location so future cable pulls do not require opening drywall.
- Non-metallic enclosed raceways used in these spaces carry their own diameter limits and testing thresholds under Canadian code guidance.
- Communication and low-voltage cable placement, along with any FT4/FT6 requirement for your project, should be confirmed with the local authority having jurisdiction before the walls close.
FT6-rated cable is required for use in air-handling spaces under Canadian code provisions covering wires and cables, a distinction that matters if the rack or any run passes through a return-air plenum. Raceway sizing and permitted non-metallic enclosures are addressed separately in the code's raceway provisions, which is worth a read before ordering conduit for a larger project.
Power planning: circuits, dedicated outlets and rack power placement
Receivers and amplifiers draw enough current that a dedicated 20 A circuit at the rack avoids the hum and dropout that come from sharing a circuit with other loads. Subwoofers, especially powered ones, do better on their own dedicated circuit too.
- Plan a separate 15 A circuit for video or projector equipment so lighting or motor loads elsewhere in the house don't interfere.
- A very high-powered amplifier setup can call for a 240 V or 208 V feed, which means bringing in a licensed electrician rather than treating it as a standard outlet run.
- Where powered recliners or motorized seating are part of the room, plan a floor outlet at the seating location and use commercial-grade outlets throughout the AV circuits to avoid loose plugs over time.
Termination, plates, labelling and documentation
Every extra connection point is a place for noise or failure to creep in, so pass-through wall plates are the better choice over binding-post plates: a pass-through plate can drop a speaker connection from six termination points down to two.
- Leave a 2 to 3 foot service loop at every outlet and rack location, coiled neatly and secured with a cable tie.
- Build a wiring map that lists a unique ID for every cable, matched to labels at both ends.
- Record measurements from a fixed reference point, such as a corner or doorway, for every hidden run.
- Take photographs of open walls before drywall goes up and keep them with the wiring map.
Pro Tip: Give a copy of the wiring map and photos to the builder or homeowner at handoff. It turns a future service call into a five-minute fix instead of a wall-opening exercise.
Testing and verification before and after drywall
Two rounds of testing catch different problems, and skipping either one is how issues get discovered after the drywall is painted.
- Before drywall: run a continuity and polarity check on every speaker cable with a tone generator or multimeter, and confirm every conduit run has a pull-string in place and pulls freely.
- After installation: test each speaker for output and correct channel mapping at the AVR, check subwoofer level against the rest of the system, and verify lip-sync alignment on each input.
- Log every result on the wiring map and keep the proof-of-test photos with the rest of the project documentation.
Why a pro checklist saves time and retrofit cost
Industry experience shows the same three mistakes cause almost every retrofit call: no conduit left for future upgrades, cables labelled poorly or not at all, and too few spare runs for the next system change. A checklist followed once, before drywall, prevents all three.
— JupiterAV
How JupiterAV can help with prewire planning and installation
A rough-in done right the first time costs far less than reopening a finished wall, and that's the gap These services fill a gap for builders and homeowners: prewire planning, low-voltage wiring, rack and AVR design, Atmos layout planning, and calibration once the system goes in.

Smart lighting, motorized blinds and security wiring can also be coordinated during the same site visit, which may be efficient if a project includes more than audio. Our prewire smart home checklist covers how those systems overlap with an audio rough-in, and our builder prewire checklist is a printable version to hand to your framing crew. To book a prewire consultation for your build or renovation, visit JupiterAV.
Where to check the standards yourself

For speaker pairing, elevation and placement rules, Dolby's Atmos installation guidelines are the source installers work from. Audioholics' prewire basics covers practical rack and cabling decisions in plain language, and the wires and cables code excerpt explains fire-rating requirements to confirm with your local authority having jurisdiction. For a room-layout perspective that pairs well with speaker planning, see this entertainment space setup guide.
Sources
FAQ
What is included in a pre-drywall audio checklist?
It covers rack location, marked speaker positions, in-wall rated cable runs, empty conduit with pull-strings, low-voltage boxes with nail plates, dedicated power circuits, spare runs, cable labelling and photo documentation. Each item gets checked off and photographed before the walls close.
What type of speaker wire should be used inside walls?
In-wall speaker cable should carry a CL2 or CL3 rating, which confirms it has been tested for enclosed wall installation rather than open-air use, per Audioholics' guidance. Runs that pass through a plenum or air-handling space may instead need an FT4 or FT6 rating under applicable code provisions.
How many spare wire runs should I leave during rough-in?
Two to three spare runs at the rack and in key rooms is a common practice among installers to allow for a future speaker or zone addition without reopening the wall. Pairing this with empty conduit gives even more flexibility for upgrades down the road.
Do Dolby Atmos speakers need to be installed in pairs?
Yes, Dolby's installation guidelines recommend adding height or ceiling speakers in pairs, with specific elevation angles to keep the overhead sound field even. Planning matching cable runs and ceiling cutouts for both speakers at rough-in avoids a second ceiling opening later.
Does JupiterAV offer prewire consultations for new builds?
Yes, JupiterAV works with builders and homeowners on prewire planning, low-voltage wiring, rack design and Atmos layout as part of its Immersive Sound & Cinema services. Contact details and service information are available at Jupiterav.