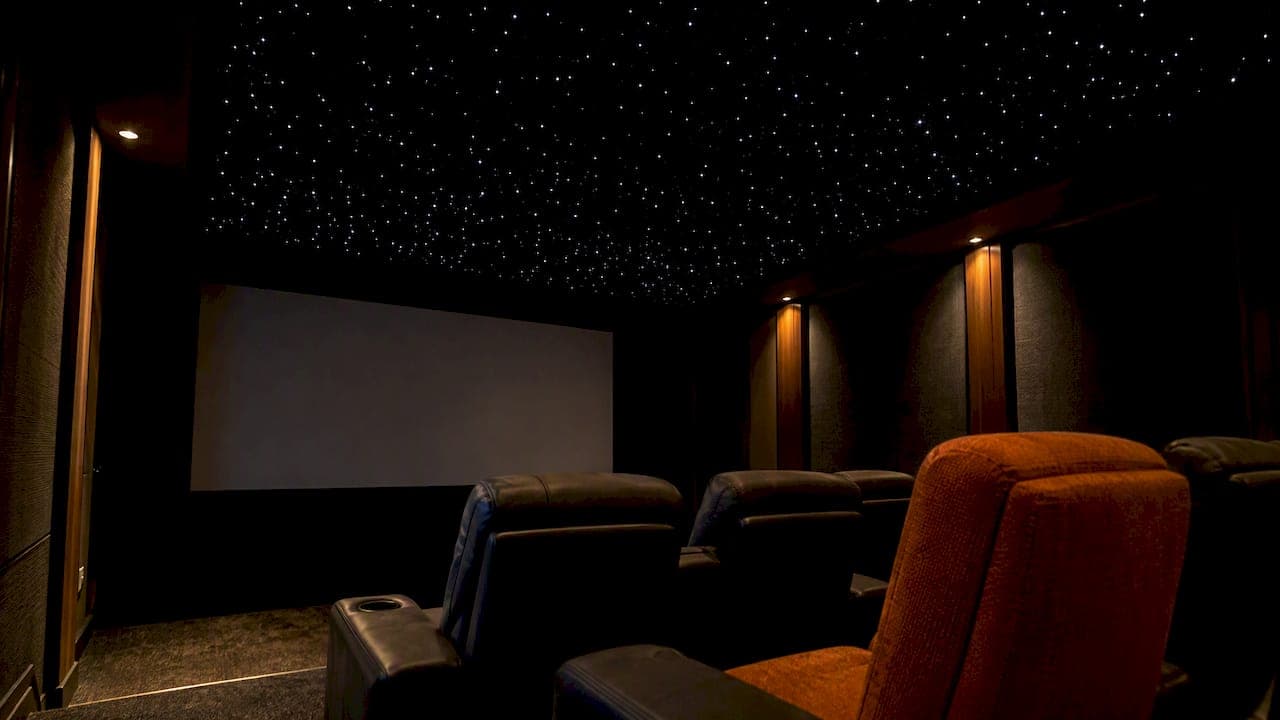
For most home theatres, a professionally installed fibre-optic panel or pre-populated acoustic star panel gives you the best mix of realism, serviceability and smart home integration. DIY kits remain a solid choice for smaller or budget projects, provided every component carries CSA or cUL approval and an electrician handles any wiring or permit questions. Below, we walk through materials, installation paths, cost ranges and design integration.
TL;DR:
- A documented DIY build took 8 to 16 hours for a small area and 30 to 40 hours for a larger ceiling, excluding your labor.
- Prepopulated acoustic panels can drop into an existing ceiling grid or mount over drywall, avoiding individual fiber routing while adding sound treatment.
- For Canadian installations, choose components carrying CSA or cUL approval, and have an electrician check new circuits, dimmers, and local permits.
- Mount the illuminator in a ventilated, reachable attic or closet space, and leave extra harness slack so future bulb changes or rerouting remain manageable.
- Check dimmer compatibility before installation, keep fiber harnesses clear of ceiling speakers, and coordinate wiring before drywall closes to avoid rework.
Table of Contents
- What a star ceiling is and why it suits a home theatre
- Materials and system types: fibre-optic kits, panels and stretch ceilings
- Installation approaches: drop ceiling, drywall retrofit and illuminator placement
- Cost and timeline expectations for DIY, panel and professional installs
- Design tips for home theatre integration
- Installer checklist and practical checks before you book an install
- When to DIY and when to hire a pro
- JupiterAV: design, installation and integration services for star ceilings
- FAQ
- Sources
What a star ceiling is and why it suits a home theatre
A star ceiling recreates a night sky overhead using one of three systems: fibre-optic strands fed from a central illuminator, pre-populated acoustic panels with built-in light points, or LED and stretch-sheet ceilings that glow rather than twinkle. In a dark viewing room, the effect reads as depth rather than decoration, pulling the eye upward without competing with the screen.
The appeal for home theatres comes down to mood control. A dimmable, low-glare point of light lets you set a scene before a film starts without flooding the room the way a pot light would.
- Fibre-optic strands give the sharpest, most realistic pinpoint stars.
- Pre-populated panels combine the star effect with acoustic treatment.
- LED or stretch-sheet ceilings create a softer glow, suited to ambient use.
Because theatres are often used late at night, picking warm, dimmable lighting matters beyond aesthetics. Lower colour temperatures and dimmable controls support better sleep and circadian health when a room doubles as a late-evening viewing space.
Materials and system types: fibre-optic kits, panels and stretch ceilings
Each system family trades installation effort for a different look, and the right pick depends on how much ceiling access you have and how much realism you want.
- Fibre-optic kits create custom constellations strand by strand, routed through a drilled ceiling to a central illuminator. They deliver the most convincing pinpoint stars but demand real labour for strand routing, trimming and dressing.
- Pre-populated acoustic panels arrive with the fibre work already done, mounted into acoustic board. They install faster, with plug-and-play harnesses, and double as sound treatment, a combination that matters when acoustic performance is part of the brief.
- Stretch and LED-sheet ceilings trade pinpoint realism for a diffuse glow. Labour is lower, but the star effect reads as atmosphere rather than a night sky.
Pre-populated panels mounted in drop grids or surface-fixed to drywall cut labour significantly compared with drilling and feeding individual fibres, and the same source notes they provide acoustic benefits that loose strand kits do not.
Fire-retardant backing and UL or CSA-rated illuminators matter for any system left running for hours during movie nights, and panels should be inspected periodically for loose harness connections.
Pro Tip: Ask any installer or kit manufacturer for the harness slack specification before mounting; a foot of extra length at the illuminator connection makes future servicing far easier.
Installation approaches: drop ceiling, drywall retrofit and illuminator placement
The install path depends mostly on what is already overhead.
- Drop ceiling workflow. Panels are populated on the bench, then dropped into the existing grid. This is the easiest retrofit, since no drywall is touched and panels can be swapped later for servicing.
- Drywall retrofit. Where there is no grid, furring strips or surface-mounted pre-populated panels avoid tearing out existing drywall, trading a small amount of ceiling height for a much simpler job.
- Illuminator placement. The light source needs ventilation, a stable mount and enough room for service access. Attic placement works where there is headroom; a nearby closet works where attic access is tight.
- Harness routing. Installation guides recommend planning joist penetrations for harness legs and leaving generous slack at illuminator connections, with specific hole sizes and routing charts for each kit.
- Electrical and permits. Any new circuit for an illuminator or control dimmer should be checked against local permit requirements, and CSA or cUL-approved components are the baseline for Canadian residential installations.
Skipping the harness slack step is the most common regret homeowners report once a bulb needs replacing or a fibre needs re-routing.
Cost and timeline expectations for DIY, panel and professional installs
Budgets vary widely by system and room size, so it helps to think in ranges rather than a single number.
- DIY fibre-optic kits can run in the low hundreds of dollars for a single kit, but a documented DIY project (2015) logged 8 to 16 hours for a small area and 30 to 40 hours for a larger ceiling, which materially changes the real cost once labour is counted.
- Pre-populated panels cost more per panel but cut installation hours substantially, since the fibre work is already done.
- Professional installs add cost for design time, concealment work and control integration, plus final commissioning and dimmer testing.
One documented fibre-optic DIY project took 8 to 16 hours for a small ceiling and 30 to 40 hours for a larger one, according to a published build log, a swing that shows why labour, not just kit price, drives total cost.
Maintenance costs are modest. Most issues are a failed LED in the illuminator or a loosened harness connector, both quick fixes when the illuminator stays accessible.

Design tips for home theatre integration
A star ceiling should support the room, not compete with it. A few rules keep it working alongside audio and screen.
- Pair star panels with acoustic treatment where possible; a pre-populated acoustic panel does double duty as sound control, which matters more in a dedicated theatre than a casual media room.
- Keep dense, bright star clusters away from the seating directly facing the screen; a bright point overhead pulls attention from dark scenes.
- Confirm the illuminator and any LED drivers are compatible with your dimming platform before installing. Dimming compatibility is often the point where integration breaks down, since trailing-edge and leading-edge dimmers are not interchangeable with every driver.
- Route fibre harnesses clear of in-ceiling speaker housings. Our 18 to 24 inch placement rule for ceiling speakers is worth checking before you finalize star layout, and the same applies to Atmos speaker locations above the listening area.
Getting this sequence right during prewire, rather than after drywall closes, avoids most of the rework homeowners run into later.
Installer checklist and practical checks before you book an install
Before scheduling any install, a few checks save time and avoid surprises.
- Survey the ceiling cavity. Confirm joist spacing, HVAC runs and plenum space, and find a spot with enough depth for the illuminator.
- Plan prewire early. Coordinate star-panel wiring with ceiling speaker runs, following established placement guidance so the two systems do not fight for the same joist bay.
- Pick a serviceable illuminator spot. Attic or closet mounting should stay ventilated and reachable for future bulb changes.
- Request documentation. A written estimate should include design mockups, a wiring diagram, a control integration plan and warranty terms before work starts.
Pro Tip: Ask for the commissioning step in writing: dimmer scenes and illuminator brightness should be tested together before the job is called complete.
When to DIY and when to hire a pro
A small tray ceiling with patient weekend hours suits a DIY fibre kit well. Concealed wiring, acoustic-panel integration and dimmer-scene control are a different story: those call for a professional who can plan prewire, hide harnesses properly and commission the lighting alongside your existing automation.
— JupiterAV
JupiterAV: design, installation and integration services for star ceilings
We install fibre-optic star ceilings as part of custom home theatre work, building each installation around the room rather than fitting a generic kit into it. The installs are designed to disappear into the architecture, with lighting and control integrated into the same system that runs your screen, speakers and automation scenes.

Those who request a quote receive an on-site survey of the ceiling cavity and joist layout, a written estimate, design options for star density and placement, and a turnkey installation that includes commissioning and dimmer testing.
- A single point of contact for design, wiring, panel installation and control setup is provided.
- Compatibility checks with smart home systems may be performed.
- Ongoing support after installation is offered beyond the initial install visit.
If a star ceiling is part of a theatre build or an upgrade to an existing room, reach out to our team at JupiterAV for a design consultation and quote.
FAQ
How do you make a fibre-optic star ceiling?
A fibre-optic star ceiling is built by drilling a ceiling panel or drywall in a chosen pattern, feeding individual fibre strands through, and connecting the bundled ends to an illuminator unit. Pre-populated panels simplify this by arriving with the fibres already placed, which reduces routing and drilling work considerably.
What is the best material for a star ceiling?
There is no single best material: fibre-optic strands give the most realistic pinpoint stars, pre-populated acoustic panels add sound control alongside the star effect, and LED or stretch-sheet ceilings create a softer glow with less installation labour. The right choice depends on whether realism, acoustics or install speed matters most for your room.
How do you get stars on a ceiling?
Stars are created either by routing fibre-optic strands through small drilled holes to a central illuminator, or by installing a panel that already has the fibre work built in. Both approaches need a power source for the illuminator and, for Canadian installs, CSA or cUL-approved components.
How much does it cost to install ceiling lighting like this?
Costs depend heavily on system choice and room size: a DIY fibre kit can cost in the low hundreds of dollars for the kit itself, but one documented project logged 30 to 40 hours of labour for a larger ceiling, which changes the real cost once your time is factored in. Professional installs add cost for design, concealment and control integration, with pricing available on request from an installer.
Do I need an electrician for a star ceiling install?
Any new wiring circuit or dimmer connection should be reviewed against local permit and inspection rules, and consulting an electrician is recommended for that step. Canadian guidance also points to CSA or cUL-approved components as the standard for residential lighting installations.
Sources
- Home Lighting Design Guide Pocket Book - Natural Resources Canada
- STAR CEILING INSTALLATION GUIDE
- Installing a Fiber Optic Starfield Ceiling | Make:
- Light and sleep - Sleep Foundation