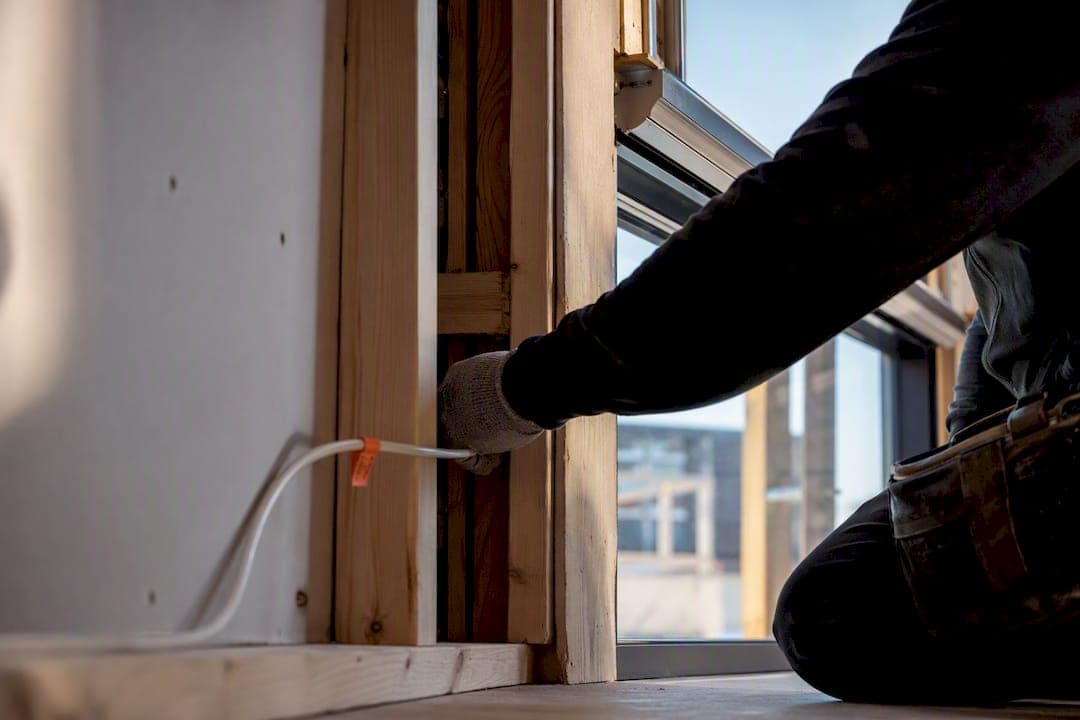
Hardwiring is the right call for anyone planning new construction or a full renovation: run a labelled two-conductor low-voltage line to every window opening and reserve one central spot for the transformer, before the drywall crew shows up. Skip this step and you're stuck with battery swaps or a visible cord later. If the walls are already closed, battery, plug-in, or solar-assisted motors still work as a fallback.
TL;DR:
- Prewiring should be done during rough-in with dedicated star topology runs from each window to a central transformer to avoid future wall breaches.
- Use 18/2 wiring for runs under 50 feet and upgrade to 16/2 or thicker for longer distances to prevent voltage drop issues.
- Label all cables at both ends, photograph the wiring plan, and leave extra conduit for future upgrades to simplify troubleshooting and maintenance.
- Plan control hubs and switches early, placing them near the main power panel with a wired uplink and spare conduit for future smart-home integration.
- Retrofit options like batteries, plug-in adapters, or solar-powered motors exist but require ongoing maintenance, unlike fully wired systems that offer long-term reliability.
Table of Contents
- The prewire motorized shades checklist for builders and electricians
- Wire gauge, voltage, and power planning for motorized shades
- Where the wire exits and how the pocket needs to fit
- Planning the smart-home side: hubs, switches, and network access
- Retrofit options if you missed the prewire window
- Getting the trades sequenced right
- What a professional installer checks on every prewire site visit
- Why we push prewiring even when it feels like an extra step
- Plan your prewire with JupiterAV before drywall closes
- Sources
- FAQ
The prewire motorized shades checklist for builders and electricians
Get this right at rough-in and nobody touches the wall again. Get it wrong, and you're fishing wire through finished drywall or living with a battery pack you didn't want.
The core principle is a star topology: every window gets its own dedicated run back to one central point, rather than shades daisy-chained off each other. Installer documentation consistently backs this approach because it isolates faults and simplifies troubleshooting later.
At rough-in, the trade crew should:
- Run a home-run low-voltage cable from each window opening directly to a central power location, never looping through another window first.
- Use 18/2 for runs under roughly 50 feet and step up to 16/2 for anything longer, based on standard electrician guidance.
- Leave a 10 to 18 inch pigtail with a protective conduit sleeve at the top corner of each window pocket.
- Cap every unused or spare run with electrical tape or a wire nut so it's safe and identifiable later.
- Label both ends of every cable by room and window (example: "Kitchen, East Window") using a permanent marker or wire tag.
- Photograph the entire wiring layout before the drywall goes up, and keep those photos somewhere you can find them in five years.
That last point sounds trivial until you're the electrician trying to remember which cable feeds which window during trim-out.
Wire gauge, voltage, and power planning for motorized shades
Wire gauge is a function of distance and current draw, not guesswork. According to Loch Monster Electric's installer guide, 18/2 handles most standard rooms fine, but once a run exceeds roughly 50 feet, resistance starts eating into voltage and you should move to 16/2 or thicker.
Most residential motorized shade systems run on 24V DC rather than 12V, mainly because 24V pushes more torque through thinner wire over longer distances without the same voltage drop penalty. A central AC-to-DC transformer, sized to the number of motors it feeds, converts household 120V power down to that low-voltage supply and distributes it out to every shade on the star network.
Pro Tip: If a run is pushing close to the maximum distance for its gauge, split the load across two transformers instead of daisy-chaining more shades onto one. It costs a little more copper and one extra transformer, but it saves you a callback when the far-end shade runs sluggish.
A few things to lock in before the electrician leaves site:
- Confirm transformer capacity against the total number of motors it will serve, with headroom for future additions.
- Plan voltage-drop math on any run over 50 feet rather than assuming standard gauge will hold.
- Leave the 120V feed and transformer installation to a licensed electrician; low-voltage shade wiring is generally within reach for a competent installer, but line voltage work is not a DIY task.
Where the wire exits and how the pocket needs to fit
Precision here is what separates a headrail that closes flush from one that gapes because a connector is jammed against the fascia. Plan the exit point roughly 120 mm above the opening, inside the recessed pocket, so the pigtail lands exactly where the motor's connector needs it.
- Size the headbox or pocket with the connector bulk in mind. Installer guidance from VelaBlinds notes that hidden splices and bulky connectors are a common reason cassettes won't close flush.
- For skylights, tall transoms, and outdoor motorized screens, plan an access point that lets a technician reach the motor for future service without tearing into trim.
- Keep pigtail length inside the 10 to 18 inch range. Shorter risks not reaching the connector; longer just creates excess wire to tuck awkwardly into a tight pocket.
- Run at least one empty conduit alongside the power wire in every opening. It costs almost nothing at rough-in and gives you a path for a future signal cable or a control-bus upgrade you haven't thought of yet.
Planning the smart-home side: hubs, switches, and network access
Wiring the shade is only half the job. If you want app control, voice commands, or scheduled scenes down the road, the hub and switch locations need to go into the rough-in plan too.
- Place the control hub near the central power panel, ideally with a wired network uplink rather than relying on WiFi through multiple stud walls.
- Decide now whether wall switches will be hardwired or wireless, and rough in a switch backbox at each location even if you install the switch later.
- Consider running a spare Cat cable or conduit for a Zigbee or Matter gateway. Some shade systems use proprietary RS485-style control wiring instead of standard networking, so confirm which protocol your chosen motors use before finalizing the run.
- Label the hub end of every wire the same way you labelled the window end. A wiring closet full of unlabelled cable is a service call waiting to happen.
Pro Tip: Even if you haven't chosen a smart-home platform yet, running the spare conduit costs you a few dollars in materials. Skipping it and needing it later costs a wall repair.
Retrofit options if you missed the prewire window
Missed rough-in? You're not stuck with corded shades forever, but understand what you're trading off.
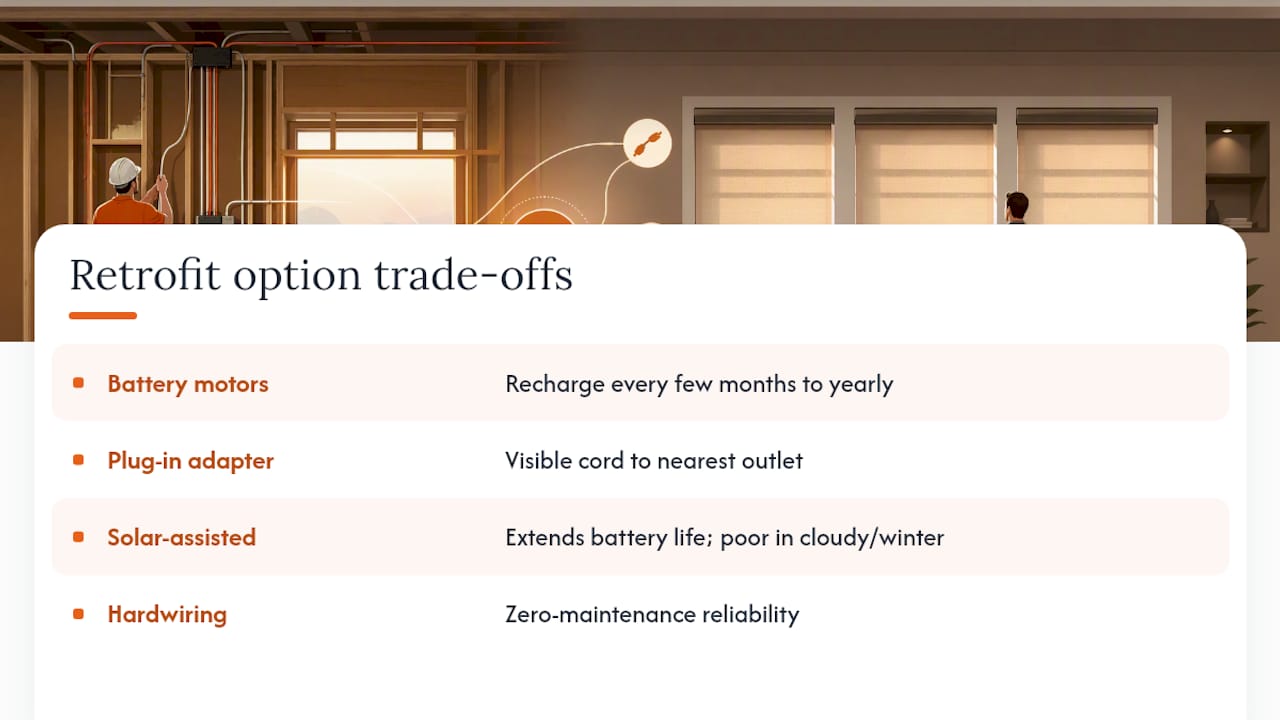
Battery-powered motors are the most common retrofit path. Depending on usage and shade size, batteries typically need recharging every few months to about once a year, based on manufacturer battery-life data. Plug-in adapters skip the battery question entirely but leave a visible cord running to the nearest outlet, which some homeowners find acceptable and others don't.
Solar-assisted motors extend battery life meaningfully and enable light-sensor automations like sunrise and sunset modes, but solar panel manufacturer guidance is clear that performance drops in cloudy or winter conditions, and a panel cannot fully recharge a completely dead battery on its own. None of these retrofit paths match hardwiring for zero-maintenance reliability, but they're a legitimate answer when the walls are already closed.
Getting the trades sequenced right
The order of operations matters more than most homeowners expect. Get it wrong and you're paying twice.
- Bring in a shade specialist and electrician during the design phase or before drywall, not after. Coordinating pocket sizes at this stage is far cheaper than adjusting them later.
- Sequence the trades: architecture and design first, then framing, then the electrician for rough-in wiring, then the shade integrator for pocket and headbox confirmation, then drywall.
- Document every wire location with photos and labels, and keep a simple wiring map at the hub location for whoever services the system in five years.
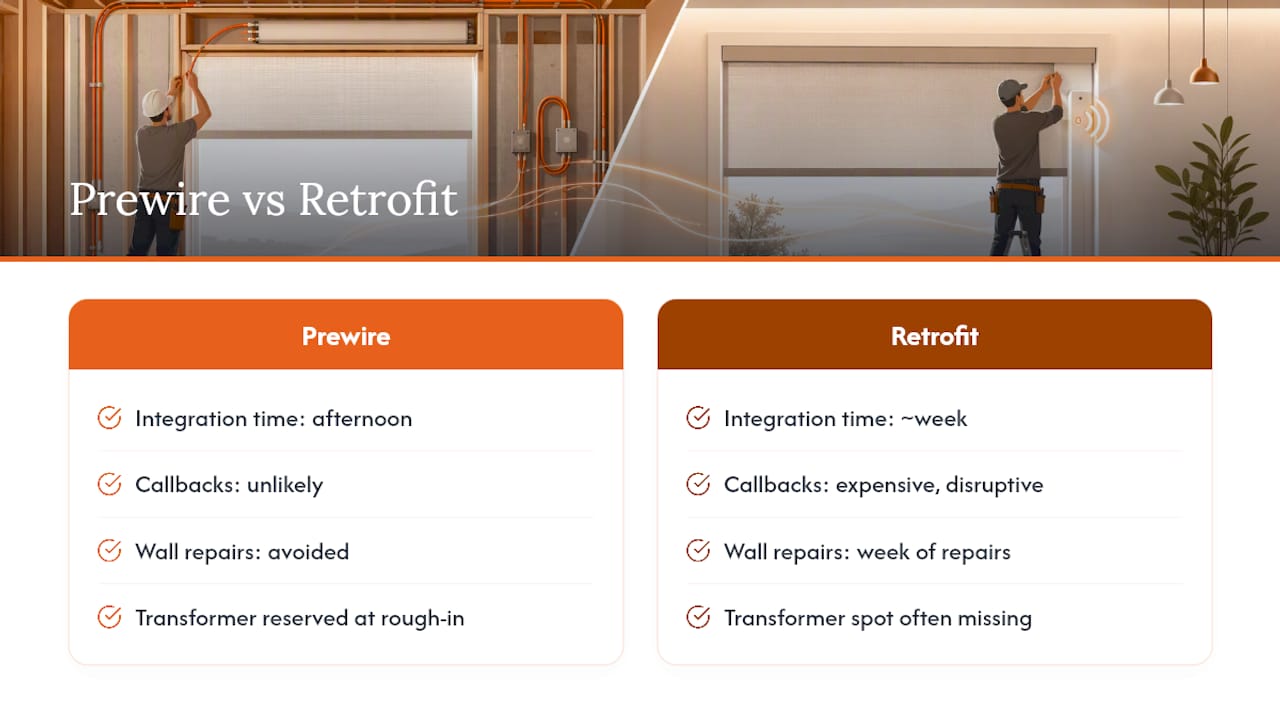
Prewiring during rough-in typically costs a fraction of what a retrofit run costs later, mainly because retrofit work means opening finished walls, patching drywall, and repainting, on top of the wiring itself.
What a professional installer checks on every prewire site visit
A prewire that looks fine on day one can still fail an integration test months later if a few small things get skipped. Experienced installers run the same checks on every job:
- Leave a service loop of extra cable at both the window and the hub end, not a wire pulled bar-tight.
- Label both ends of every run the moment it's pulled, not after the fact.
- Mount the transformer somewhere accessible, never buried behind finished cabinetry.
- Photograph wiring before drywall closes it up, and pull one extra empty conduit per opening for future upgrades.
- Test every shade group for response and range before final trim goes on, so a bad connection gets caught while the wall is still open.
Homeowners should expect realistic maintenance: batteries in retrofit motors need periodic recharging, and hardwired systems need almost none. Both types of systems are serviced by professional providers.
Why we push prewiring even when it feels like an extra step
Callbacks after drywall closes are expensive, disruptive, and almost always preventable. There have been builds where a single labelled run and a reserved transformer spot at rough-in meant the shade integration on move-in day took an afternoon instead of a week of wall repairs. That gap between "planned ahead" and "retrofitted later" is the whole argument for doing this now.
Plan your prewire with JupiterAV before drywall closes
If you're mid-build or mapping out a renovation, professional installers plan and install the low-voltage wiring, transformer placement, and hub integration for motorized shades, alongside the rest of your smart-home rough-in. One coordinated visit covers pocket sizing, wire runs, and hub placement, so your electrician, framer, and shade installer aren't guessing at each other's requirements.

A prewire consultation walks your site before drywall, confirms pocket and headbox dimensions against your chosen shade motors, and provides your electrician a labelled wiring plan they can follow without back-and-forth. If your build also needs whole-home audio, networking, or smart home integration, that same visit covers it. Book a prewire consultation and get your rough-in locked down before the drywall trucks arrive.
Sources
- Solar-panel SBS-301 - instruction
- Pre-Wiring For Motorized Window Treatments In A New Build
- Guide for Motorized Blinds Wiring Requirements in the Twin Cities | Loch Monster Electric
FAQ
How do I prewire for motorized blinds?
Run a labelled two-conductor low-voltage cable (18/2 for shorter runs, 16/2 for longer ones) from each window opening back to a central transformer location, using a star topology rather than daisy-chaining shades together.
How much does it cost to have motorized shades installed?
Costs vary by wire run length, number of windows, and transformer setup, with prewiring during new construction typically running well below what a comparable retrofit costs once walls are closed. See JupiterAV's motorized blinds cost breakdown for Alberta-specific budgeting.
Can I motorize existing shades without rewiring?
Yes. Battery-powered motors, plug-in adapters, and solar-assisted battery motors all work as retrofit options on existing shades, though none match hardwiring for long-term reliability or zero maintenance.
What are the disadvantages of motorized blinds?
The main drawbacks are the upfront wiring or battery-management effort, periodic battery recharging on non-hardwired units (see JupiterAV's battery-life guide), and the higher retrofit cost if wiring wasn't planned during construction.
Should I hire an electrician or a shade installer for prewiring?
Both. A licensed electrician should handle the 120V feed and transformer installation, while a shade specialist confirms pocket sizing, pigtail placement, and connector clearance before drywall closes.