
If your LED lights flicker when dimmed, the cause is almost always a compatibility mismatch between the bulb and the dimmer switch, or a load problem on the circuit. LED flicker is rarely a sign of a defective bulb; it is usually a fixable wiring or hardware issue. Two checks to do right now:
- Confirm the bulb packaging says "dimmable" — non-dimmable LEDs will always flicker or buzz on a dimmer.
- Confirm the dimmer switch is LED-rated, not a legacy incandescent or halogen dimmer.
If both check out and you still have an LED flicker with dimmer, the next step is to power-cycle the fixture, reseat the bulb firmly, then test the same bulb in a non-dimmed socket. If it works fine there, the dimmer or the circuit is the problem. All wiring work in Canada must comply with the Canadian Electrical Code (CEC) and use CSA-certified devices. When in doubt, stop and call a licensed electrician. JupiterAV handles exactly these diagnostics for Calgary homeowners.
Pro Tip: Before buying anything, swap the suspect bulb with one known-good dimmable LED from another room. If the flicker disappears, you have a bad bulb, not a bad dimmer.
Key takeaways
Fixing LED flicker on a dimmer almost always comes down to confirming bulb compatibility, matching the dimmer technology to the LED driver, and ruling out loose connections before touching anything else.
| Point | Details |
|---|---|
| Check the bulb first | Confirm the bulb is labelled dimmable; swap in one known-good dimmable LED to isolate the cause before buying a new dimmer. |
| Match dimmer to LED technology | Trailing-edge (ELV) dimmers are the most compatible choice for modern LED drivers and reduce flicker, buzz, and limited dim range. |
| Minimum load causes low-end flicker | If total LED wattage falls below the dimmer's minimum, add compatible bulbs or fit an approved bypass load at the fixture. |
| Stop for safety signs | Scorch marks, a burning smell, or a warm switch plate mean stop immediately and call a licensed electrician. |
| JupiterAV for professional help | JupiterAV provides on-site diagnostics, LED dimmer installation, and code-compliant wiring repairs for Calgary homeowners. |
Table of Contents
- Why does your LED flicker on a dimmer switch?
- How dimmers actually work, and why LEDs react differently
- Step-by-step diagnostic checklist
- Practical fixes: what to do and when to call a pro
- Dimmer type vs LED behaviour: a quick reference
- Canadian safety and electrical code considerations
- An installer's perspective on why this problem keeps coming back
- JupiterAV can handle the diagnosis and the fix
- Useful sources and compatibility references
Why does your LED flicker on a dimmer switch?
Most residential LED flicker traces to dimmer/bulb incompatibility or minimum-load issues. Here is the full list of culprits, roughly in order of how often they show up:
- Non-dimmable bulb on a dimmer. A bulb without a dimmable driver will flicker, buzz, or simply refuse to dim. This is the single most common cause.
- Legacy TRIAC (leading-edge) dimmer. Old TRIAC dimmers were designed for incandescent loads and often behave unreliably with low-wattage LED lamps. The mismatch shows up as flicker, limited dim range, or audible hum.
- Dimmer minimum-load problem. Many older dimmers require a minimum wattage on the circuit to operate correctly. A handful of 8-watt LED bulbs may fall well below that threshold, causing flicker at low settings.
- Mixed bulb batches. Different LED brands use different internal drivers. Mixing models on one dimmer circuit creates unpredictable interactions — one bulb's driver can destabilise the others.
- Loose or corroded connections. A loose wire at the switch terminal or fixture causes intermittent contact, which looks identical to a dimmer compatibility problem but is a wiring fault.
- Failing integrated driver. In a fixed LED downlight or panel, the driver is built into the fixture. When it starts to fail, flicker is often the first symptom.
- Smart switches and no-neutral controls. Smart switches and no-neutral devices can leak a small current to power themselves, causing ghosting or faint glow in LEDs unless the switch, dimmer, and bulbs are specifically matched or a neutral wire is provided.
- Shared neutral or upstream voltage dips. A multi-wire branch circuit with a shared neutral, or a voltage sag caused by a large appliance starting up, can produce flicker that appears random and is harder to trace without a meter.
How dimmers actually work, and why LEDs react differently
A dimmer does not reduce voltage the way a volume knob reduces signal. It works by rapidly switching the mains power on and off, effectively "slicing" the AC waveform. The proportion of each cycle that gets through determines the apparent brightness. This is called phase-cut dimming, and there are two versions that matter for LEDs.
Leading-edge (TRIAC) dimming
A leading-edge dimmer cuts the beginning of each half-cycle. The result is a hard, abrupt turn-on spike every cycle. Incandescent filaments are slow to respond and simply average out the chop. LED drivers are fast and reactive, so they see that spike and can misinterpret it, producing flicker, buzz, or erratic behaviour. This is why a dimmer that worked perfectly with your old incandescent bulbs may cause problems the moment you switch to LEDs.
Trailing-edge (electronic/MOSFET) dimming
A trailing-edge dimmer cuts the end of each half-cycle instead. The waveform ramps up smoothly and drops off gradually. Trailing-edge (reverse-phase) dimming produces a smoother waveform and is generally more compatible with modern LED drivers than leading-edge (TRIAC) dimming. Most quality LED-rated dimmers sold today use trailing-edge technology, and it is the pragmatic retrofit choice for modern LED installations because it reduces audible noise, widens the dimming range, and tolerates electronic drivers better.
The minimum-load problem
Older dimmers were calibrated for the wattage of a room full of incandescent bulbs, which is far higher than the total wattage of many LED bulbs in the same space. Flicker at low dim settings is often caused by the dimmer's minimum load being above the total LED wattage, or by LED drivers that do not operate smoothly at very low conduction angles. The fix is either adding more load to the circuit or replacing the dimmer with one that specifies "no minimum load" for LEDs.
Pro Tip: ELV (Electronic Low Voltage) dimmers use trailing-edge technology and are often labelled as LED-compatible. MLV (Magnetic Low Voltage) dimmers use leading-edge technology and are generally a poor match for LEDs. When shopping, look for "ELV" or "trailing-edge" on the spec sheet.
Step-by-step diagnostic checklist
A systematic troubleshooting sequence — bulb, then dimmer, then wiring, then upstream supply — minimises wasted purchases and gets to the answer faster. Work through these steps in order and document what you find at each stage.
Safety first: Switch off power at the wall before handling bulbs or fixtures. For any wiring inspection, turn off the breaker and confirm the circuit is dead with a non-contact voltage tester. If you are not comfortable doing that, stop and call a licensed electrician.
-
Isolate the lamp. Reseat the bulb firmly. Then remove it and test it in a non-dimmed socket elsewhere in the house. If it flickers there too, the bulb is faulty. If it works fine, the problem is the dimmer circuit.
-
Swap in a known-good dimmable LED. Replace the suspect bulb with one you know works correctly on a dimmer. If the flicker stops, you had a bad bulb or a driver incompatibility with that specific model.
-
Test the dimmer. Temporarily replace the dimmer with a standard on/off switch (or a known LED-rated trailing-edge dimmer if you have one). If the flicker disappears with a plain switch, the dimmer is the problem.
-
Check the load. Add up the total wattage of all bulbs on the dimmer circuit. Compare that to the dimmer's stated LED minimum and maximum load range. If you are below the minimum, that is your cause.
-
Inspect connections. With the breaker off, remove the dimmer from the wall box and check every terminal for loose wires, heat discolouration, or scorch marks. A loose neutral is a common hidden culprit.
-
Check smart controls. If you have a smart dimmer or a no-neutral switch, disable any smart features and test with the switch in manual mode. Check whether the device requires a neutral wire and whether one is connected.
- If flicker occurs on multiple circuits or correlates with appliances starting, suspect a shared neutral or an upstream supply issue. That requires a licensed electrician with a meter.
- If you find scorch marks, a burning smell, or a warm switch plate, stop immediately. That is a safety issue, not a DIY fix.
Pro Tip: Take a short video of the flicker before you start swapping parts. The pattern — steady flicker, random flicker, flicker only at low settings, flicker when another appliance starts — tells an electrician a lot before they even open the wall box.
Practical fixes: what to do and when to call a pro
Start with the lowest-cost, lowest-risk actions and work up.
- Confirm dimmable labelling and standardise the bulb model. Replace any non-dimmable bulbs. Then standardise to one brand and model of dimmable LED on the circuit. Mixed driver behaviours are a common source of the "bad apple" effect where one bulb destabilises the rest.
- Adjust the dimmer's low-end trim. Many LED-rated dimmers have a small trim screw or a digital calibration setting that raises the minimum dim level. Setting it just above the flicker threshold often eliminates low-end flicker without replacing anything.
- Replace the dimmer with an LED-rated trailing-edge model. This resolves the majority of cases where the bulbs are already dimmable. Look for a dimmer that lists "no minimum load" and specifies LED compatibility. Check the manufacturer's approved lamp compatibility list before buying — it is the most reliable way to confirm a specific bulb-dimmer pair will work.
- Add a bypass or dummy load. If your total LED wattage is below the dimmer's minimum, you can add a small resistive load device at the fixture. Ask at an electrical supply store for an "LED dimmer bypass" or "dummy load" rated for your dimmer. This is a legitimate fix, but it does add a small amount of heat to the fixture box — confirm the fixture is rated for it.
- For integrated LED fixtures with a failing driver, check whether the fixture is still under warranty. If it is, replace the whole fixture. If not, a licensed electrician can sometimes replace just the driver module, though for budget fixtures the cost of labour often makes full replacement the smarter call.
When to stop DIYing and call a licensed electrician:
- Scorch marks, a burning smell, or a warm switch plate
- Flicker that correlates with a large appliance starting (fridge, HVAC, washer)
- Flicker on multiple circuits simultaneously
- Any uncertainty about neutral wires, shared neutrals, or switch-loop wiring
- Any wiring change that goes beyond swapping a like-for-like device
For homeowners considering a broader lighting upgrade, planning your lighting layout thoughtfully from the start — grouping fixtures by type and load — makes dimmer compatibility far easier to manage long-term.
Dimmer type vs LED behaviour: a quick reference
| Dimmer type | Typical LED behaviour | Minimum load concern | Recommended first action |
|---|---|---|---|
| Leading-edge / TRIAC | May flicker, buzz, or have limited dim range | Often high | Replace with LED-rated trailing-edge dimmer |
| Trailing-edge / ELV (electronic) | Works well with most dimmable LEDs | Usually low or none | Confirm bulb is dimmable; check compatibility list |
| Smart / no-neutral control | Ghosting or faint glow if neutral is absent | Varies by device | Confirm neutral wire present; match bulb to device spec |
| Legacy incandescent dimmer (unlabelled) | Flicker, buzz, or no dimming | High | Replace immediately with LED-rated dimmer |
Always check the dimmer manufacturer's approved lamp list before purchasing replacement bulbs. A combination that looks compatible on paper may still flicker if the specific driver design is not on the tested list.
Canadian safety and electrical code considerations
One code note first: all permanent wiring and device installations in Canada are governed by the Canadian Electrical Code (CEC) and must use CSA-certified devices. Swapping a like-for-like dimmer in an existing box is generally within DIY scope in most provinces, but running new wiring, adding circuits, or modifying a panel requires a licensed electrician and, in many provinces, a permit.
Stop and call an electrician if you notice any of the following:
- A burning smell from the switch or fixture
- Scorch marks or heat discolouration on terminals or wires
- A dimmer plate that feels warm to the touch
- Breakers tripping when the dimmer is in use
- Any arc-like crackling sound from the switch
Shared neutrals and multi-wire branch circuits deserve special mention. In older Canadian homes, two circuits sometimes share a single neutral wire. Replacing a dimmer on one of those circuits without understanding the wiring can create voltage imbalances or unstable behaviour on both circuits. If you open the wall box and see more wires than you expected, or if the neutral is connected to more than one device, leave it for a licensed technician.
Permits and licensed work are not bureaucratic obstacles. They exist because wiring faults cause house fires. The cost of a service call is a fraction of the cost of a claim, and a licensed electrician carries liability insurance that protects you.
An installer's perspective on why this problem keeps coming back
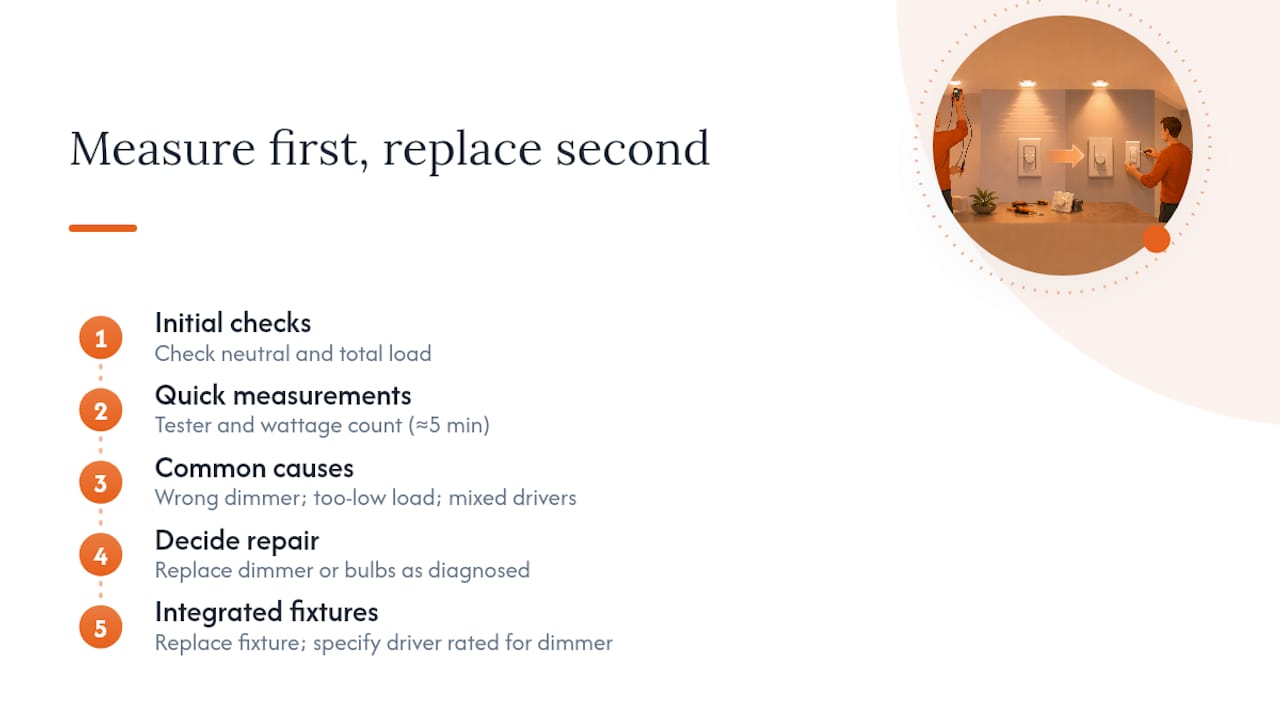
The same three causes show up again and again: the wrong dimmer type, a circuit that is under-loaded for the dimmer's minimum, and mixed bulb batches where one driver is fighting the others. The fix for all three is usually straightforward once you know which one you are dealing with — but homeowners often skip straight to buying a new dimmer when the bulb is actually the problem, or vice versa.
The diagnostic order matters. Measure first, replace second. A non-contact voltage tester and a simple wattage count take five minutes and can save a wasted trip to the hardware store. When a pro visits a site, the first thing they do is check whether the neutral is solid and whether the total load is within the dimmer's rated range. Those two checks resolve the majority of cases before any hardware changes.
For integrated LED fixtures, the calculus is different. When a driver fails inside a sealed fixture, repair is rarely cost-effective unless the fixture is high-end. Replacement is usually the right call, and it is an opportunity to specify a fixture with a driver that is rated for the dimmer already in the wall.
JupiterAV can handle the diagnosis and the fix
Flickering lights are annoying, but the wiring behind them can occasionally signal something more serious. JupiterAV provides on-site circuit diagnostics, LED-rated dimmer installation, and code-compliant wiring repairs for Calgary homeowners and businesses. A service visit covers a full safety check, a load calculation for your dimmer circuit, and a clear quote before any work begins.

JupiterAV also installs and programmes Lutron Caseta smart lighting controls, which are pre-tested against a wide range of LED fixtures and eliminate the guesswork around compatibility entirely. If you want a system where the dimmer, the bulbs, and the smart controls are guaranteed to work together, that is the cleaner long-term solution.
Ready to stop guessing? Contact JupiterAV for an on-site diagnosis or a dimmer upgrade in Calgary.
Useful sources and compatibility references
These resources were used to compile this guide and are worth bookmarking for your own research:
- LED Bulb Flicker: Causes, Fixes, and How to Prevent It — 1000Bulbs Blog: practical overview of flicker causes and fixes.
- Why Are My Dimmable LEDs Flickering? — Samotech: detailed explanation of dimmer/bulb incompatibility and minimum-load issues.
- How a Dimmer Switch Works: Trailing Edge vs Leading Edge — ElectraSim Blog: clear technical explanation of phase-cut dimming and why it matters for LEDs.
- LED Dimmer Flickering Fix — Electrical ASAP: retrofit guidance for replacing TRIAC dimmers with LED-compatible units.
- How to Avoid Flickering LED Lights — Leviton: manufacturer compatibility list guidance and tested lamp lists.